

After choosing the IP address of the Barracuda Web Security Gateway and opening the necessary ports on your corporate firewall, configure the unit using the web interface per the instructions below. Make sure the computer from which you are configuring the Barracuda Web Security Gateway is connected to the same network and that the appropriate routing is in place to allow connection to the Barracuda Web Security Gateway’s IP address via a web browser.
By default, HTTPS filtering and SSL inspection are disabled on the Barracuda Web Security Gateway due to the fact that both features require additional configuration steps in order to operate properly. Barracuda Networks recommends enabling at least one of these features in order to provide visibility and control of HTTPS traffic, which continues to increase in usage. To understand and enable these features, please see HTTPS Filtering With the Barracuda Web Security Gateway and Using SSL Inspection With the Barracuda Web Security Gateway.
Understanding Operating Modes
Before you configure the Barracuda Web Security Gateway to filter traffic, it is recommended to become familiar with the possible operating modes and how they affect which traffic can be filtered and blocked. For initial configuration with an inline deployment, you should set the Operating Mode to Audit from the BASIC > IP Configuration page, and note how traffic is logged.
Operating modes include:
- Active - The Barracuda Web Security Gateway actively protects your network by detecting spyware-infected machines on your network, using transparent HTTP proxy scanning to block and log non-HTTP spyware traffic, and using filters to block and log web traffic that conflicts with your organization's Internet usage policy. Note: In this mode, the system operates in Active Bridging Mode to manage connections between network devices and the Barracuda Web Security Gateway.
- Audit - In this mode, for an inline deployment, only proxied HTTP/HTTPS traffic is filtered and logged, but not blocked, and downloads over HTTP will NOT be scanned for viruses or spyware. For inline traffic, only HTTP traffic is filtered and logged. Use this mode to preview how your currently configured Internet policies would be applied, but without disturbing production traffic. For forward proxy deployments, traffic is logged and policies are applied, just as in Active mode.
For non-HTTP traffic, the following configured policies DO apply:- Application blocking
- IP Block/Exempt rules (Exempt traffic is logged)
- Outbound spyware activity is blocked
For non-HTTP traffic, the following does NOT apply:
- Content Filter settings
- MIME-type blocking
- Domains - blocked and allowed rules
- URL Patterns - logged only
- Categories - logged only
- Exceptions
In Audit mode, access to spyware sites and spyware downloads is not blocked but is logged. Note: If the Barracuda Web Security Gateway is deployed as a web traffic monitoring device (as opposed to a web traffic filtering device), the system monitors traffic sent through any mirrored (spanned) port on your switches.
- Safe - This mode can only be entered automatically by the Barracuda Web Security Gateway and is not configurable via the web interface. When the System Load exceeds normal thresholds for an extended period, as indicated on the BASIC > Dashboard screen, the device shifts to Safe mode until the System Load returns to normal levels. Note: In this mode, traffic is neither filtered nor logged. Safe mode does not apply if the Barracuda Web Security Gateway is deployed in a WCCP configuration.
Complete Configuration
- From a web browser, enter the IP address of the Barracuda Web Security Gateway followed by port.
For example: http://192.168.200.200:8000 - Log in to the web interface using admin for the username and, for the password:
- If your appliance serial number is higher then 311431, then the default administrator password is the numeric portion of the serial number. For help finding the serial number of your appliance, see Serial Number for Hardware and Virtual Appliances.
- If your serial number is 311431 or lower, then the default administrator password is admin. - Go to the BASIC > IP Configuration page and perform the following steps. Click Help on the right side of each section title for additional online help.
If you have not already set the IP address for the Barracuda Web Security Gateway in previous steps, enter it in the IP address field. Enter the Subnet Mask that is used to define this area of your network, and the Default Gateway, which is the IP address of the next outbound hop from the Barracuda Web Security Gateway. The Barracuda Web Security Gateway sends all egress traffic to the default gateway via the WAN port on the front of the appliance.
Enter the IP address of your primary and secondary DNS servers (if these have not yet been set up).
Set Operating Mode to Audit.
Set Enable Proxy on WAN to No to protect against WAN-side proxy requests if the Barracuda Web Security Gateway is deployed outside of the corporate firewall.
Enter the Default Hostname which will be displayed in alerts, notifications, and messages sent by the Barracuda Web Security Gateway.
Enter the Default Domain which will be displayed in alerts, notifications, and messages sent by the Barracuda Web Security Gateway.
Click Save.
Activate Your Subscriptions
After installation, your Energize Updates and other optional subscriptions must be activated for the Barracuda Web Security Gateway to be fully enabled and to continue to receive the latest updates to all spyware, virus and category definitions from Barracuda Central. The Energize Updates service is responsible for downloading these updates to your Barracuda Web Security Gateway.
Advanced Threat Protection (ATP)
Advanced Threat Protection is a subscription bases service that combines behavioral, heuristic, and sandboxing technologies to protect against zerohour, targeted attacks and ransomware. You can subscribe to the ATP service just as you do with Energize Updates. In order to purchase an ATP subscription, you must have a valid Energize Updates subscription. Subscription status for ATP is shown on the BASIC > Dashboard page. For more information about ATP, see Advanced Threat Protection Configuration.
Product Activation
- At the top of every page, you may see the following warning:

Click on the designated link to open up the Product Activation page in a new browser window.
On the Product Activation page, fill in the required fields and click Activate. A confirmation page opens to display the terms of your subscription.
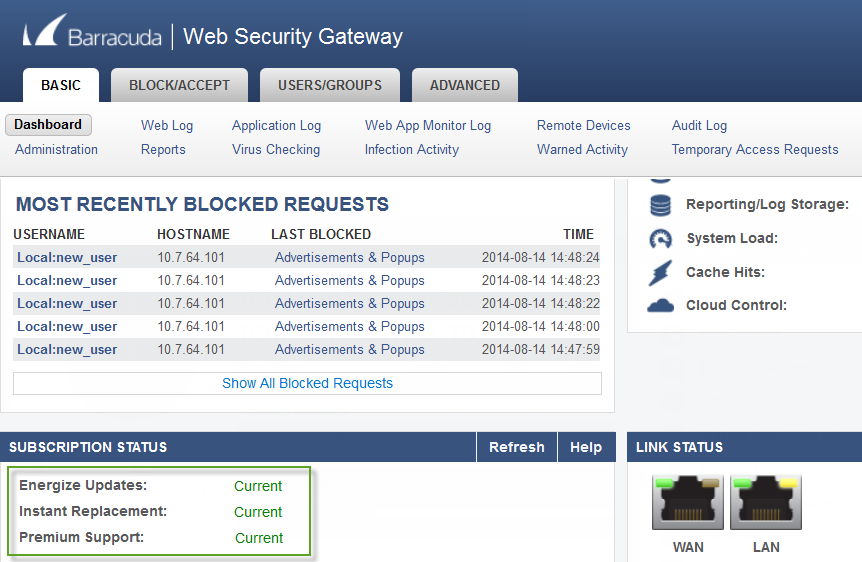
- Return to the Barracuda Web Security Gateway web interface and navigate to the BASIC > Dashboard page. In the Subscription Status section, verify that the word Current appears next to Energize Updates, Instant Replacement Service (if purchased) and Premium Support (if purchased):
There may be a slight delay of a few minutes for the display to reflect your updated subscription status. If the status is still showing as not activated, click Refresh in the Subscription Status section.
Update the Barracuda Web Security Gateway Firmware
Prior to upgrading the firmware on your Barracuda Web Security Gateway, it is always recommended that you read the release notes. To update the firmware on the Barracuda Web Security Gateway:
- From the web interface, select ADVANCED > Firmware Update.
- Read the release notes to learn about the latest features and fixes provided in the new firmware version.
- Click Download Now next to Latest General Release. Download Now is disabled if the Barracuda Web Security Gateway is already up-to-date with the latest firmware version.
The Barracuda Web Security Gateway begins downloading the latest firmware version. You can view the download status by clicking Refresh. A message displays once the download is complete. It is important to not power-cycle the unit during the download.
Updating the firmware may take several minutes. Do not turn off the unit during this process. - Click Apply Now when the download completes. The Barracuda Web Security Gateway will apply the firmware and automatically reboot. It is important to not power-cycle the unit during this process. A Status page displays the progress of the reboot. Once the reboot is complete, the login page appears.
Update Definitions
To apply the newest definitions provided by Energize Updates:
- Select ADVANCED > Energize Updates.
- Select On for Automatically Update. The recommended setting is On for all available definitions.
- Check to see if the current version is the same as the latest general release. If the rules are up-to-date, proceed to the next section. If the rules are not up-to-date, continue to the next step.
- Click Update to download and install the latest available definitions onto the Barracuda Web Security Gateway.
Continue with Step 4 - Configure and Secure the Web Interface.