The XDR Collector runs as a service in your environment. While the minimum specifications are listed below, the required resources depend on the number of active integrations and the amount of data being processed.
Install the XDR Collector on each server you want to monitor.
Minimum Requirements
To set up the XDR Collector, the minimum requirements are the following:
Minimum requirements | |
|---|---|
CPU | 2vCPU |
Disk Size | 10GB SSD |
Memory | 1GB |
Network interface card (NICs) | 2 |
Operating System
Windows Server 2016 and higher
Windows 10 and higher
Windows Server 2022 is recommended.
IP Address Requirements
Two private static IP addresses are required, one for each Ethernet interface.
Required Endpoint/Port Communication
The XDR Collector must be able to communicate to the following endpoints/ports:
Logstash |
|
Management Server | b5e9a5096e0a4f7782cc444c8edbbd5e.fleet.us-east-1.aws.found.io:443 |
Update Server | artifacts.elastic.co:443 |
Setting up the XDR Collector
To set up the XDR Collector, you must do the following procedures:
To configure a static IP address
To install the XDR Collector
To set up switch port mirroring
To install Suricata
To trigger a manual alert for threat simulation (Optional)
To configure a Static IP Address
Configure a static IP address for each Ethernet interface. See the documentation for your specific version of Windows.
To install the XDR Collector
In Barracuda XDR Dashboard, click Infrastructure > Collectors.
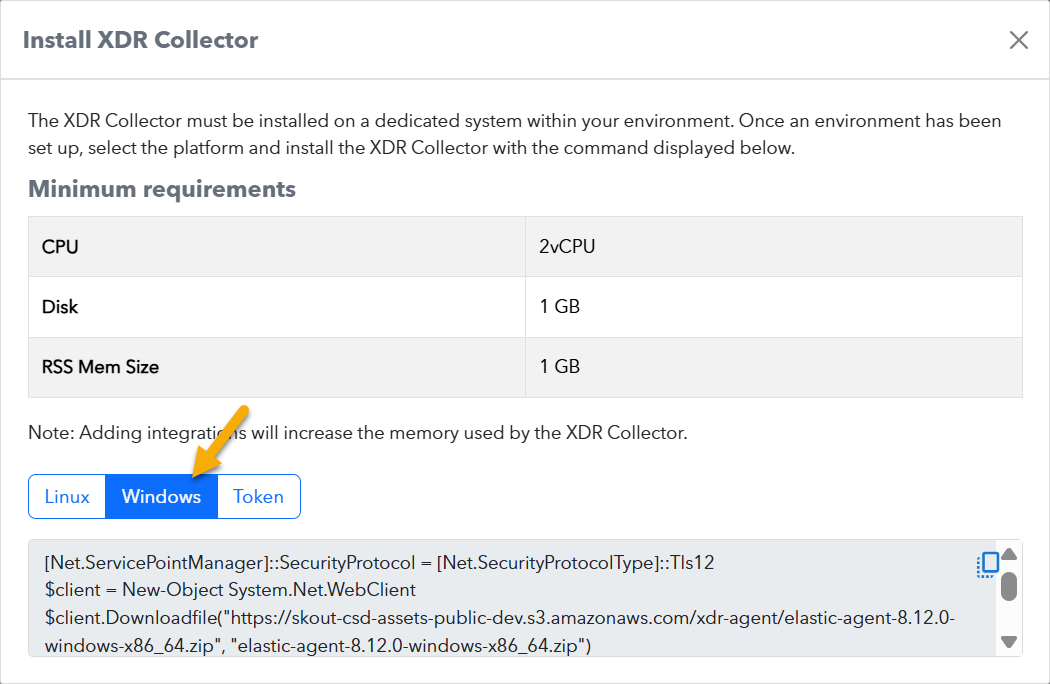
In the Policies table, next to the on-prem policy, click Action > Install.
Click Windows.

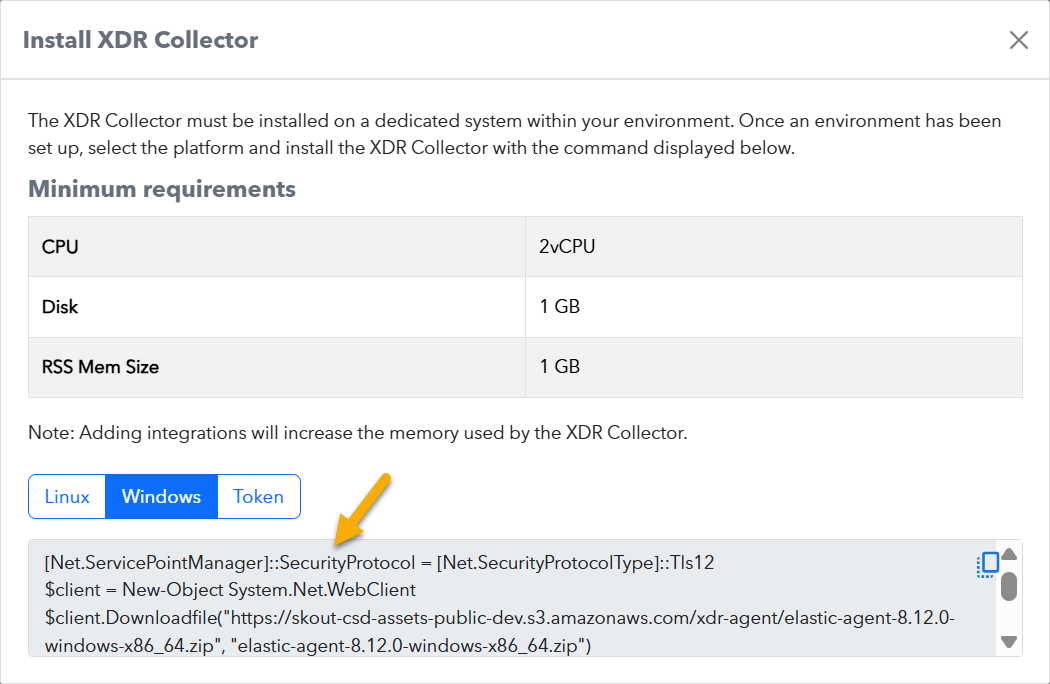
Copy the command at the bottom of the dialog box.

On the appropriate system, run Powershell as an administrator, paste the command, and run it.
To set up Switch Port Mirroring
Click a link for specific configurations for the following:
Connect the secondary Ethernet interface on the XDR Collector's host machine to the mirrored port on the switch.
Configure the switch to mirror traffic in both directions on all other ports on the switch.
To install Suricata
Download and install NPCAP (https://npcap.com/#download).
Ensure the Install Npcap in WinPcap API-compatible Mode option is enabled
NOTE NPCAP allows Windows software to capture raw network traffic.Download and install Windows 64 Suricata from https://www.openinfosecfoundation.org/downloads/windows/Suricata-7.0.7-1-64bit.msi.
Open the file "C:\Program Files\Suricata\suricata.yaml" and locate the current HOME_NET value. Modify the value to include only the subnets monitored by your switch. The values must be in cidr notation. Save the file.
As Administrator, open PowerShell and paste the following command, in its entirety. Modify the path if your install directory is different. Press enter and follow the prompts to begin the installation and configuration process.
$suricataPath = "C:\Program Files\Suricata"Invoke-WebRequest -Uri "https://skout-csd-assets-public.s3.amazonaws.com/suricata/windows/suricata-windows-scripts.zip" -OutFile "$suricataPath\suricata-windows-scripts.zip";Expand-Archive -Path "$suricataPath\suricata-windows-scripts.zip" -DestinationPath "$suricataPath" -Force;Remove-Item "$suricataPath\suricata-windows-scripts.zip" -Force& "$suricataPath\install-suricata-service.ps1"
To trigger a manual alert for threat simulation
In order to trigger a test alert, run the following command from PowerShell on any system within your network:Invoke-WebRequest -Uri http://testmynids.org/uid/index.html
To Uninstall Suricata
In the Windows, open Add or Remove Programs.
Remove Suricata.
Remove NpCap.
As Administrator, open PowerShell and paste the following command. Modify the path if your install directory is different. Press enter to remove the scheduled tasks.
& "C:\Program Files\Suricata\remove-scheduled-tasks.ps1"Optionally, delete the suricata directory: "C:\Program Files\Suricata"
