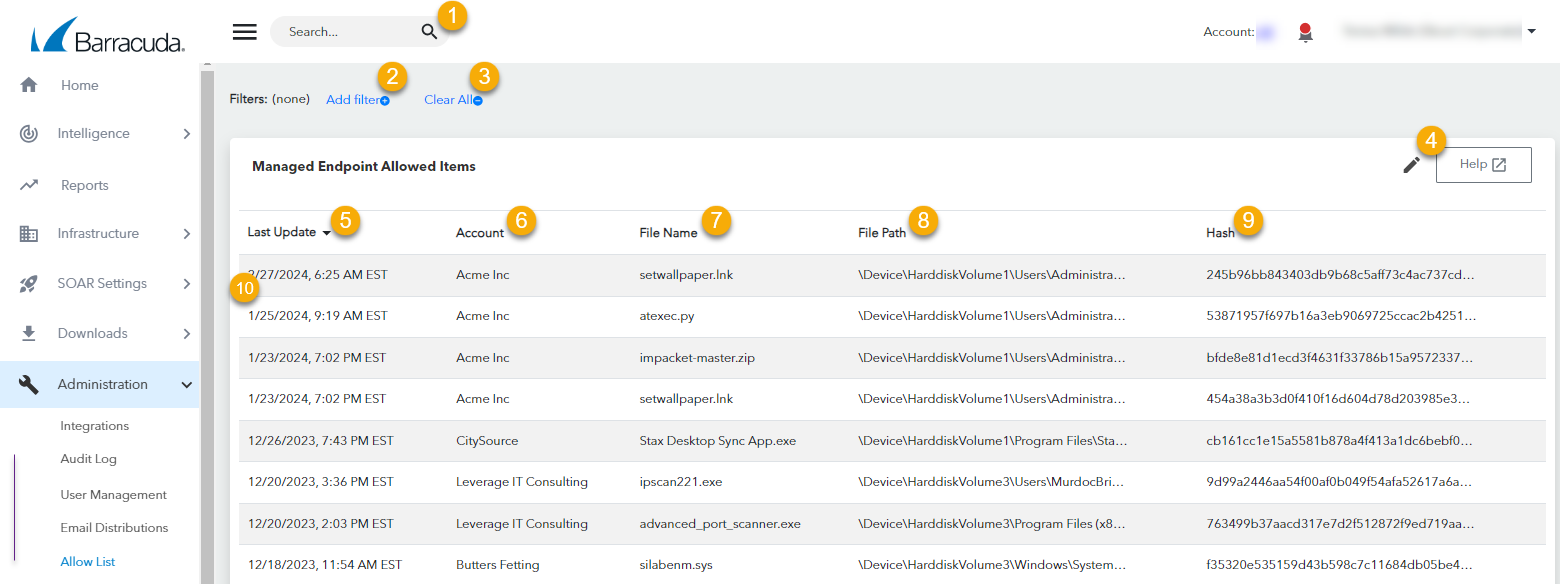
If you know certain threats are not malicious, you can add them to the Allow list. Adding non-malicious threats to the Allow list means that if they happen again, those threats won't create alerts. This reduces false positives and lets you focus on alerts that can genuinely affect your managed devices.
Once you've created an Allow list, you can sort and filter it. You can also remove items you don't want on the list.

Type a search term to search.
Click to add or edit a filter. See Filtering the Allow List Page.
Click to clear the filters. See Filtering the Allow List Page.
Click to change the columns displayed in the Managed Endpoint Allowed Items table.
Displays the time the threat was added to the Allow List.
Displays the account that the threat was identified on.
Displays the file name of the threat.
Displays the file path where the threat was found.
Displays the hash of the threat.
Displays the threats that have been added to the Allow List. Click a threat to remove it from the Allow List. See Removing a Threat from the Allow List.
