To integrate Salesforce, follow the procedures below:
- To verify user permissions
- To get the Salesforce instance URL
- To create a client key and client secret
- To enable the Salesforce integration in the Barracuda XDR Dashboard
To verify user permissions
- Log into Salesforce as an administrator
Find the user you want to associate with your new Client Key (created in the following step).
- Navigate to Setup > Quick Find > Users.
- Click the profile link associated with the User Account used for data collection.
Search for API-enabled permission on the same page:
- If API Enabled privilege is not selected, enable it for data collection.
To get the Salesforce Instance URL
- Do one of the following:
- In Salesforce Classic, copy the URL from the address bar of your browser. Remove the "/home/home.jsp" from the end of the address, for example if the URL was
https://AAA.salesforce.com/home/home.jsp, it would becomehttps://AAA.salesforce.com. - In Salesforce Lightning, click the View Profile tab. Copy the URL that can be found under the user name.
- In Salesforce Classic, copy the URL from the address bar of your browser. Remove the "/home/home.jsp" from the end of the address, for example if the URL was
To create a client key and client secret
- Log into Salesforce with the user you identified in the To verify user permissions procedure.
- In the top right menu bar, click Setup.
- In the Search Setup search box, search for App Manager, then select App Manager.
- Click New Connected App.
Type a name for the connected application
Type the API name.
- Type the contact email of an administrator responsible for the application.
- In the API (Enable OAuth Settings) section, select Enable OAuth Settings.
- If Enable for Device Flow option is not enabled, select it.
- In Callback URL, type the Salesforce Instance URL. For example:
https://na9.salesforce.com/oauth2/callback - Select the following OAuth scopes to apply to the connected app:
- Manage user data via APIs (api)
- Perform requests at any time (refresh_token, offline_access)
- (Optional) In case of data collection, if any permission issues arise, add the Full access (full) scope.
- Select Require Secret for the Web Server Flow to require the app's client secret in exchange for an access token.
- Select Require Secret for Refresh Token Flow to require the app's client secret in the authorization request of a refresh token and hybrid refresh token flow.
- Select Enable Client Credential Flow.
Click Save.
- Click Edit Connected Apps policies.
- Navigate to Setup > Quick Find > Manage Connected Apps.
- Click Edit Policies.
- In the IP Relaxation menu, select Relax IP restrictions.
- Click Continue
- Under API details, click Manage Consumer Details > Verify the user account using Verification Code.
In the Consumer Details section, copy the Consumer Key and Consumer Secret.
- Click Save.
To enable the Salesforce integration
- In Barracuda XDR Dashboard, navigate to Administration > Integrations.
- On the Salesforce card, click Setup.

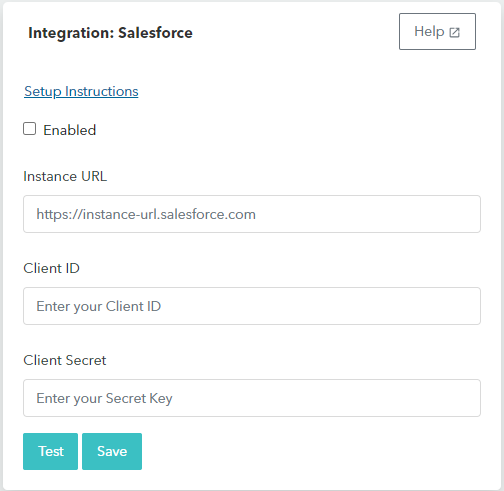
- Enter the following:
- Salesforce Instance URL — The Salesforce Instance URL from the To get the Salesforce Instance URL procedure above
- Client ID — The Consumer Key from the To create a client key and client secret above
- Client Secret — The Consumer Secret from the To create a client key and client secret above

- Optionally, click Test to verify the credentials.
- Select the Enable check box.
- Click Save.
