

To integrate Barracuda Web Application Firewall, do the following:
Obtain the serial number of the Web Application Firewall
Configure the Web Application Firewall for syslog output
Enable the Barracuda Web Application Firewall integration
To obtain the serial number of the Web Application Firewall
Log into the web interface of the Web Application Firewall. Locate the serial number at the bottom of the page.
Copy the digits at the end of the serial number, after the second dash. For example, if the serial number is Serial #BAR-WF-0000000, copy “0000000”.
To configure the Web Application Firewall for syslog output
In the web interface of the Web Application Firewall, navigate to the ADVANCED > Export Logs page.
In the Export Logs section, click Add Export Log Server.
The Add Export Log Server window opens.Specify values for the following:
Name – Type
Barracuda XDR.Log Server Type – Select Syslog NG.
IP Address or Hostname – Type
barracudawaf.ingest.skoutsecure.com.Port – Type
9256.Connection Type – Select UDP.
Validate Server Certificate – Select No.
Client Certificate – Select No.
Log Timestamp and Hostname – Select No.
Enable XDR format – Select Yes.
Optionally, type a comment.
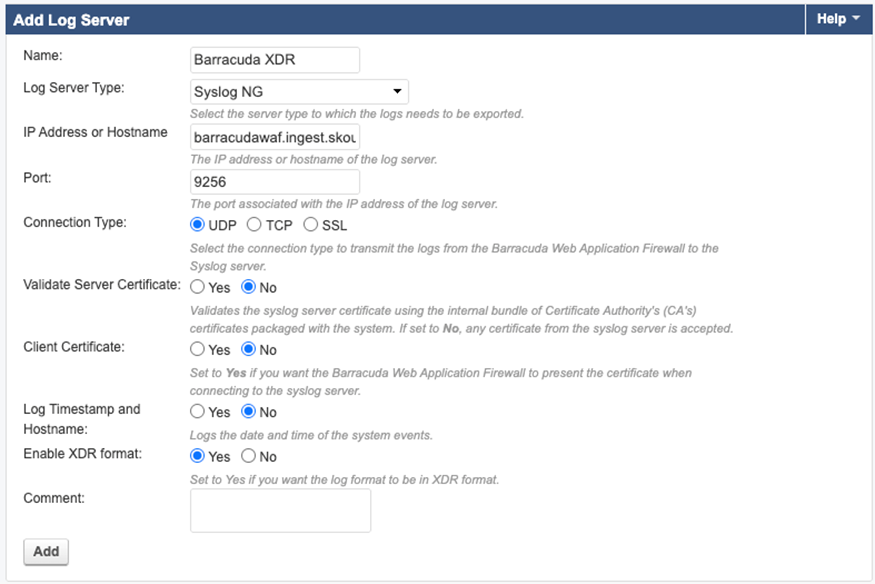
11. Click Add.
To enable Barracuda Web Application Firewall
In Barracuda XDR Dashboard, navigate to Administration > Integrations.
On the Barracuda Web Application Firewall card, click Setup.
Select the Enabled check box.
Enter the serial number from the To obtain the serial number of the Web Application Firewall procedure.
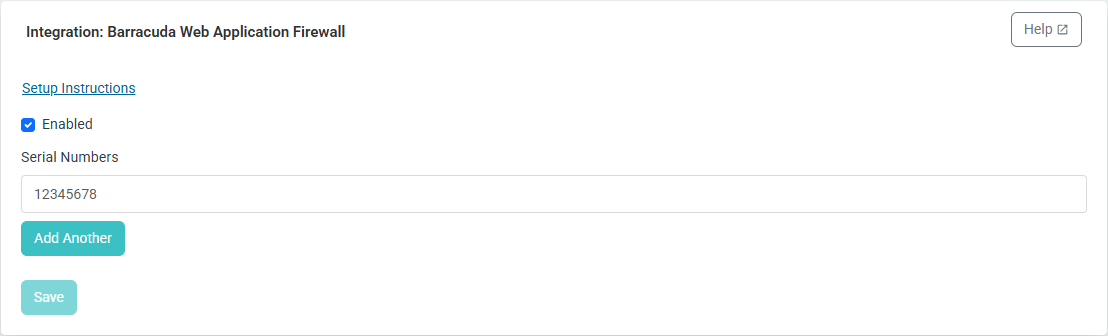
If you are integrating multiple firewalls, click Add Another and enter the serial number of another firewall.
Repeat step 5 until all firewall serial numbers are added.
Click Save.