

You can restore Microsoft SQL databases to flat files. Each SQL instance has a configurable restore type property where you can specify original location or flat file.
To change restore type on a SQL instance (enable flat file restore):
- In the Navigation bar, select Advanced, then Network.
- In the Network tree, expand Microsoft SQL Server. Select the SQL instance and click Properties.
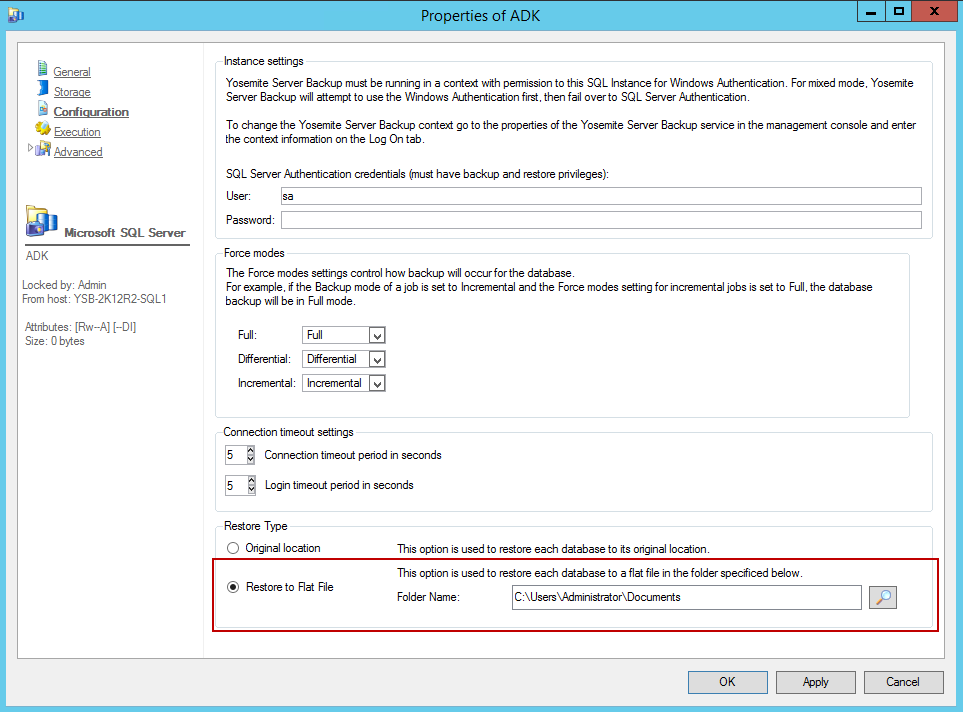
- In the Properties window for that instance, on the left side, select Configuration. On the right side, in the Restore Type area, select Restore to Flat File.
Browse to the folder where you want the restored flat file to be saved, then click OK.
Restoring Databases from a Flat File using SQL Server Management Studio
To restore the flat file backup:
- In the Object Explorer, expand the server.
- Right-click the database folder and select Restore Files and Filegroups.
- In the Restore Database window, select the Source Database or type a new name to create one.
- In the Source for Restore section, browse for the full .bak file. Select the check box to perform a full restore on that source, then click OK.
Important: Always restore the full database first, then restore the differential.
- In the left panel, select the Options page.
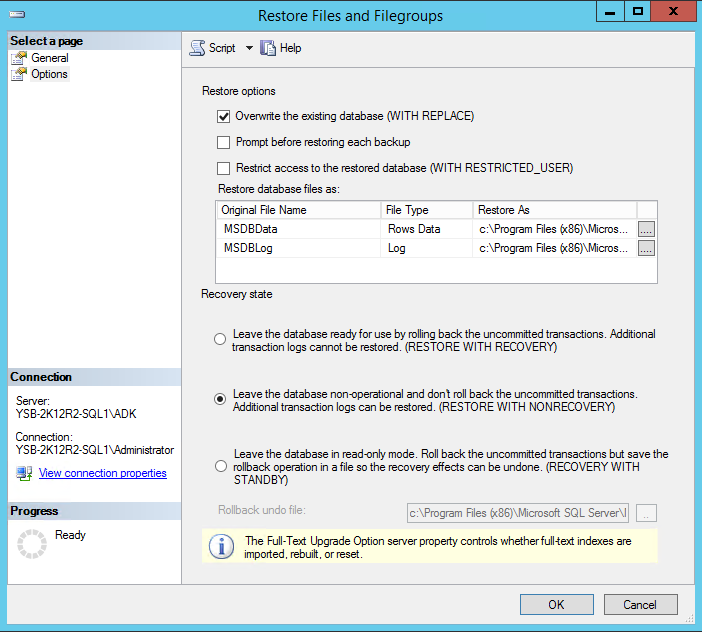
- If you plan to overwrite the original database, in the Restore Options section, select the check box for Overwrite the existing database (WITH REPLACE).
- If you plan to restore a differential after the full database, in the Recovery State section, select the RESTORE WITH NONRECOVERY option. Selecting this option enables you to restore addition transactional log backups to the database before finalizing it.
- Run the database restore. If you are only restoring a full database, your process is complete. If you are also restoring differential files, continue below to restore the transactional logs (.trn files).
- Return to the Restore with Files and Filegroups window. Select the transactional logs (.trn files) to restore and select their check boxes.
- On the Options page, select the RESTORE WITH RECOVERY option. This will append the transactional logs and finalize the database.
- Refresh the server view to see the database.
For additional information on restoring Microsoft SQL Databases from flat database and differential files, refer to the following Microsoft documentation: