

The Barracuda SecureEdge Manager allows you to configure a PPPoE WAN connection setup for a new site during initial deployment via the new site setup wizard. You can also edit or configure the PPPoE WAN interface later through the Sites tab.
Before You Begin
- For Microsoft Azure:
- Create a Virtual WAN in Microsoft Azure. For more information, see How to Create a Microsoft Azure Virtual WAN.
- Create an Edge Service.
Step 1 Create the Site Configuration
Go to https://se.barracudanetworks.com and log in with your existing Barracuda Cloud Control account.
- In the left menu, click the Tenants/Workspaces icon and select the workspace your appliance should be assigned to.
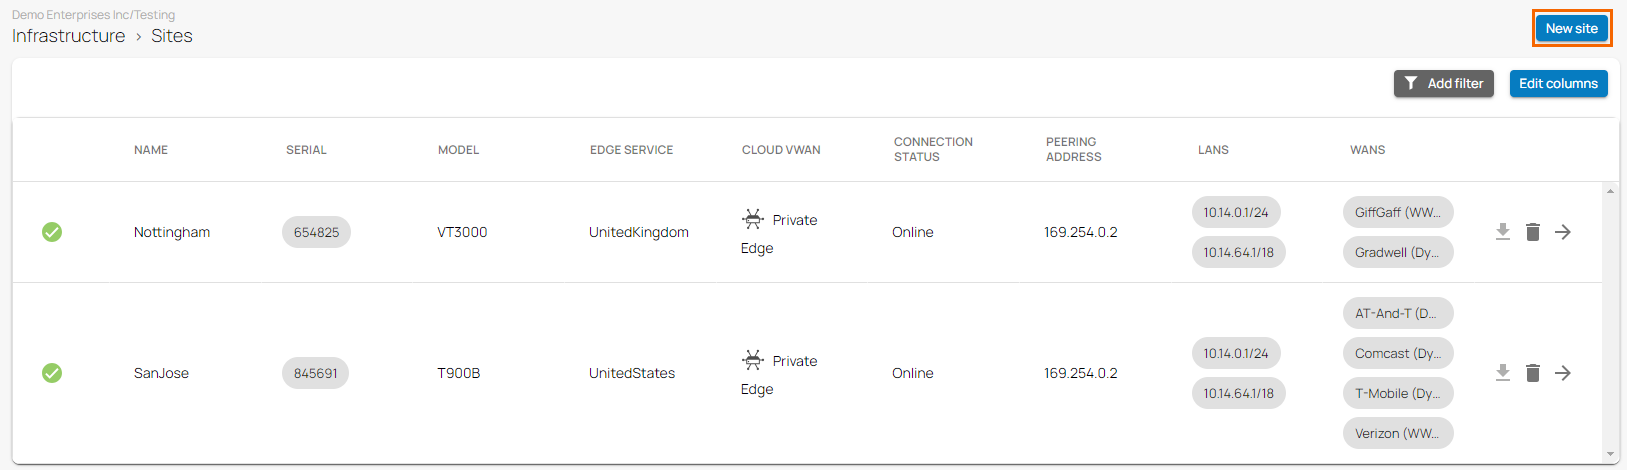
- Go to Infrastructure > Sites.
- The Sites page opens. In the top-right corner of the window, click New site.
- The New Site Basic Information blade opens. Enter values for the following:
- Name – Enter the name of the site.
- Edge Service – Select the Edge Service you want your site to connect to from the drop-down menu. Select (None) if you do not want this service to connect to another one.
- Root Password – Enter the root password. The password must not contain the "%" character.
- Confirm Root Password – Retype the root password to confirm.
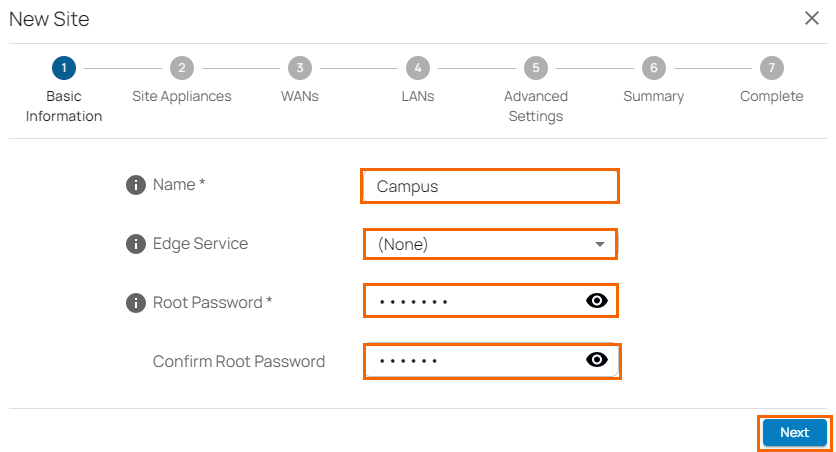
- Click Next. The Site Appliances blade opens.
Select your appliance from the list of appliances linked to your account. For a high availability cluster, select two appliances. For more information on high availability, see High Availability. Note: After ordering, it might take up to 3 hours before your device is listed.
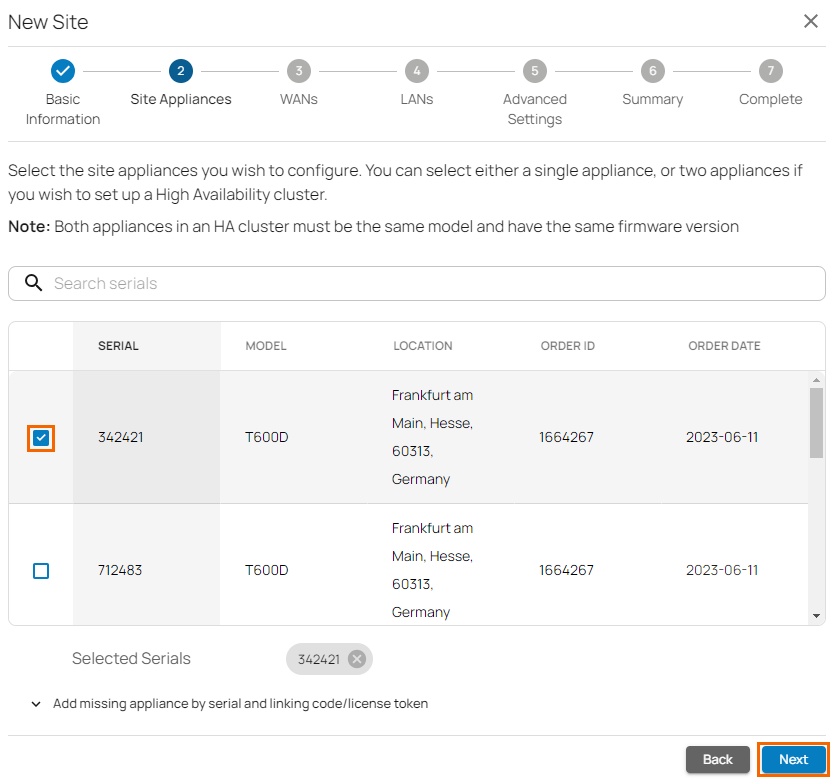
- Click Add missing site appliance by serial/linking code and specify values for the following:
- Serial – Enter the serial number of your appliance.
Code/Token – Enter the linking code (located on the back of the Quick Start Guide shipped with your hardware appliance), or the token of your VTx appliance.
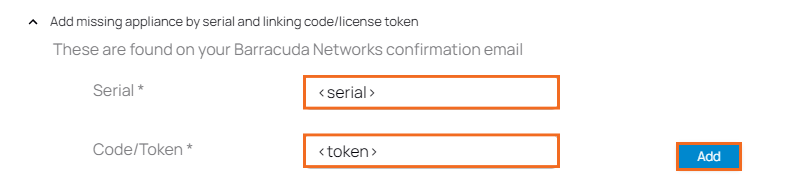
- Click Add to add the device to your account.
- Click Next. The WANs blade opens.
Select the number of desired WAN connections from the drop-down list. Note: The number in the Number of WANs cannot be greater than 4.
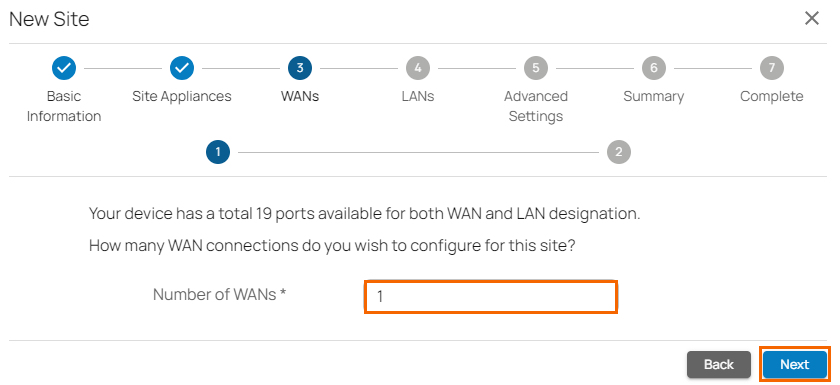
- Click Next. The Configure WAN link blade opens.
- Specify values for the following:
- Name – Enter a unique name for your uplink.
Type – Select PPPoE from the drop-down list.
- Port – Select the port where your uplink is connected to. Default for DHCP connections is p4, except model T93 Revision A where DHCP is located on p2. Note: Port 1 is reserved for high availability.
- Virtual LAN ID (Optional) – If required, enter the Virtual LAN ID this interface is connected to.
- Provider Pinning – Select a provider classification from the drop-down list.
- Username – Enter the username.
- Password – Enter the password.
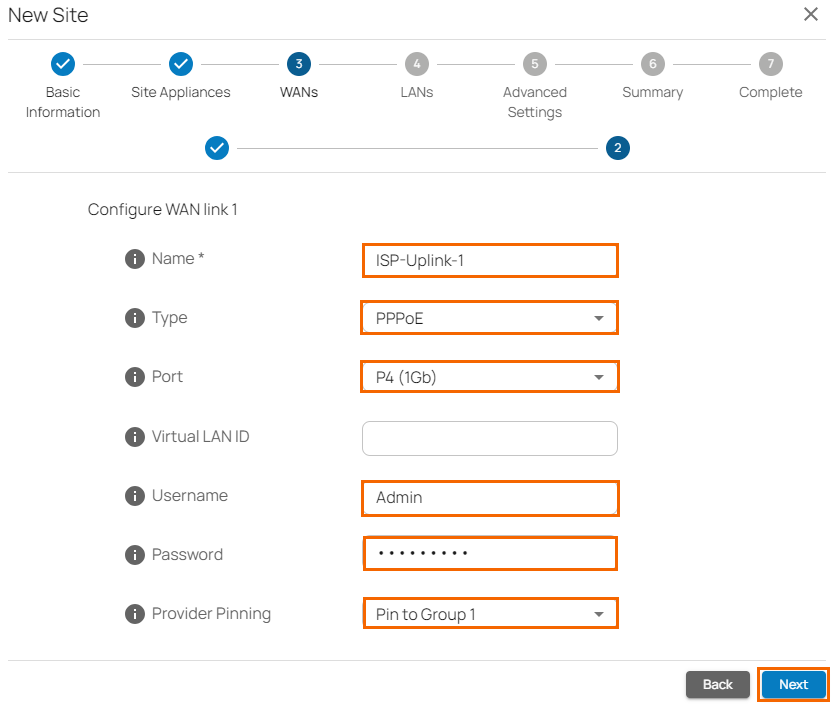
- Click Next. The LANs blade opens.
- Select the number of desired LAN connections from the drop-down list.
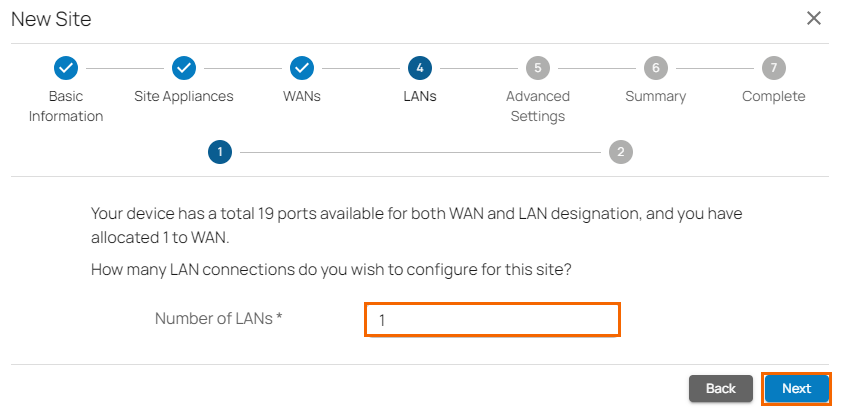
- Click Next. The Configure LAN link blade opens.
- Specify values for the following:
- Name – Enter a name for your LAN.
- Port – Select a port from the drop-down list where the LAN is attached to. Note: Port 1 is reserved for high availability.
- Virtual LAN ID (Optional) – If required, enter the Virtual LAN ID this interface is connected to.
- IP Address – Enter the IP address.
- Netmask – Enter a number between
0and32for the subnet mask. - DHCP Server – Click to enable. If enabled, you must enter the First IP Address and the Last IP Address. IP addresses within this range will be automatically assigned via DHCP.
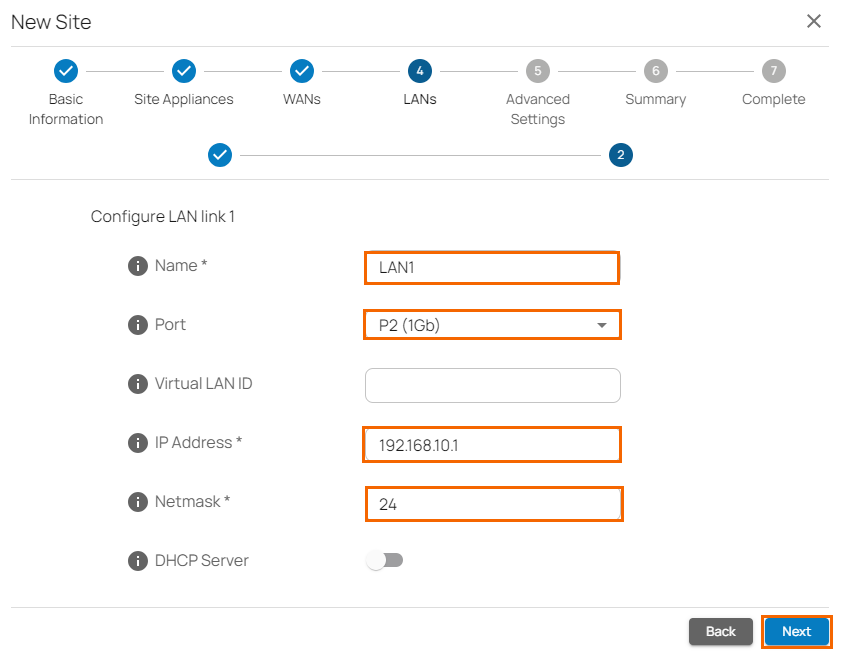
- Click Next. The Advanced Settings blade opens.
- Specify values for the following:
- Update Window Timezone – Select Dynamic from the drop-down list, or select the time zone where the box is located.
- Primary DNS – Enter the IP address of the primary DNS server.
- Secondary DNS – Enter the IP address the secondary DNS server.
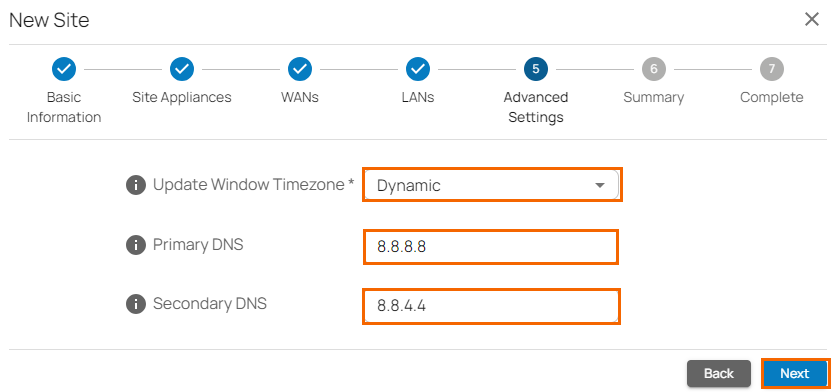
- Click Next. The Summary blade opens.
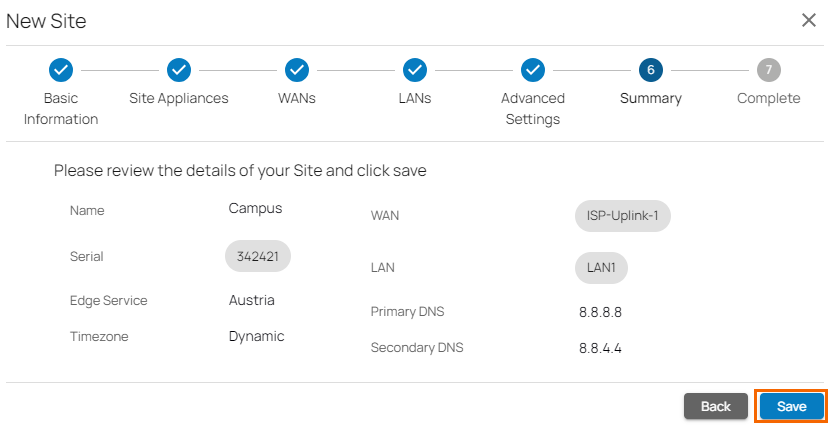
- Review your specifications. If everything is correct, click Save.
- Verify that your site configuration has been created successfully and click Finish.
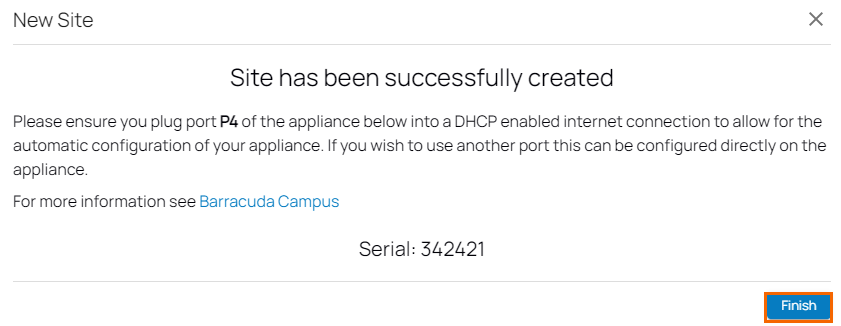
The appliance will automatically apply the configuration upon its first boot.