

The Barracuda SecureEdge Manager allows administrators to configure SecureEdge Access settings on a global level as default settings. In addition to Web Filtering, SecureEdge Access now also incorporates several new safety features such as Tamper Proof, Device Pre-Logon, and User Device Limit. 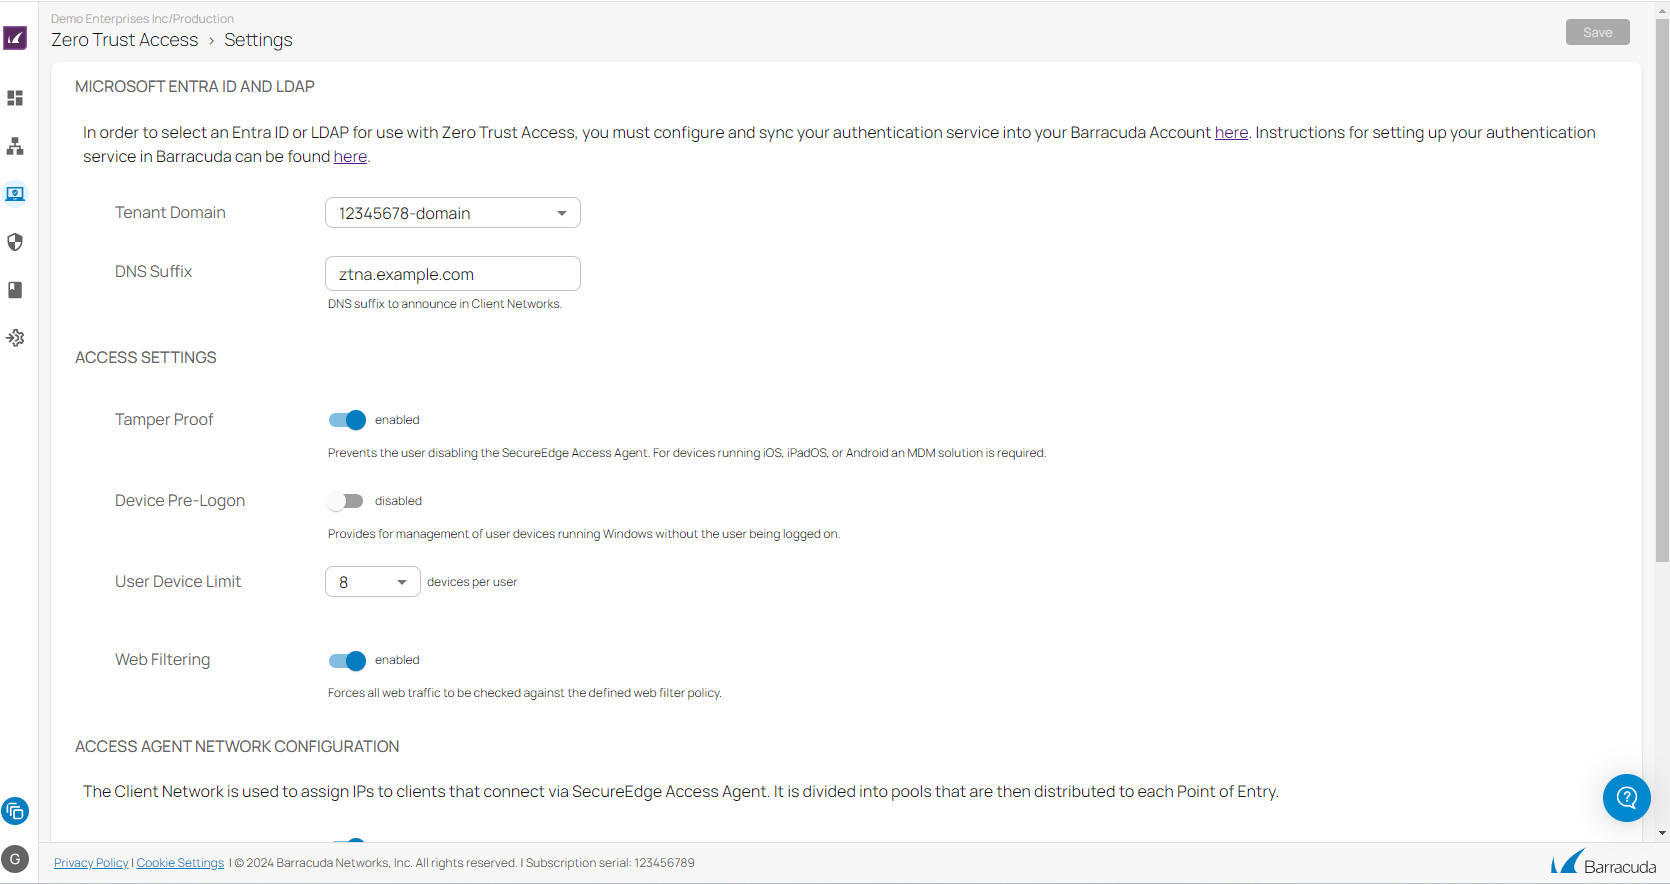
Create Access Settings
- Go to https://se.barracudanetworks.com and log in with your existing Barracuda Cloud Control account.
- In the left menu, click the Tenants/Workspaces icon.
- From the drop-down menu, select the workspace your SecureEdge Access should be configured for.
- In the left menu, click the Access icon, and select Settings.

- The Settings page opens.
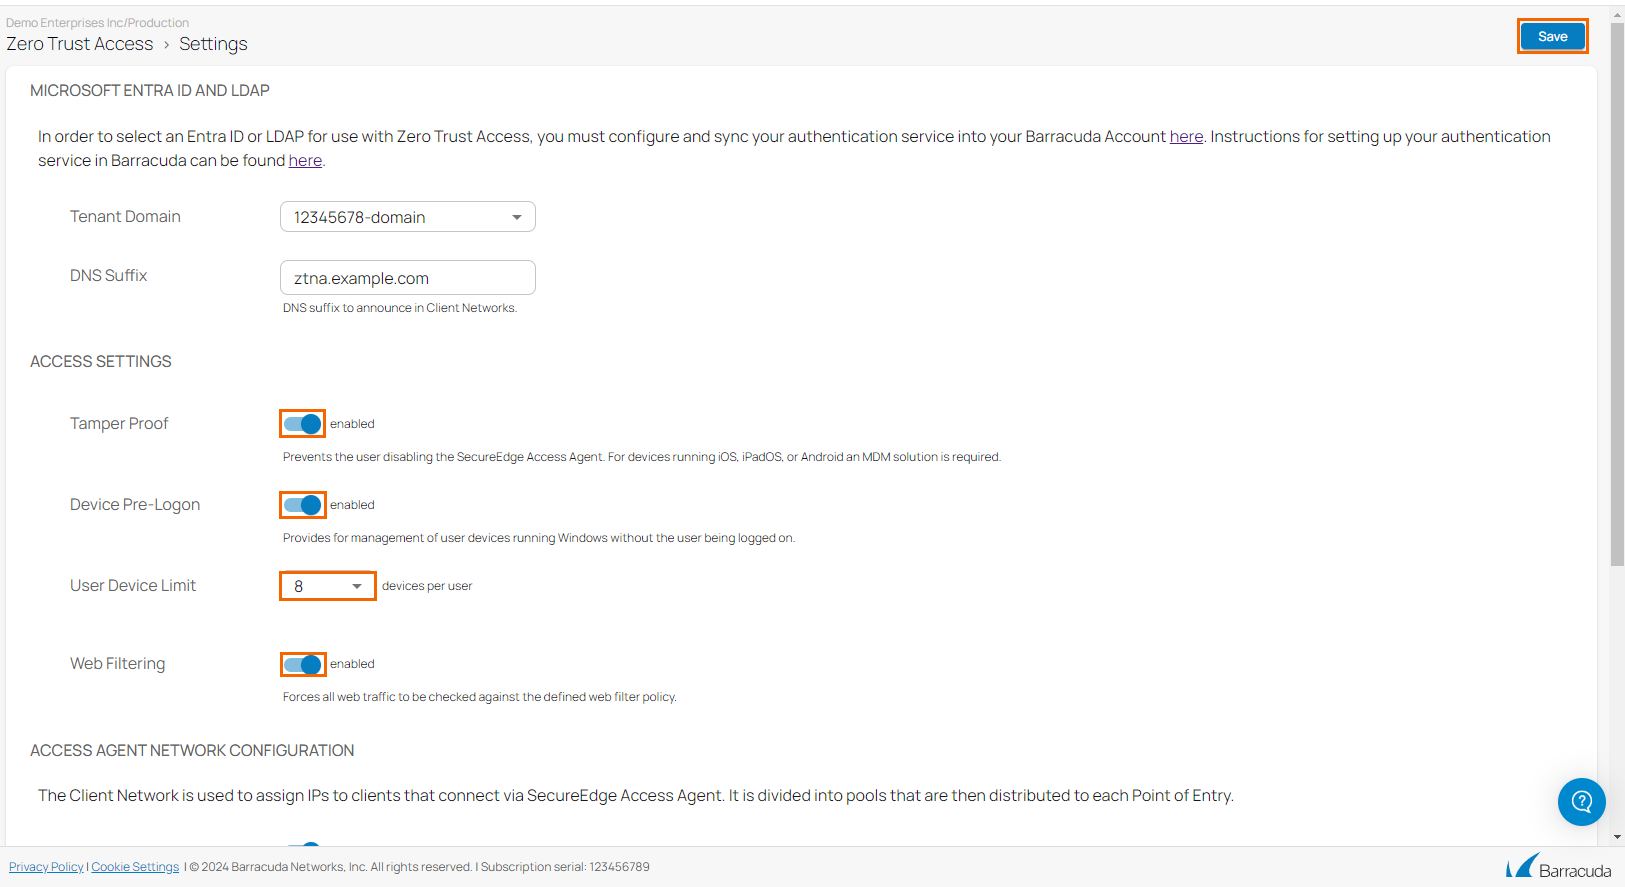
- In the Access Settings section, specify values for the following:
Tamper Proof – Click to enable/disable. By default, Tamper Proof is disabled. Note: For devices running iOS, iPadOS, or Android, an MDM solution is required.
If Tamper Proof is enabled, the user will no longer be able to do the following:
- Disable the SecureEdge Access Agent
- Unenroll
- The right-click Quit option for SecureEdge Access Agent will not be available in the system tray
- If Tamper Proof is disabled, all of the above-mentioned features are available to the user.
- Device Pre-Logon – Click to enable/disable. By default, Device Pre-Logon is disabled.
- If Device Pre-Logon is enabled, administrators can manage user devices running Windows without the user being logged in. Note: This feature is available only for Windows.
- User Device Limit – Select a user device limit from the drop-down menu. You can choose between 1 to 10 devices per user. User Device Limit refers to the number of devices the user is allowed to enroll. By default, User Device Limit is 5.
- Web Filtering – Click to enable/disable DNS-based web filtering. By default, Web Filtering is enabled.
- If Web Filtering is enabled, all web traffic will be checked against the defined Web Filter policy. You can enforce Web Filtering policies for the web traffic that the clients connect to via the SecureEdge Agent in order to establish a secure connection to access internal and external company resources. For more information, see Web Filter Policies.
- If Web Filtering is enabled, all web traffic will be checked against the defined Web Filter policy. You can enforce Web Filtering policies for the web traffic that the clients connect to via the SecureEdge Agent in order to establish a secure connection to access internal and external company resources. For more information, see Web Filter Policies.
- Click Save.
After configuration is complete, verify your SecureEdge Access settings on the SecureEdge Access Agent. The usage of ZTNA features is as follows:
- You can enable/disable Tamper Proof for all users
- You can enable/disable Device Pre-Logon for all users
- You can enable/disable Web Filtering for all users. If enabled, all web traffic will be checked against the defined Web Filter policy.
- By default, User Device Limit is 5. The range is between 1 and 10.
Further Information
The SecureEdge Access settings of the ZTNA features can also be defined on a user level. For more information how to set up ZTNA features per user, see How to Configure SecureEdge Access User Settings.