

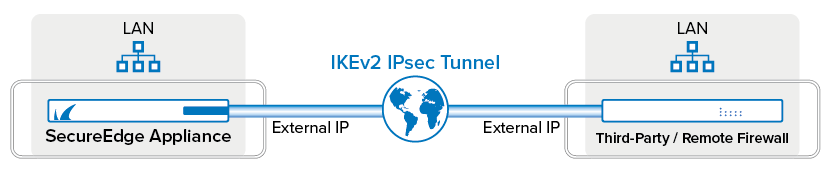
Barracuda SecureEdge can establish IPsec VPN tunnels to any standard-compliant third-party IKEv2 IPsec VPN gateway. IPsec IKEv2 tunnels can be created on all types of site devices and all Edge Services. The site-to-site IPsec VPN tunnel must be configured with identical settings on both SecureEdge and the third-party IKEv2 IPsec gateway.
Requirements and Limitations
For IPsec traffic, do not configure your SD-WAN policy with ACTION set to PIN; otherwise, site-to-site traffic over IPsec tunnels might be blocked.
If you want to connect the stand-alone site to the Edge Service for vWAN for an IPsec tunnel using BGP, you must first delete the stand-alone site configuration completely and re-configure the same settings via the new site setup wizard.
If you configure an IPsec IKEv2 VPN tunnel with BGP enabled, you can add more than one destination. However, you must ensure that two destinations of the same tunnel do not have the same remote gateway value.
When creating general settings for an IPsec tunnel on the SecureEdge appliance, you must disable the Initiates field for your connected Barracuda-hosted Edge Service or Edge Service for vWAN. However, you can enable the Initiates field for your connected Site or Private Edge Service.
Step 1. Create an IKEv2 IPsec Tunnel with BGP Enabled
Go to https://se.barracudanetworks.com and log in with your existing Barracuda Cloud Control account.
The chosen Tenant/Workspace is displayed in the top menu bar.

Click the expandable drop-down menu and select the workspace you want to configure the IPsec IKEv2 tunnel for.
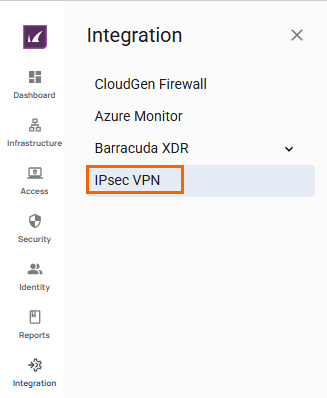
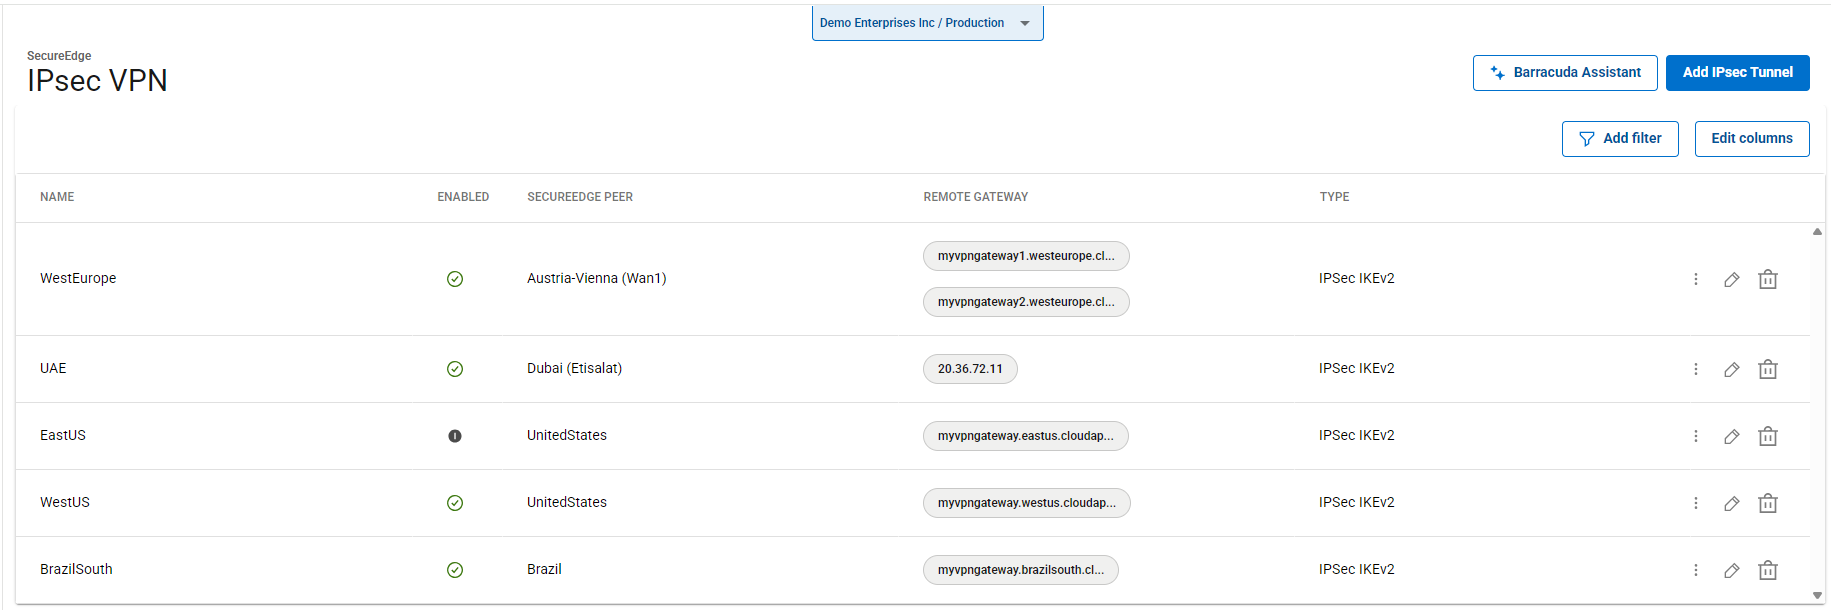
Go to Integration > IPsec VPN.
The IPsec VPN page opens. To add a tunnel, click Add IPsec Tunnel.

The Create IPsec Tunnel window opens.
In the General tab, specify values for the following:
Enable – Click to enable/disable tunnel status.
Initiates – Initiates tunnel. Click to enable/disable.
If enabled, the appliance is the active unit and continuously attempts to connect to the remote VPN gateway until a VPN tunnel is established.
If disabled, the appliance is the passive unit and waits for connection attempts from the remote VPN gateway.
In the GENERAL INFORMATION section, specify values for the following:
Name – Enter a unique tunnel name.
Description – Enter a brief description.
In the AUTHENTICATION section, specify values for the following:
Authentication – Select the authentication method from the drop-down menu.
Shared Secret – Enter the shared secret to use a shared passphrase to authenticate.
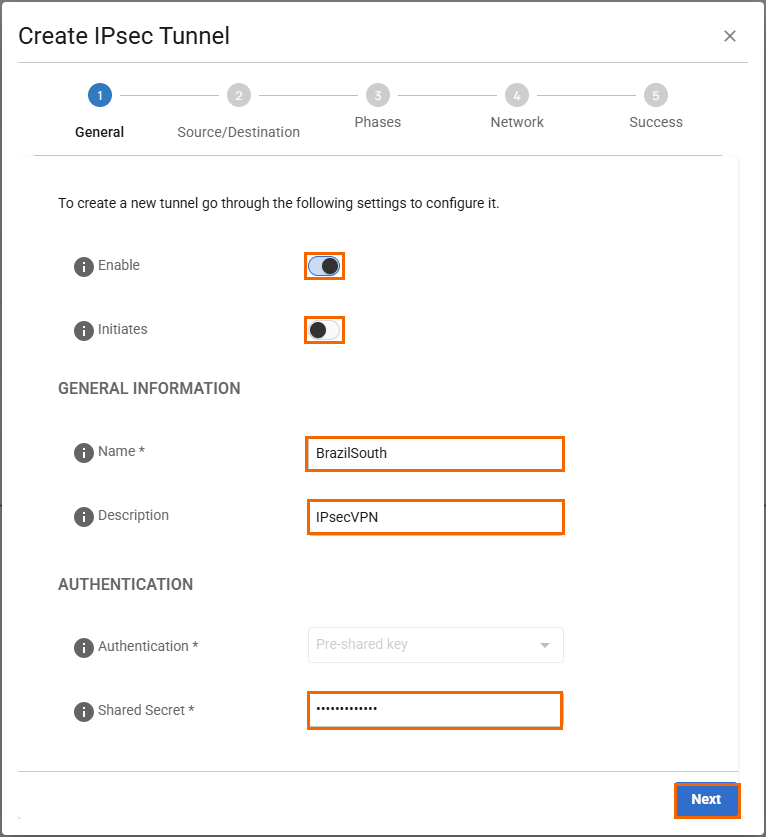
Click Next.
In the Source/Destination tab, specify values for the following:
Enable BGP – Click to enable.
In the SOURCE section, specify values for the following:
Type – Select the type from the drop-down list. You can choose either Edge Service or Site.
Peer – Select the peer on which the tunnel will be configured from the drop-down list.
Local ID – Enter the local ID.
Peering Address – Enter the peering address of the local network, e.g.,
169.254.25.2/24ASN – Enter the ASN of the local side, e.g.,
65002.In the DESTINATION section, specify values for the following:
Remote Gateway – Enter a remote gateway.
Remote ID – Enter a unique ID. VPN tunnels without remote ID will not establish successfully.
Peering Address – Enter the remote BGP peer IP address, e.g.,
169.254.25.1ASN – Enter the ASN of the remote side, e.g.,
65003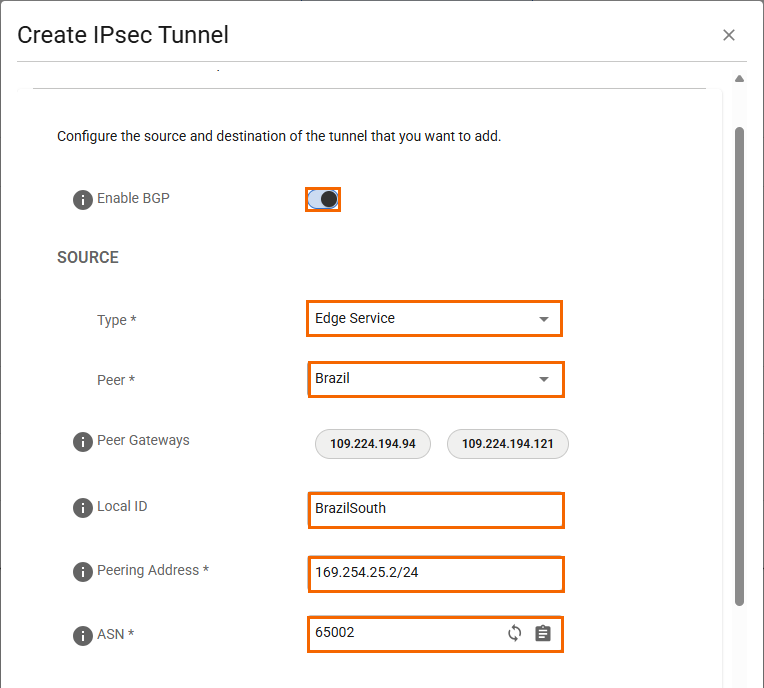
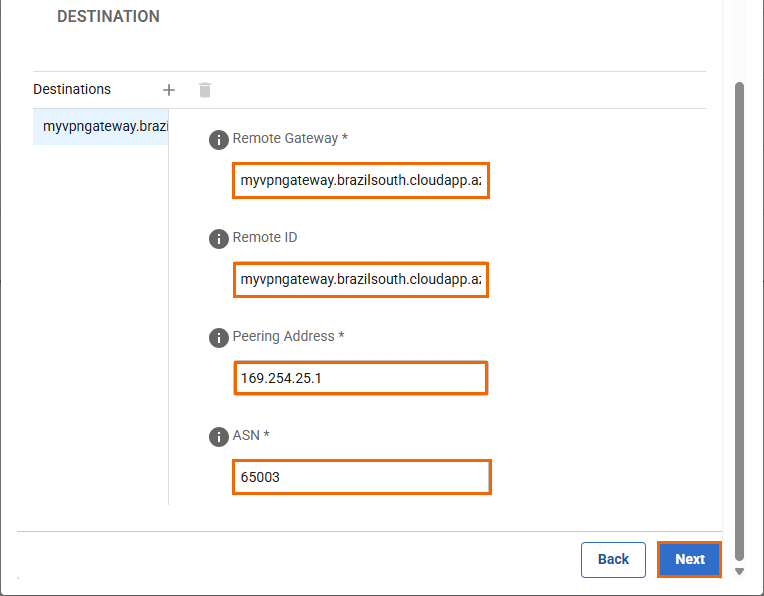
Click Next.
In the Phases tab, specify values for the following:
In the PHASE 1 section, specify the values for the following:Encryption – Select the encryption algorithm from the drop-down list. You can choose between AES, 3DES, Blowfish, or AES256.
Hash – Select the hashing algorithm from the drop-down list. You can choose between MD5, SHA, SHA256, or SHA512.
DH-Group – Select the Diffie-Hellman Group from the drop-down list. Supported groups are: 1, 2, 5, 14 - 24.
Proposal Handling – Select the proposal handling from the drop-down list. You can choose between the following:
Strict – The effective encryption is strictly determined by the proposed set of Encryption, Hash, and Group. The communication partner must agree with the proposed set; otherwise, no communication will be established due to a missing common encryption agreement.
Negotiate – This option lets a communication partner decrease the strength of the encryption if it cannot support the proposed encryption from the initiator.
Lifetime – Enter the number of seconds until the IPsec SA is re-keyed. Default:
28800
In the PHASE 2 section, specify the values for the following:
Encryption – Select the encryption algorithm from the drop-down list. You can choose between AES, 3DES, Blowfish, or AES256.
Hash – Select the hashing algorithm from the drop-down list. You can choose between MD5, SHA, SHA256, SHA512, or GCM.
DH-Group – Select the Diffie-Hellman Group from the drop-down list. You can choose either Disable PFS or supported groups. Supported groups are: 1, 2, 5, 14 - 24.
Proposal Handling – Select the proposal handling from the drop-down list. You can choose between the following:
Strict – The effective encryption is strictly determined by the proposed set of Encryption, Hash, and Group. The communication partner must agree with the proposed set; otherwise, no communication will be established due to a missing common encryption agreement.
Negotiate – This option lets a communication partner decrease the strength of the encryption if it cannot support the proposed encryption from the initiator.
Life time – Enter the number of seconds until the IPsec SA is re-keyed. Default:
3600.Traffic Volume Enabled – Click to enable/disable.
If enabled, specify the value for the following:
Traffic Volume KB – Enter the number of KB after which the IPsec SA is re-keyed.

Click Next.
In the Network tab, specify the values for the following:
In the NETWORK SETTINGS section, specify the values for the following:Force UDP Encapsulation – Click to enable/disable. Use UDP encapsulation (4500) for ESP traffic even if no NAT is detected.
IKE Reauthentication – Click to enable/disable. Reauthenticate during every IKE rekeying. This setting must be disabled if the remote device is a Microsoft Azure Dynamic VPN Gateway.
In the DEAD PEER DETECTION section, specify the values for the following:
Action When Detected – Select the action from the drop-down list. You can choose between the following:
None – Disable DPD.
Clear – Connection with the dead peer is stopped, and routes removed.
Restart – Connection is restarted.
Delay – Enter the number of seconds after which an empty INFORMATIONAL message is sent to check if the remote peer is still available. Note: DPD Delay is required when detected DPD action is set anything other than None.
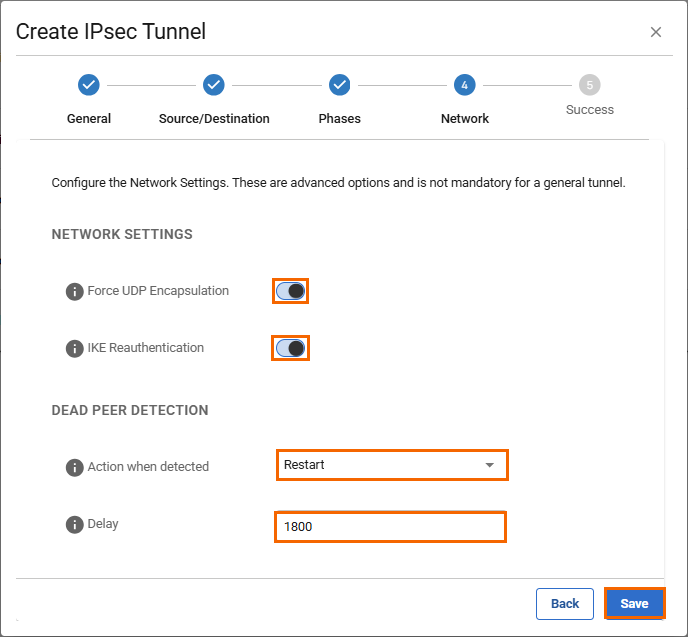
Click Save.
Verify that your IPsec tunnel configuration has been created successfully.

Click Finish.
After the configuration is complete, you can see a new IPsec tunnel is shown on the IPsec VPN page, and the status of the field names (e.g., Enabled) can be verified.
(Optional) Restart the IPsec Tunnel
If you must restart the IPsec tunnel, proceed with the following steps:
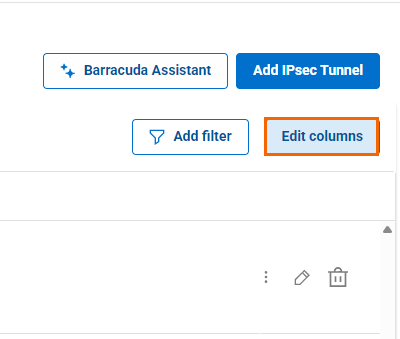
On the IPsec VPN page, click the icon of three vertical dots to restart the IPsec tunnel.
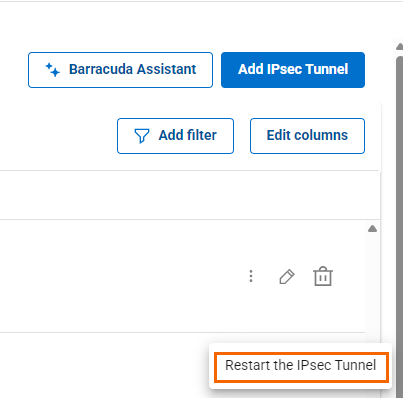
Click Restart the IPsec Tunnel.
(Optional) Edit Visible Columns
To get more detailed information on IPsec VPN, click Edit columns.
The Edit Visible Columns page opens.
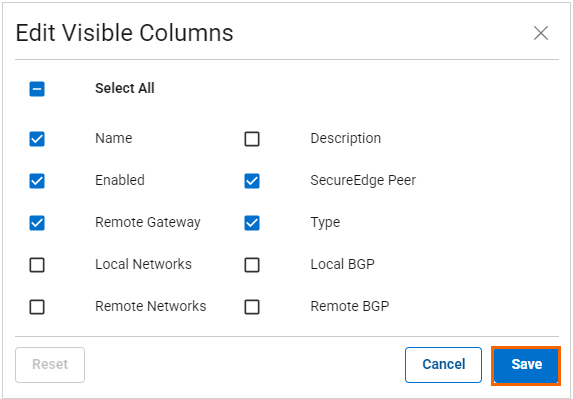
Select the field names you wish to display the columns for, and click Save.
Step 2. Create an IPsec Tunnel with the Remote Appliance
Configure the remote appliance or third-party VPN gateway with the same settings. Only the local and remote networks and the IP address for the remote VPN gateway must be interchanged. You can create a pass access rule on the remote appliance to allow traffic through the VPN tunnel.
Monitoring a VPN Site-to-Site Tunnel
To verify that the VPN tunnel was initiated successfully and traffic is flowing, proceed with the following steps:
Go to https://se.barracudanetworks.com and log in with your existing Barracuda Cloud Control account.
Select the workspace containing your Site.
Go to Infrastructure > Sites. The Sites page opens.
Select the site you want to verify the status for. Click on the arrow icon next to the Site.
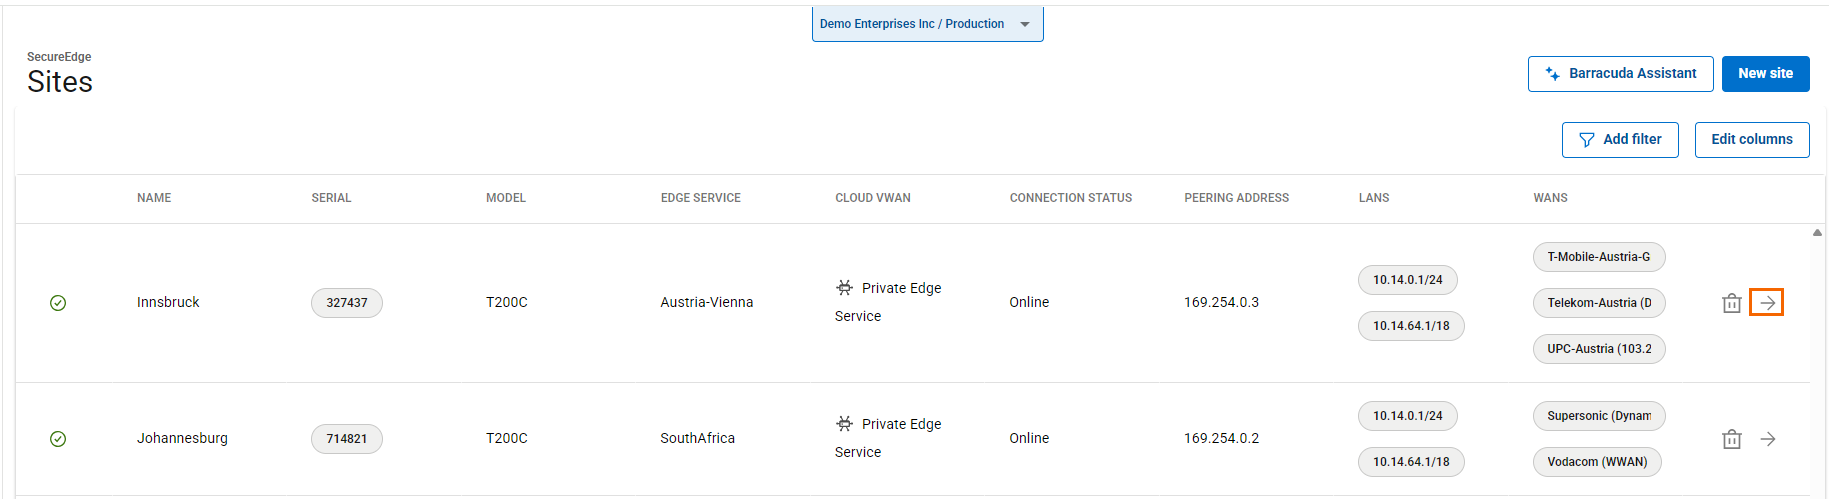
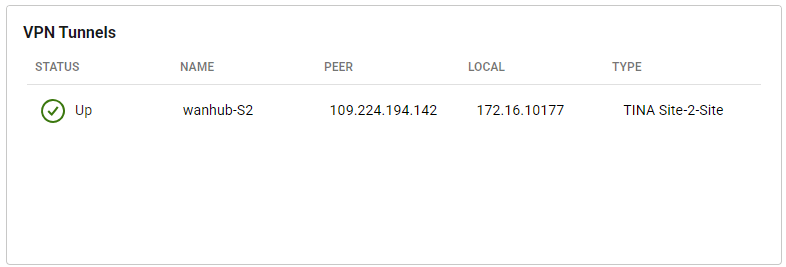
In the Site menu, the Dashboard page opens. You can see the status of all VPN tunnels for the corresponding sites.
Edit an Existing IPsec VPN Tunnel
Go to https://se.barracudanetworks.com and log in with your existing Barracuda Cloud Control account.
Select the workspace you want to edit the IPsec IKEv2 tunnel for.
Go to Integration > IPsec VPN.
The IPsec VPN page opens. Click on the pencil icon next to the IPsec IKEv2 tunnel you want to edit.
The Edit IPsec Tunnel window opens. Edit the value you are interested in.
Click Save.
Remove an Existing IPsec VPN Tunnel
Go to https://se.barracudanetworks.com and log in with your existing Barracuda Cloud Control account.
Select the workspace you want to remove the IPsec IKEv2 tunnel for.
Go to Integration > IPsec VPN.
The IPsec VPN page opens. Click on the trashcan icon next to the IPsec IKEv2 tunnel you want to remove.
The Delete IPsec Tunnel <Name of Tunnel> window opens.
Click Ok to confirm.