You can install the Barracuda CloudGen Firewall as a virtual machine in the Microsoft Azure public cloud. The Azure Solution Template deploys a single firewall into a dedicated subnet of a new or existing Virtual Network. Centrally managed firewalls get their configuration from the Control Center.
You can choose between the following images in the Azure Marketplace:
- Bring Your Own License (BYOL) – Uses licenses purchased directly from Barracuda Networks. Barracuda Networks offers a 30-day evaluation license.
- Pay As You Go (PAYG) – No dedicated licenses required. Licensing fees are included in the hourly price of the virtual machine. All charges are billed directly through your Microsoft Azure account.
Depending on your deployment, you may want to use more than one resource group to be able to maintain the deployed VMs more easily.
Before You Begin
- Create a Microsoft Azure account.
- (BYOL images only) Purchase a Barracuda CloudGen Firewall or Control Center for Microsoft Azure license, or register to receive an evaluation license from the Barracuda Networks Evaluation page.
Step 1. Basics
- Go to the Azure portal: https://portal.azure.com
- In the upper left-hand corner, click + Create a resource.
Search the Marketplace for
Barracuda CloudGen Firewall & SD-WAN for Azureand click Barracuda CloudGen Firewall & SD-WAN for Azure.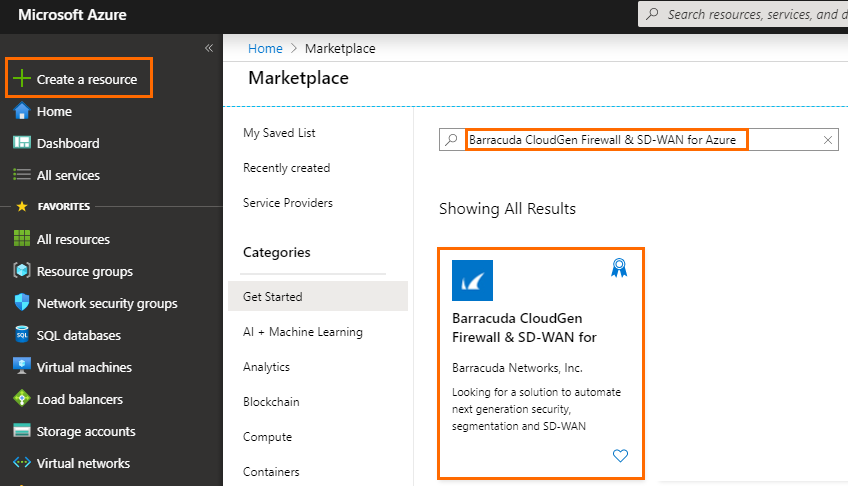
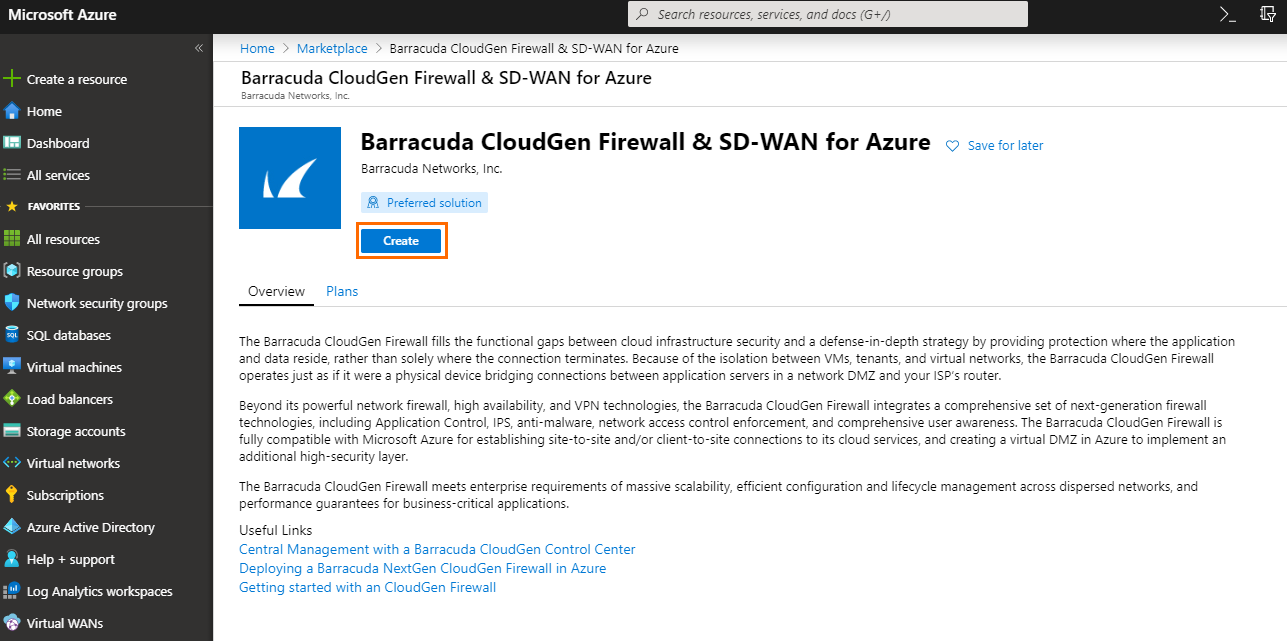
- In the next window, click Create.
- In the Basics blade, configure the following settings:
- Subscription – Select your subscription.
- Resource Group – Select an existing resource group to deploy to, or click Create new for a new resource group.
- Region – Select the desired location the firewall will be deployed to.
- Firewall Name – Enter the hostname for the CloudGen Firewall.
- License scheme – Select either PAYG or BYOL.
- Firmware version – Select one of the available firmware versions. Barracuda Networks recommends deploying the highest available version.
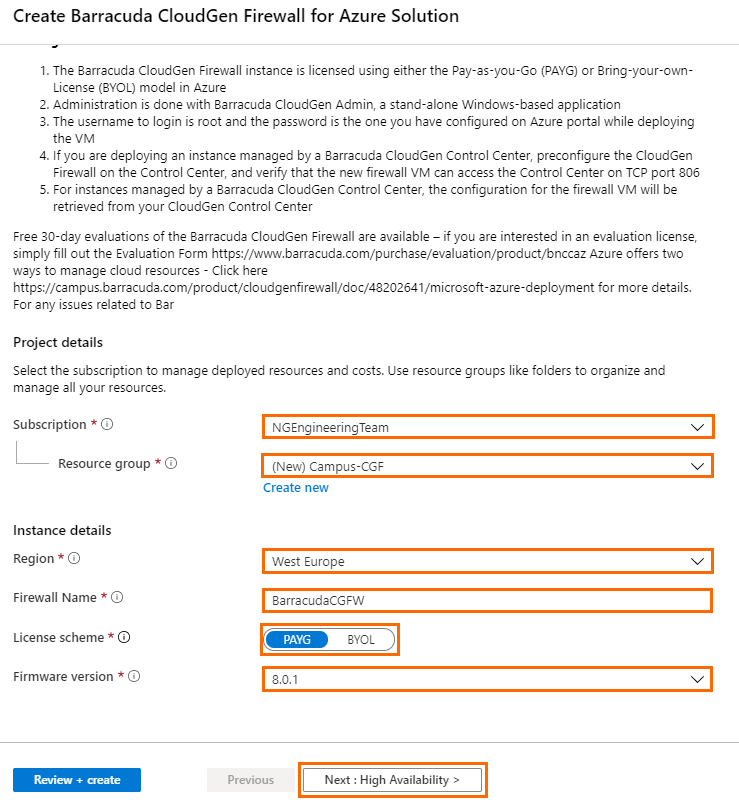
- Click Next : High Availability >.
Step 2. High Availability
In this blade you can create either a high availability cluster or a single firewall.
- High availability mode – Select from the drop-down menu if you want to deploy a single firewall or a high availability cluster. The following options are available:
- Active/passive HA cluster – Deploys a high availability (HA) cluster. For more information, see How to Deploy a High Availability Cluster with Cloud Integration from the Microsoft Azure Marketplace.
- Standalone – Deploys a single firewall.
- Standalone in availability set – Deploys a single firewall in an availability set. Enter an Availability set name. If this set does not exist, it will be created automatically.
- Standalone in availability zone – Deploys a single firewall in an availability zone. Select a High Availability Zone to deploy the firewall into it.
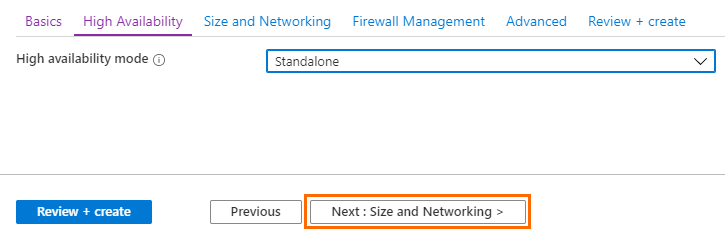
- Click Next : Size and Networking >.
Step 3. Size and Networking
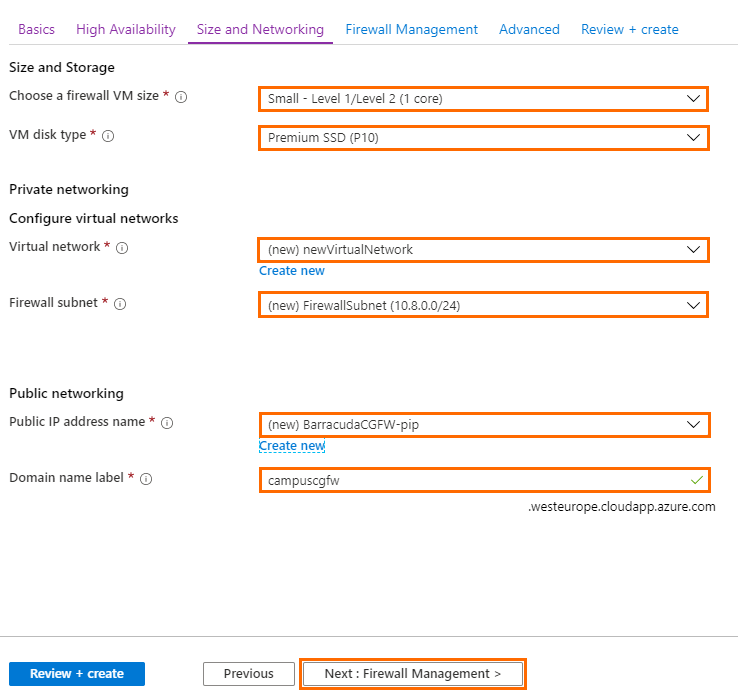
- In the Size and Networking blade, configure the following settings:
Choose a firewall VM size – Select the size of the virtual machine
- VM disk type – Select the disk type of your firewall virtual machine.
- Virtual network – Select an existing Virtual network , or create a new one.
- Firewall subnet – Select an existing subnet, or create a new one. This subnet will host your firewall. The firewall must be placed in a different subnet than the protected instances.
Public IP address name – Select an existing Public IP address, or create a new one. If you are using high availability, select a Standard SKU public IP.
- Domain name label – Enter a domain name for your firewall.
- Click Next : Firewall Management >.
Step 4. Firewall Management
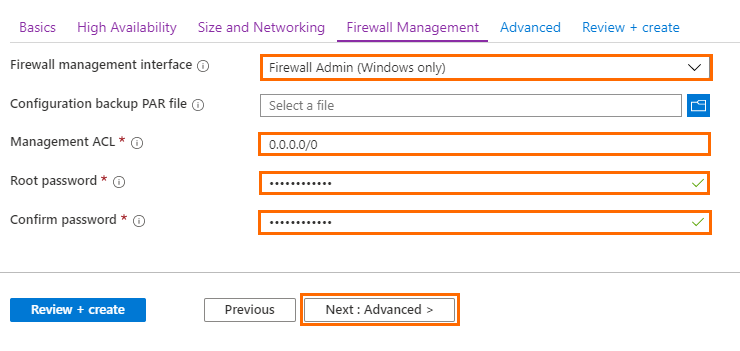
- In the Firewall Management blade, configure the following settings.
Firewall management interface – Select the management interface type for your Barracuda CloudGen Firewall. You can choose between Firewall Admin (Windows only), Web Interface and Centrally managed via Control Center. For more information on each topic, see Barracuda Firewall Admin, and Firewall Control Center. For a Control Center-managed firewall, you need the configuration backup PAR file, the IP address of the Control Center, the Control Center Range ID, the Cluster name, and the PAR file retrieval key.
Configuration backup PAR file – Select an unencrypted configuration backup to restore a firewall configuration. Make sure that static IP addresses, hostname and licenses of the configuration backup match the configuration of the virtual machine.
Management ACL – Introduces a Network Security Group that restricts access to management ports of the firewall. Enter
0.0.0.0/0to allow access from any network and to skip creating a Network Security Group.Root password – Enter the password for the root user of the firewall.
- Confirm password – Retype the password for the root user of the firewall.
- Click Next : Advanced >.
Step 5. Advanced
- In the Advanced blade, configure the following settings.
- Barracuda CloudGen Firewall private IP address – Enter a static private IP address from the subnet the firewall is deployed to. The first four and the last IP addresses in the subnet are reserved by Azure.
- VM size – If not already configured, change the virtual machine size.
Accelerated networking – Enable or disable Azure Accelerated Networking if the size of your virtual machine meets the requirements of Microsoft.
- SSH management access – Select Enabled to allow SSH access to the Barracuda CloudGen Firewall, and enter the SSH public key.

- Click Review + create >.
Step 6. Summary
- The basic configuration of the Barracuda CloudGen Firewall is validated, and if no errors are found, the virtual machine is ready for provisioning. For automated deployments, you can download the configuration template.

- Click Create .
- Wait for Microsoft Azure to finish the deployment of your Barracuda CloudGen Firewall.
- Go to Virtual machines , click on the CloudGen Firewall VM, and locate the Public IP address used to connect to your firewall. Use this IP address to connect to your CloudGen Firewall, as configured, either via Barracuda Firewall Admin or Web User Interface. The username is root and the password is the password you configured in Step 4.
Next Steps
Configure a user-defined routing table for the backend VMs to send traffic through the firewall, and enable Azure Cloud Integration to allow the firewall VM to directly connect to the Azure service fabric.
