The OVA package uses a default configuration that may not be suitable for your deployment. If you want to use multiple network interfaces, a different type of network adapter, or a bigger size for the virtual disk, use Barracuda Firewall Install to create the custom configuration files that you need to deploy the Barracuda CloudGen Firewall Vx with your specific settings.
Before You Begin
- From the Barracuda Download Portal, download the following:
- The ISO image for the Barracuda CloudGen Firewall Vx version that you want to install. There is only one ISO for the Barracuda CloudGen Firewall and Barracuda Firewall Control Center.
- Barracuda Firewall Install for the firmware version that you are going to install.
- Download and install WinImage or a comparable utility to create flp floppy images.
- You must install the Visual C++ Redistributable for Visual Studio 2012 on your computer to use Barracuda Firewall Install.
- Decide on the sizing requirements for your Barracuda CloudGen Firewall Vx. For more information, see Virtual Systems (Vx).
Step 1. Create Configuration Files with Barracuda Firewall Install
Create the configuration files with Barracuda Firewall Install.
- Start Barracuda Firewall Install.
Select the Full wizard mode, and then click Next.
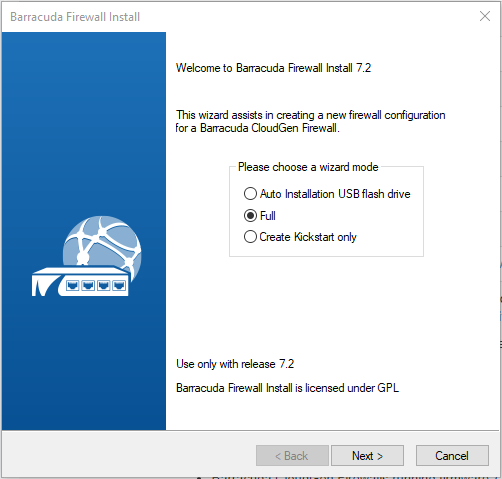
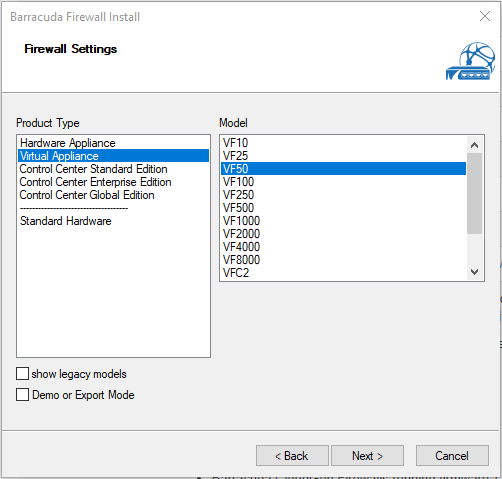
On the Box Type Settings page, select the Product Type and Model for your virtual appliance. You can configure Barracuda CloudGen Virtual Appliances and Barracuda Firewall Control Centers. After making your selections, click Next.
- On the Systems Settings page:
- Enter the following settings:
- Hostname – Enter a hostname (e.g.,
CloudGen Firewall VF50). - Timezone – Select the timezone that the appliance is in.
- Keyboard Layout – Select the keyboard layout for the console of the Barracuda CloudGen Firewall Vx.
- DNS – Enter the DNS servers for your network.
- Domain Suffix – Enter the domain that your appliance is in.
- Use NTP & IP – Enable NTP and enter the IP address for the NTP server.
- Hostname – Enter a hostname (e.g.,
- Click Next.
- Enter the following settings:
- On the Partition Settings page:
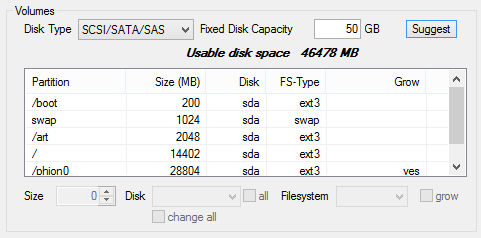
- In the Fixed Disk Capacity field, enter the virtual disk size in gigabytes. Barracuda Networks recommends that you use disks that are at least the sizes recommended in Firewall Settings.
Click Suggest to adjust the partitions to your disk size.
- Click Next.
- On the Network Device Settings page:
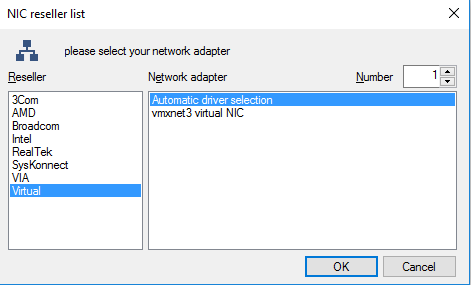
- Click Add and then specify these settings in the NIC reseller list window:
- Reseller – Select Virtual.
- Network adapter – Automatic driver selection.
- Number – Select the numberof network interfaces.
- Click OK.
- Double-click the eth0 network interface in the Network Adapter table and then specify these settings in the NIC adapter configuration window:
- Management IP address – Enter the IP address that you want to use as the management IP address.
- Subnet mask – Enter the subnet mask.
- (Optional) Configure an Additional Gateway route.
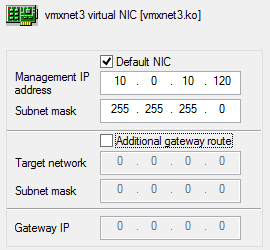
- Click OK.
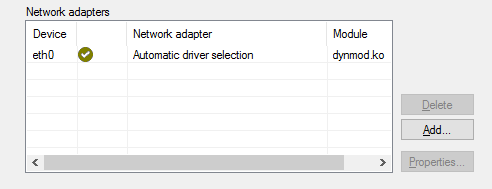
- Click Next.
- Click Add and then specify these settings in the NIC reseller list window:
- On the Security Settings page, enter the Password and Service Login Password and then click Next.
- On the Software Packages page, click Next.
- On the Script Settings page, enter the destination for your configuration files in the Save to field.

- Click Next.
- Click Finish.
After the configuration files are created, a message appears confirming that the configuration files were written successfully.
The following configuration files are created in the destination that you selected:
![]()
Step 2. Create a Floppy Image with WinImage
Add the configuration files that you created with Barracuda Firewall Install to a floppy image FLP file. You will attach this image to the VMware virtual machine during installation.
- Start WinImage.
- Locate the configuration files that you created with Barracuda Firewall Install.
- Select all the Barracuda Firewall Install configuration files and drag them to the WinImage window.
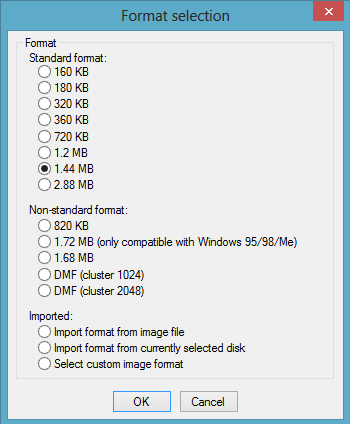
- In the Format selection window, select 1.44 MB from the Standard format list and then click OK.
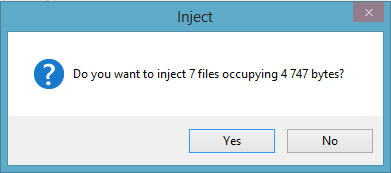
- In the Inject window, click Yes.
- Click the Save icon.
- In the Save as window:
- Select Virtual floppy Image (*.vfd,*.flp) from the Save as type list.
- Enter a File name with the
.flpextension (e.g.,NGInstallFloppy.flp). Otherwise, WinImage saves the floppy image with the.vfdextension, which cannot be used by the VMware hypervisor.

- Click Save.
Step 3. Create a New Virtual Machine
On the VMware server, create a new virtual machine for the Barracuda CloudGen Firewall Vx.
- Using VMware vSphere Client, log into your VMware hypervisor.
- Right-click the VMware server that you want to deploy the Barracuda CloudGen Firewall Vx image on and select New Virtual Machine. The Create New Virtual Machine window opens.
- On the Configuration page, select Typical and then click Next.

- On the Name and Location page, enter a Name for the virtual machine (e.g.,
BarracudaNGFirewallVF50) and then click Next.

- On the Storage page, select the datastore where the virtual disk should be created and then click Next.
- On the Guest Operating System page:
- From the Guest Operating System list, select Linux.
- From the Version list, select Other 2.6.x Linux (64-bit).
- Click Next.

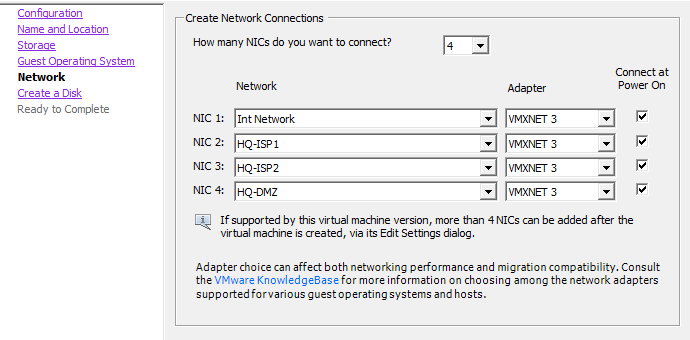
- On the Network page:
Select the number of network interfaces from the How many NICs do you wan to connect list. The number must match the number of network interfaces that you selected in Step 1. Create Configuration Files with Barracuda Firewall Install.
- For every NIC, specify these settings:
- Network – Select the virtual network that the virtual interface will connect to.
- Adapter – Select VMXNET 3. The adapter must match the Barracuda Firewall Install configuration. Barracuda Networks recommends using the VMXNET3 driver.
- Connect at Power On – Select this check box to connect the NIC to the VM.
- Click Next.
- On the Create a Disk page:
- Enter the Virtual disk size. For more information, see Firewall Settings.
- Select Thick Provision Eager Zeroed.
- Click Next.

- On the Ready to Complete page, click Finish. Depending on your virtual disk size, it can take a couple of minutes for the VM to be created. You can view the status of the Create Virtual Machine task in the Recent Tasks pane at the bottom of the vSphere Client window.
- Right-click the VM that you created and then select Edit Settings.
- In the Virtual Machine Properties window:
Configure the Memory and CPUs according to your Barracuda CloudGen Firewall Vx model.
Click OK.
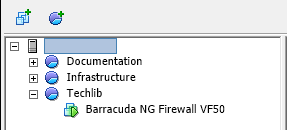
Your virtual machine is now listed in the left pane under the VMware server that you created it on.
Step 4. Start the Virtual Machine
Connect the Barracuda CloudGen Firewall Vx ISO and the floppy image to the virtual machine for the automated installation.
- Using VMware vSphere Client, log into your VMware hypervisor.
- Power on your Barracuda CloudGen Firewall Vx virtual machine.
- From the taskbar, click the CD icon (
 ), click CD/DVD Drive 1, and then select Connect to ISO image on local disk.
 - Select the Barracuda CloudGen Firewall Vx ISO file on the local hard disk and then click Open.

- Press Ctrl + Alt + Ins to reboot the VM.
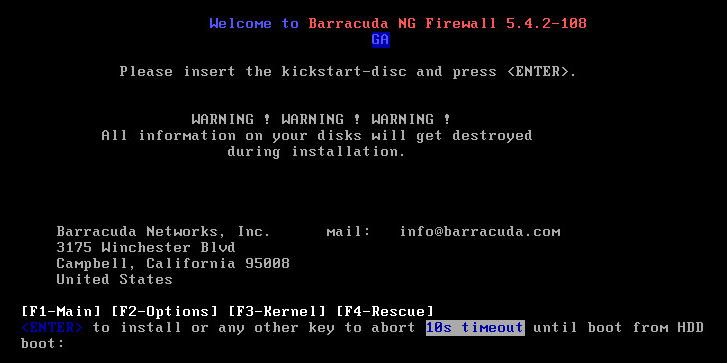
- At the Welcome to Barracuda CloudGen Firewall boot prompt, press any key except <Enter> to stop the 10 second timeout.
- From the taskbar, click the Floppy icon (
 ) and select Connect to floppy image on local disk.
 From your local hard disk, select the floppy image (e.g.,
NGInstallFloppy.flp) that you created in Step 2. Create a Floppy Image with WinImage.

- Press Enter to start the installation.
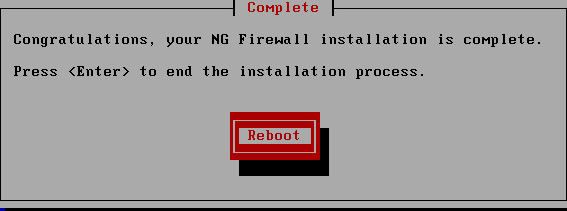
- After the installation completes, press Enter to reboot.
Adding or Removing a Network Interfaces on a Virtual Firewall on the VMware Hypervisor
If you are required to add or remove a network interface on the virtual firewall, the initial order of the interfaces might get disrupted. This happens because the assignment of interfaces to MAC addresses causes these interfaces to be sorted differently on the hypervisor.
For more information on how to handle network interfaces of a CloudGen firewall in conjunction with a VMware hypervisor, see How to Add or Remove Network Interfaces on a Virtual Firewall on the VMware Hypervisor.
Next Step
After you deploy the Barracuda CloudGen Firewall Vx unit, continue with Get Started and optionally Best Practice - Performance Tuning on VMware Hypervisors.
