Virtual machines (VMs) deployed through Azure Gallery prior to mid February, 2015 do not support Disk Expansion. If you deployed prior to this time period and want to expand the disk, you must re-deploy the VM using the latest VM image available in Azure Gallery. See How to add Additional Storage to your Azure Deployment .
Licensing of Barracuda Email Security Gateway after deploying on Microsoft Azure
After provisioning the Barracuda Email Security Gateway on Microsoft Azure, the next step is licensing. After you deploy the Barracuda Email Security Gateway image on the Microsoft Azure environment, do the following:
- Sign in to the Microsoft Azure Portal.
- Go to the VIRTUAL MACHINES and click on the Barracuda Email Security Gateway instance you created, noting down the DNS.
Open the browser and enter the copied DNS (from step 2) with port 8000 for HTTP. No port is required for HTTPS. For example:
For HTTP : http://<DNS>:8000
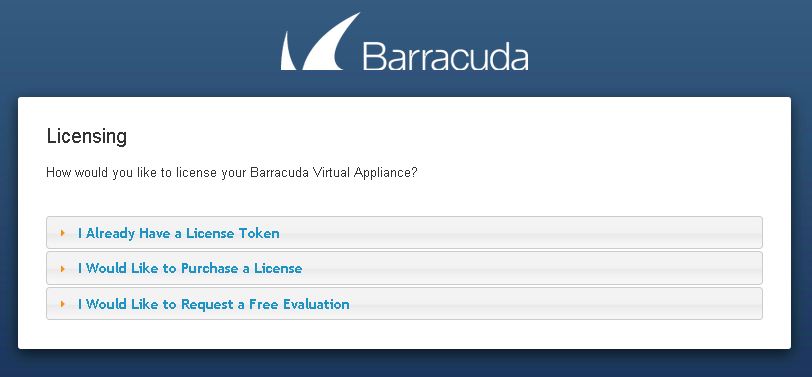
For HTTPS : https://<DNS>- After the boot process is complete, the Licensing page displays with the following options:
- If you already have a license token, click on that option and enter your Token and Default Domain, and then click Provision. The Barracuda Email Security Gateway connects to the Barracuda Update Server to get the required information based on your license, then reboots automatically. Allow 5 or more minutes for the reboot process.
- If you already have a license token, click on that option and enter your Token and Default Domain, and then click Provision. The Barracuda Email Security Gateway connects to the Barracuda Update Server to get the required information based on your license, then reboots automatically. Allow 5 or more minutes for the reboot process.
- I Already Have a License Token – Use this option to provision your Barracuda Email Security Gateway with the license token you have already obtained from Barracuda Networks. Enter your Barracuda Networks Token and Default Domain to complete licensing, and then click Provision.
The Barracuda Email Security Gateway connects to the Barracuda Update Server to get the required information based on your license, and then reboots automatically. Allow a few minutes for the reboot process. Once the instance is provisioned, you are redirected to the login page. - I Would Like to Purchase a License – Use this option to purchase the license token for the Barracuda Email Security Gateway. Provide the required information in the form, accept the terms and conditions, and click Purchase. The Barracuda Email Security Gateway connects to the Barracuda Update Server to get the required information based on your license, and then reboots automatically. Allow a few minutes for the reboot process. Once the instance is provisioned, you are redirected to the login page.
- I Would Like to Request a Free Evaluation – Use this option to get 30 days free evaluation of the Barracuda Email Security Gateway. Provide the required information in the form, accept the terms and conditions, and click Evaluate. The Barracuda Email Security Gateway connects to the Barracuda Update Server to get the required information based on your license, and then reboots automatically. Allow a few minutes for the reboot process. Once the instance is provisioned, you are redirected to the login page.
- I Already Have a License Token – Use this option to provision your Barracuda Email Security Gateway with the license token you have already obtained from Barracuda Networks. Enter your Barracuda Networks Token and Default Domain to complete licensing, and then click Provision.
Verify Configuration and Change Password
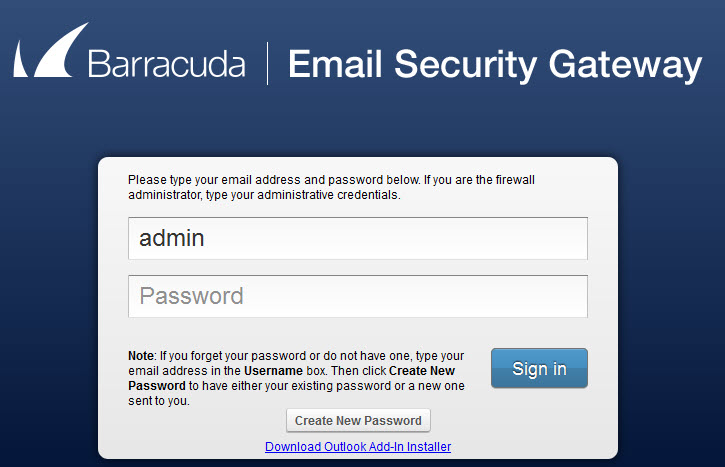
After provisioning of the Barracuda Email Security Gateway is complete, you will see the login page:

- Log into the Barracuda Email Security Gateway appliance web interface as the administrator:
Username: admin
for Password, use the password you created during the virtual machine creation process described in step 6c. of How to Deploy the Barracuda Email Security Gateway in the Microsoft Azure Management Portal. - To prevent unauthorized use, change the default administrator password to a more secure password. You can only change the administrator password for the web interface. Go to the BASIC > Administration page and enter your old password, new password, and re-enter the new password.
Enter the Server Name/IP of the destination email server where you want the Barracuda Email Security Gateway to deliver mail.
For example: type: mail.<yourdomainname>.comEnter Default Host Name in the Domain Configuration section of the page. The Host Name will be used in reporting and displays in alerts, notifications and messages sent by the Barracuda Email Security Gateway. The Default Domain is the domain for the system and is appended to the Host Name.
For example: <yourhost>
Enter the Default Domain.
For example: <yourcompanydomain.com>
Under Allowed Email Recipient Domain(s), enter each domain for which you want the Barracuda Email Security Gateway to receive email.
Update the Firmware
Go to the ADVANCED > Firmware Update page. If there is a new Latest General Release available, perform the following steps to update the system firmware:
- Click Download Now next to the firmware version that you want to install. To view the download progress, click Refresh. When the download is complete, the Refresh button is replaced by the Apply Now button.
- Click Apply Now to install the firmware. The firmware installation takes several minutes to complete.
After the firmware is applied, the Barracuda Email Security Gateway virtual machine automatically reboots. The login page is displayed when the system comes back up. Log back into the web interface and read the Release Notes to learn about enhancements and new features. It is also good practice to verify settings that you have already entered, because new features might have been included with the firmware update.
For more information, see Product Activation and Update Firmware.
Verify the Barracuda Email Security Gateway Configuration
After you install your Barracuda Email Security Gateway virtual machine and configure your firewall, you can test the configuration. Go to the ADVANCED > Troubleshooting page and ping updates.barracudacentral.com.
Next Step
Continue with the Configure the Barracuda Email Security Gateway From the Web Interface section of Step 5 - Configure the Web Interface.

