

To remove a Hyper-V Standard backup set, perform the following steps.
- Navigate to the Backup Selections page. See Creating Hyper-V Standard Backup Sets for instructions.
The Backup Selections page is displayed.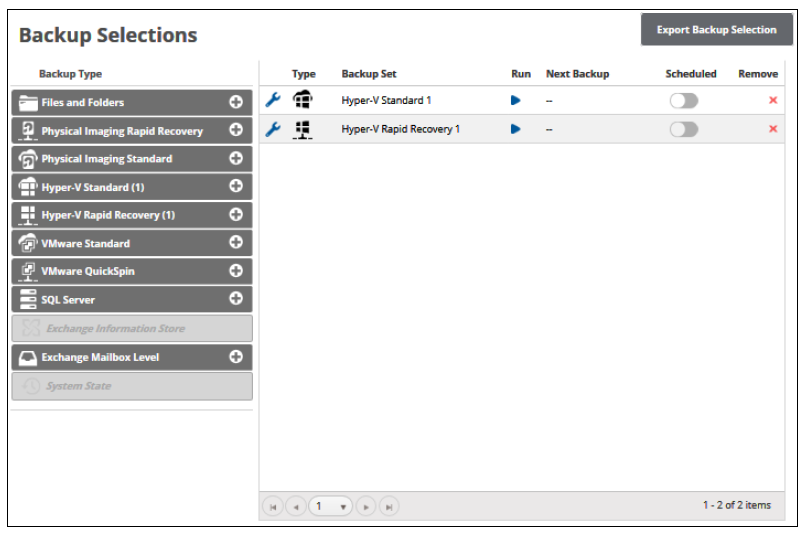
- At the relevant backup set row, click the remove icon
 to remove the backup set.
The confirmation pop-up is displayed.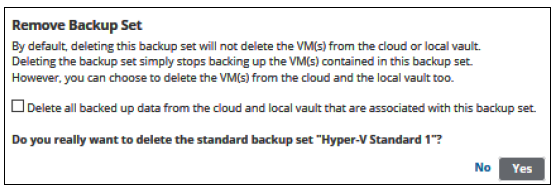
Note: By default, deleting the backup set does not delete the VMs from the cloud or local vault. Deleting the backup set only stops backing up the VMs contained in this backup set. - Optionally select the Delete all backed-up data from the cloud and local vault that are associated with this backup set check box.
CAUTION! Deleted data is completely purged and can no longer be accessed or restored.
Note: It is recommended to select this option to free up disk space by deleting unnecessary data. - After making your selection, click Yes.
The backup set is removed.