

System state backups are useful because they back up the system registry, Active Directory, COM+ database, SysVol, Certificate Services, and IIS metabase. It is important to note that system state backups should not be relied on for re-imaging of servers that experience hardware failures; this is due to a Microsoft limitation where system states are only meant to be restored back to the same machine or one with identical hardware. With this in mind, here is how you can set up a system state backup set.
Prerequisites
Before you begin, there are two prerequisites to using the system state plugin. If the machine you are backing up is Windows Server 2008 or later, you must have Windows Server Backup installed. Directions for installing that are here. In addition, you will need a storage location to use as a "scratch drive" to temporarily house the system state files during the backup.
This scratch drive must meet the requirements listed under "Choosing a storage location" and it is recommended the scratch drive have at least 30-40 GB of free space. In addition, for Windows Server 2008 and later, the scratch drive cannot be a "critical volume" or one which contains files or programs the operating system uses.
Once you have these two prerequisites met, you can move on to making the system state backup set.
Creating a System State Backup Set
- Log into the management portal and go to the Manage tab. Navigate to the computer account to which you want to add a System State backup set.
- Go to the Backup tab and click on the
 button next to System State in the Backup Type section.
 First, set the name of this new backup set by clicking on the name at the top or on the
 button next it. Then, select whether you want the new backup set to store its backups Local Only, Online Only, or Online and Local.
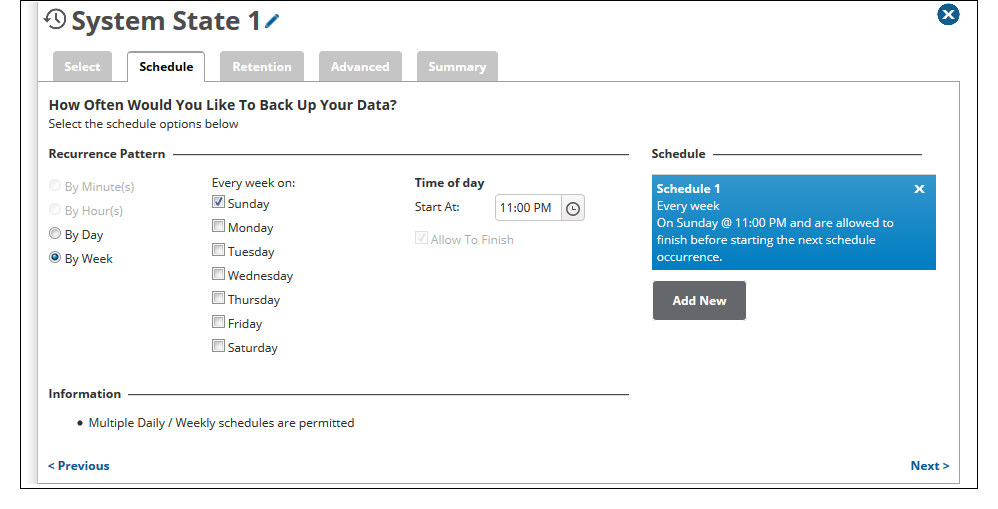
Click Next to continue.- Set a schedule for the backup set by choosing a recurrence interval ( days or weeks) and either how often the backup will run or on which days the backup will run. If you want to add more than one schedule, click the Add New button.
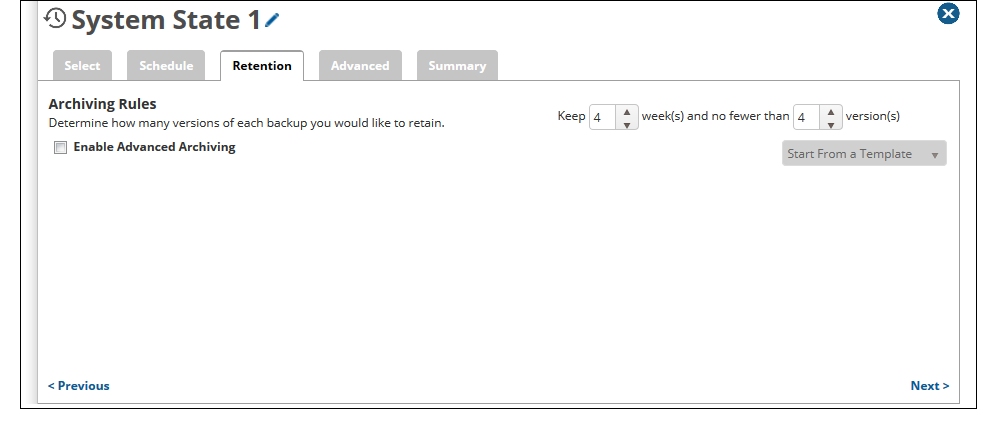
Hit Next to proceed. - Set an archiving rule by modifying the default rule or by enabling an advanced archiving rule. When you have the archiving rule you want, click Next.
- Choose a temporary folder location with at least 40GB of space free and specify a scratch drive that also has at least 40GB of free space. The scratch drive you choose must meet the requirements outlined here.
Finally, hit Next to see a summary of the backup set you just configured or click on the Create Backup Set button to finalize the backup set creation.