

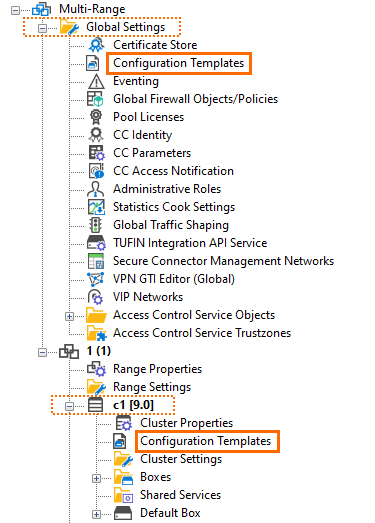
The Configuration Template Manager window is the central tool for creating Configuration Templates and handling box-specific instances that have been derived from a specific template. The tool orchestrates all the components and their relations in an overview window. The Configuration Templates are accessible below the Global Settings level and the level of a Cluster node, and its main window can be activated by double-clicking the node Configuration Templates in the CC configuration tree.
By having these two identical nodes, administrators with different administrative levels can handle configuration templates to a different degree. In this way, the templates can better conform to a company's specific policies. The same model also applies if a managed service provider must pre-configure certain setups for his customers so that the customer can not change settings that are under the control of the managed service provider.
Managing the Relation between Templates and Instances
Global and Cluster-specific Configuration Templates
Configuration templates can be created on a global, a range, and a cluster level. However, using ConfTemplates on a range level requires additional steps. For more information, see How to Work with Configuration Templates on Different Levels in the Configuration Tree.
Creating, modifying, and accessing these configuration templates depends on the administrative rights that a Control Center administrator has been granted. This is important if Configuration Templates are planned to be simultaneously used by MSPs (Managed Service Providers) and their customers. While an MSP may be allowed to configure certain templates that apply to his own technical requirements, the customer can not modify these settings. However, the customer may have permission to create other templates on his own administrative cluster level that do not interfere with the global configurations from the provider.
This significant difference will be viewed in the Configuration Template Manager window which is described next.
The Configuration Template Manager Window
Opening the Configuration Template Manager Window on the Global Level
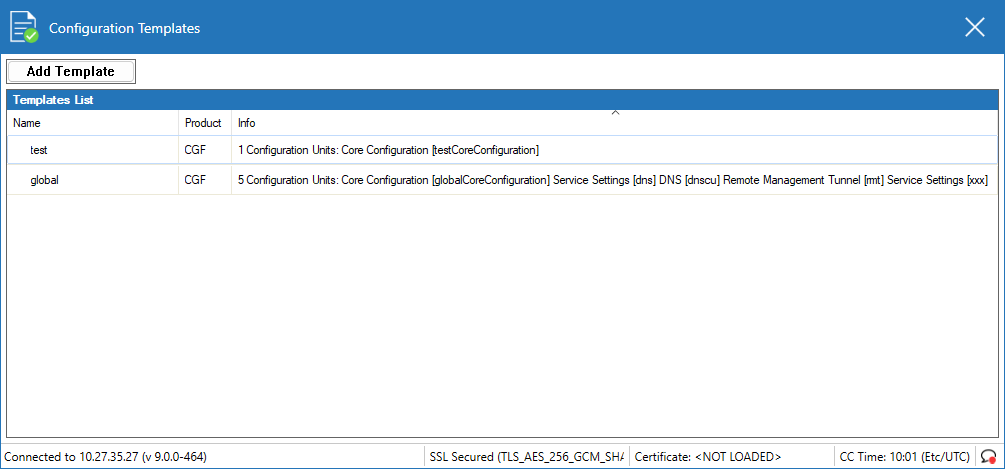
When opening the Configuration Template Manager window on the global level, the window displays a list of configuration templates created on the global level. Clicking the Add Templates button opens another window for creating a new configuration template.
Opening the Configuration Template Manager Window on the Cluster Level
The Configuration Template Manager window on the cluster level is visually divided into two areas. The area on the left side starts with the button Add Template followed below by an area for displaying all created templates in a list. The area to the right side begins with the button Add Instance followed below by an area for displaying all instances that have been derived from a specific template from the left side.
When opening the Configuration Template Manager window on the cluster level, the window displays a list of configuration templates created both on the global and cluster level.
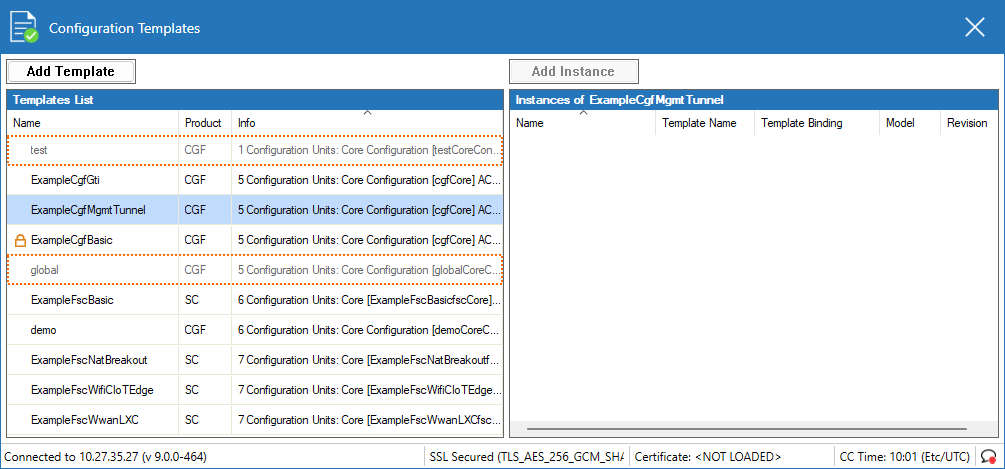
Note that some configuration templates are displayed with grey text indicating they have been created at the global level. All other rows containing an entry displayed in black text indicate that the configuration template has been created exclusively on the cluster level.
The following example templates are intended to help users understand how Configuration Templates work.
When opening the window for the first time, the left area displays a list of example templates. The right area for template instances is empty.
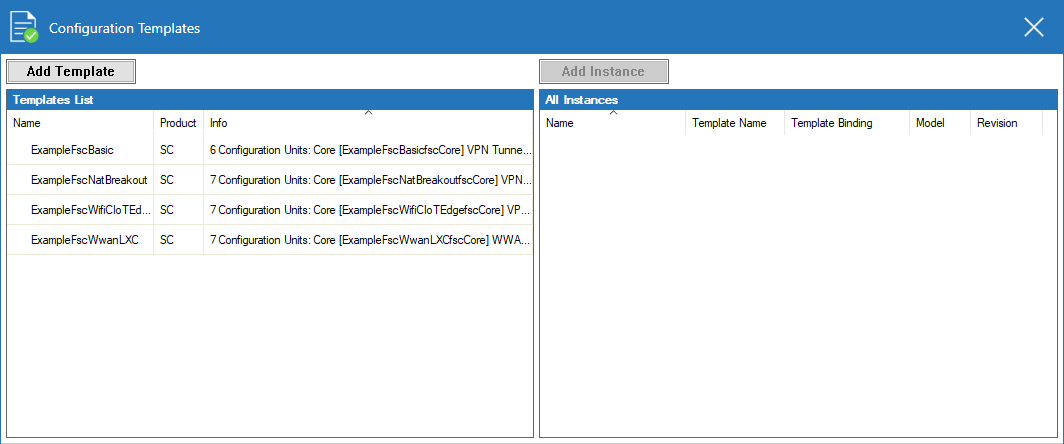
As soon as there are templates and instances present, they are all displayed in their corresponding area when the window is opened. Templates are listed in the left area, and instances are listed in the right area of the window.
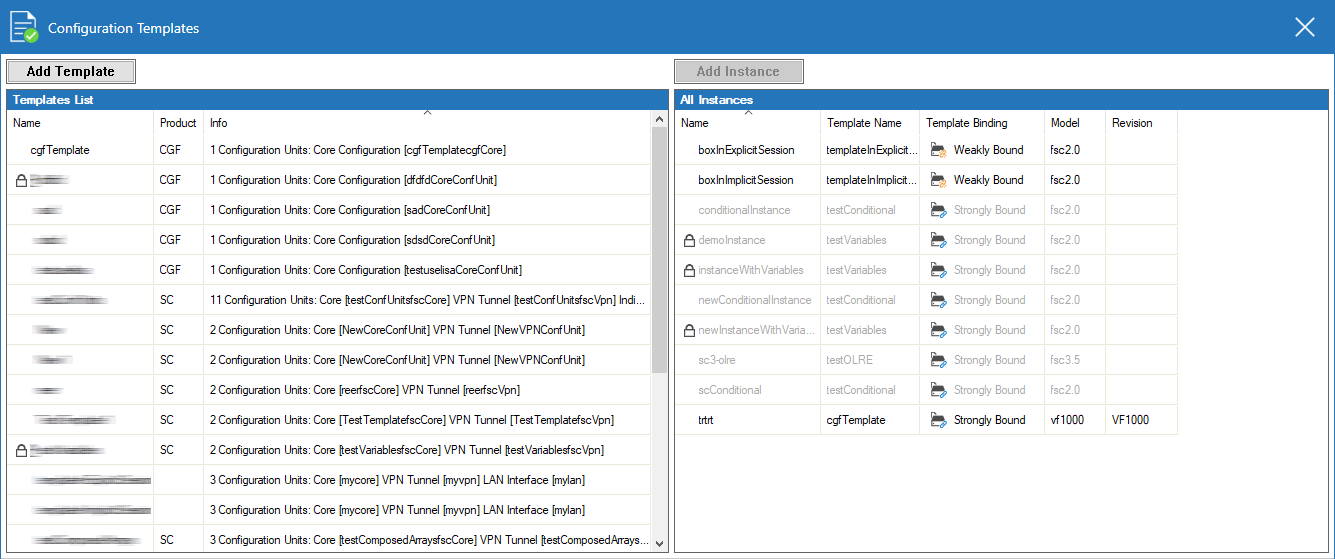
However, when clicking a specific template, only those instances will be displayed in the right window area that are associated with the selected template in the left window area.
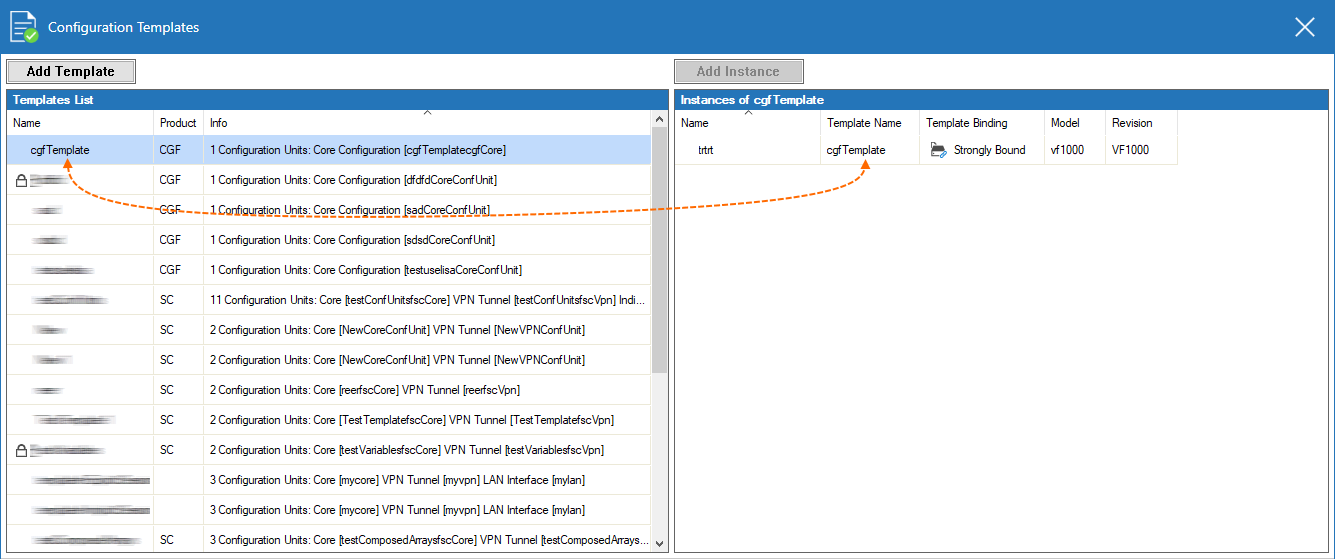
In order to see all instances again, you must clear your template in the left area. To do so, keep the CTRL button on your keyboard pressed and click the selected template again.
Creating/Adding a New Template
To add/create a new ConfTemplate, click the Add Template button. This opens the Add new Template window and requires the user to enter the following details:
Template name – Enter the name for your new ConfTemplate.
- Display name – Enter the name that is displayed for your ConfTemplate.
- Product – Select from the list of possible products. Currently, CGFs and SCs are supported.
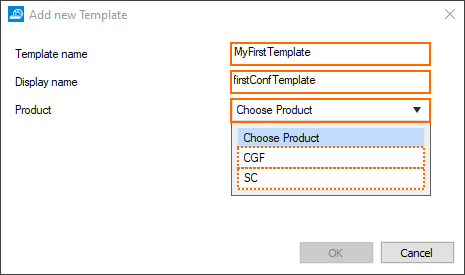
After confirming the dialog by clicking OK, the ConfTemplate Editor window opens.
The Configuration Template Editor
The window area of the ConfTemplate Editor contains the following buttons across the top:
- Edit – Clicking Edit foregrounds the editing area and allows you to configure the template.
- Script – Clicking Script foregrounds the script editor and allows you to configure the template in text mode.
- Show Reference Library – Clicking Show Reference Library opens the window for configuring parameters and variables.

The Interactive Configuration Template Editor
The interactive Configuration Template Editor serves as a tool for creating a Configuration Template from one or multiple Configuration Units. Click Edit to see this editor in the window.
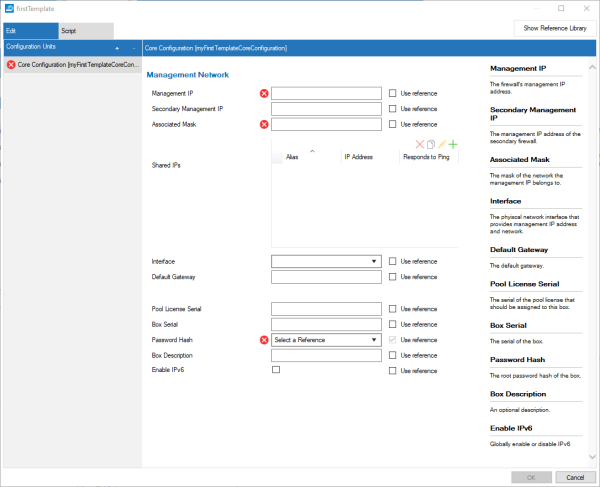
The interactive Configuration Template editing area contains a column on the left side that lists all Configuration Units that will commonly build the final Configuration Template. When creating a new Configuration Template, the core Configuration Unit will always remain visible for the corresponding product. Click '+' on top of the column in the area Configuration Units to add a new Configuration Unit, or click '-' to remove a Configuration Unit from the list.
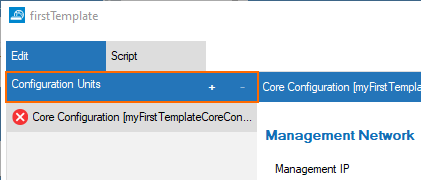
In the middle area, the window displays all edit fields that belong to the Configuration Unit. Edit fields with a red bullet to the left side are mandatory and must be filled to create a valid Configuration Template.
The check box to the right side of an edit field has the name Use reference and can be selected to transfer a predefined value from the reference library. If the check box is selected, the edit field will be converted into a menu list that contains all available references, one of which must be selected.
The following screenshot shows the middle area of the window and contains an example of a core configuration unit (Management Network):

The third column contains help comments that refer to the content of the displayed Configuration Unit.
Depending on the selected Configuration Unit, the content of the middle (configuration) and right (help) areas will display variable content that always relates to the selected Configuration Unit.
The Reference Library Window
The reference library is the location for centrally managing and storing important static information and values. References use parameters and variables as placeholders for values that are part of the template. Parameters are constants defined per instance, and a variable consists of an expression based on parameters and constants.
To access the Reference Library window, click Show Reference Library in the upper-right corner of the Configuration Templates editor window:

In the Edit Template References window, configured parameters and variables are displayed in their corresponding areas:
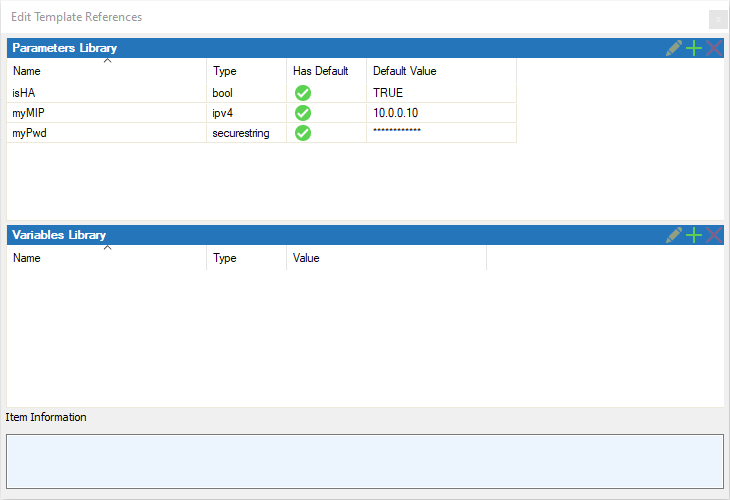
Parameters and variables can be managed in three ways:
- Edit – After selecting the line in question, click the pencil icon to edit the entry.
- Add/create – Click '+' to add/create a new parameter/variable.
- Delete – After selecting the line in question, click the red 'X' to remove the entry.
Clicking Edit or Add opens the window that displays the parameter/variable name, its type and assigned value, and its description:
| Adding/Editing Parameter Window | Adding/Editing Variable Window |
|---|---|
 | 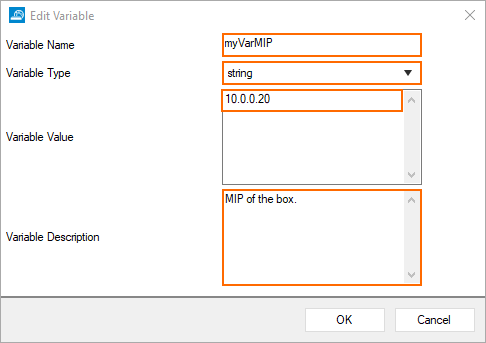 |
For variables, the option Has Default is not provided, and the labels begin with Variable instead of Parameter, e.g., Variable Value.
Parameters, Data Types, and Variables
Working with configuration templates requires handling parameters, data types, and variables.
For more information, see Template Definition Language - TDL.
The Script Editor
When creating a Configuration Template in the interactive editor, the Configuration Template Manager window helps to assemble the content of the processed Configuration Units into a common script. These scripts are rendered in the Template Definition Language (TDL). For more information on TDL, see Template Definition Language - TDL.
Click Script to foreground the script editor.
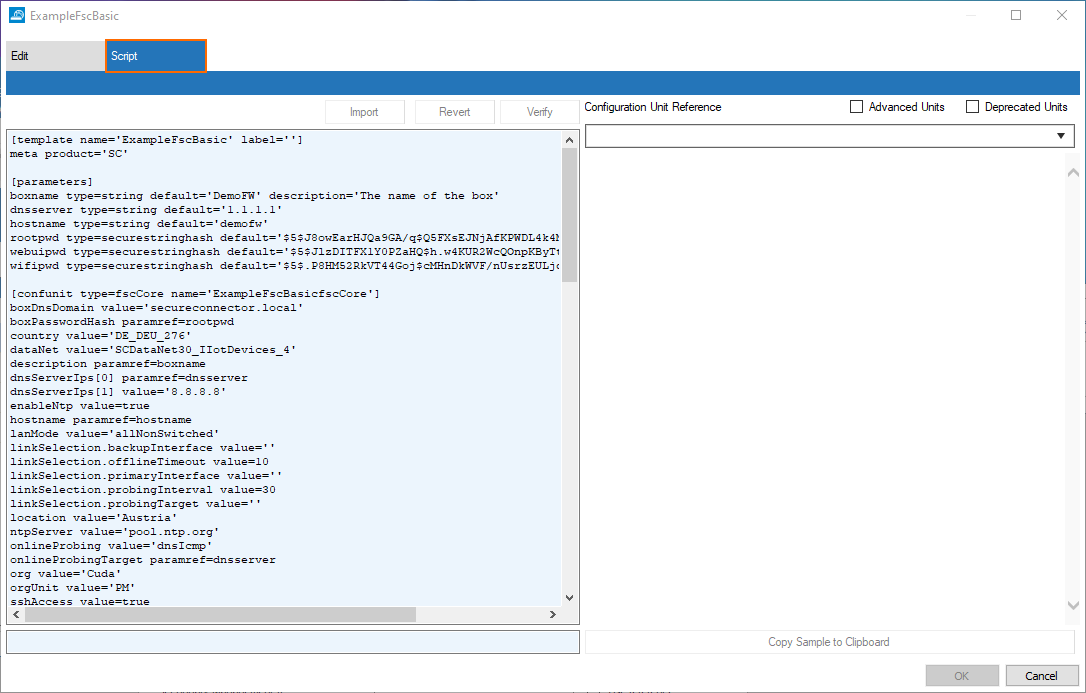
The right side of the script editor has an area that provides help for configuration units. Click the rectangle below the label Configuration Unit Reference to display a menu list that shows all available Configuration Units by their corresponding names.
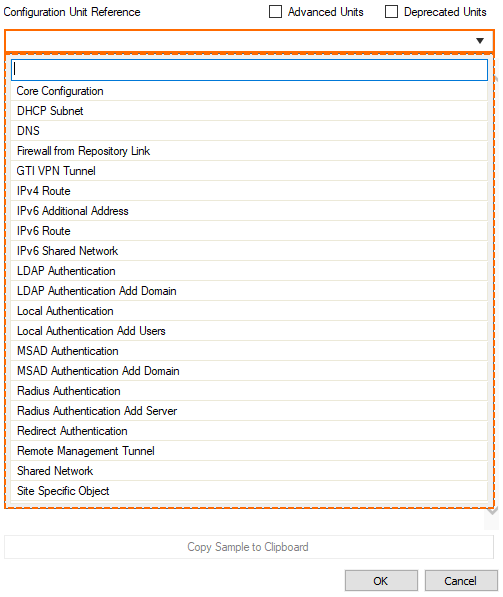
Click on a specific entry in the list to load the help content that refers to the selected Configuration Unit.
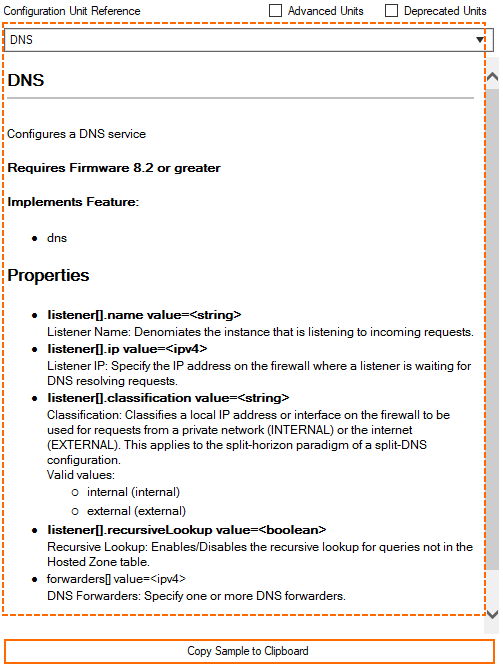
To use the associated example text of a ConfUnit, click Copy Sample to Clipboard and then paste it into the text view of the script editor.