

Working with Configuration Templates in the Control Center's configuration tree is possible on three levels:
- On the global level.
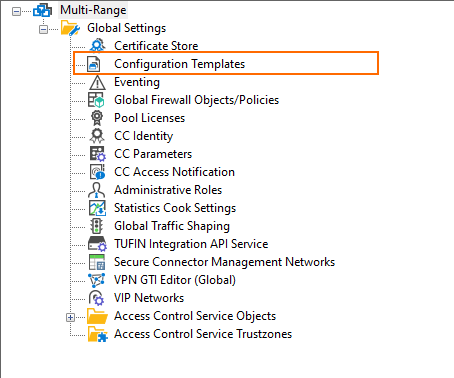
You can locate the respective node Configuration Templates in the configuration tree at CONFIGURATION > Configuration Tree > Multi-Range > Global Settings. - On the range level.
The Configuration Templates node is hidden by default. For more information, see How to enable Configuration Templates on the Range Level below. - On the cluster level.
You can locate the respective node Configuration Templates in the configuration tree at CONFIGURATION > Configuration Tree > Multi-Range > Global Settings > your range > your cluster.
When you open the configuration tree in the Control Center for the very first time, the Configuration Templates node is only visible on the Global Settings level.
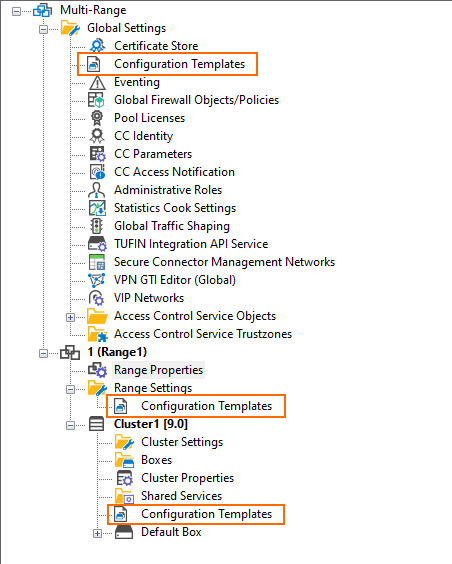
In order to see the Configuration Templates nodes on the global and cluster level, you must first add a range and a cluster that corresponds with your organizational requirements. The following example shows the configuration tree with 1 range and 1 subordinated cluster.

By default, the Configuration Templates node on the range level is disabled.
How to Enable Configuration Templates on the Range Level
In order to enable Configuration Templates on the range level, you must ensure that there are 'Range' nodes configured. For more information on how to create ranges and clusters, see How to Manage Ranges and Clusters.
Then perform the following steps:
- Log into your Control Center.
- Go to CONFIGURATION > Configuration Tree > Multi-Range > your range > Range Properties.
- Click Lock.
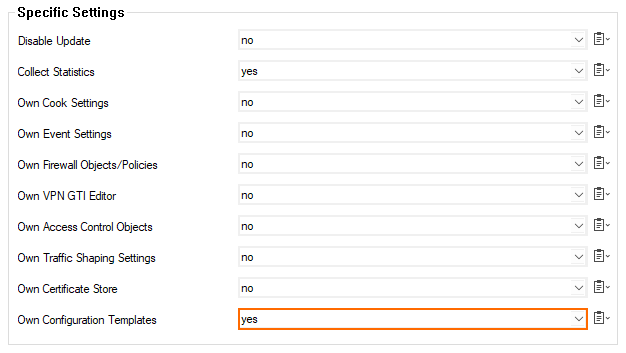
- In the section Specific Settings, select yes for Own Configuration Templates
- Click Send Changes.
- Click Activate.
- Go to CONFIGURATION > Configuration Tree. The configuration tree now shows the Configuration Templates node on the global, the range, and the cluster level.
Configuration Templates on the Global, the Range, and the Cluster Level
Configuration templates fully comply with the concept of propagating configuration settings to a different amount of managed instances in the Control Center depending on the level where the configuration has been made in the configuration tree. In fact, the Configuration Templates window looks initially different on the three levels:
| Global Level | Range Level | Cluster Level |
|---|---|---|
 | | 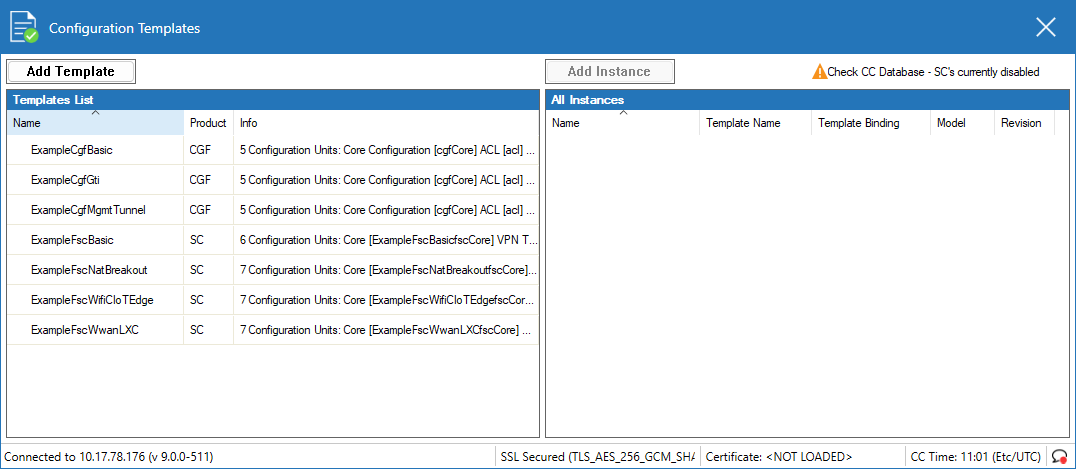 |
On CloudGen firewalls with firmware that provides the Configuration Template feature, multiple example configuration templates are provided only on the cluster level.
Adding an entry at a higher level in the configuration tree will make this entry be displayed on all subordinated levels. As an example, an entry that is added on the global level will be displayed both on the range and the cluster level. If an entry is added to the range level, it will not be displayed on the global, however, it will be displayed on the cluster level.
In order to distinguish such entries that have been entered at higher levels in the configuration tree, these entries are displayed in grey color at the range and the cluster level.
| Template Added | Templates Displayed on Original Level | Templates Displayed on Subordinated Levels | |
|---|---|---|---|
| Global Level | cgf-Template-GL | 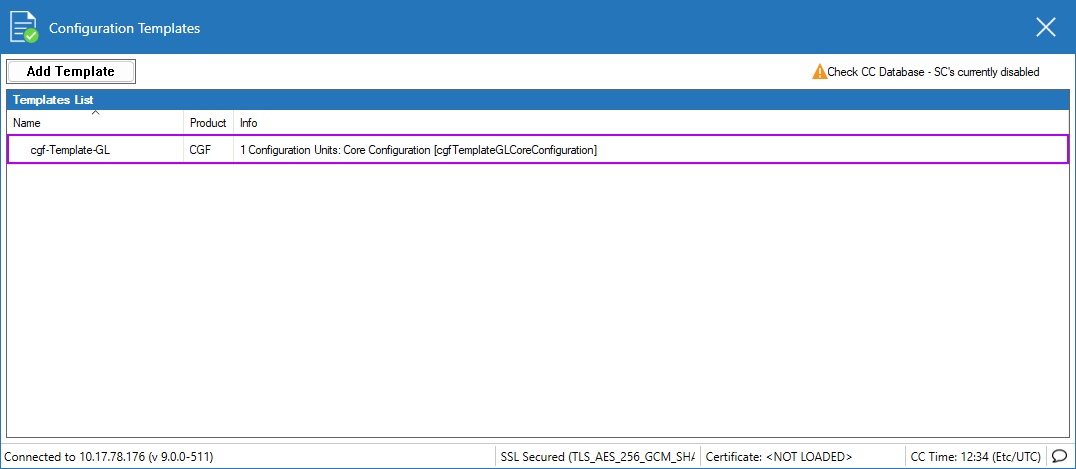 | - |
| Range Level | cgf-Template-RL | 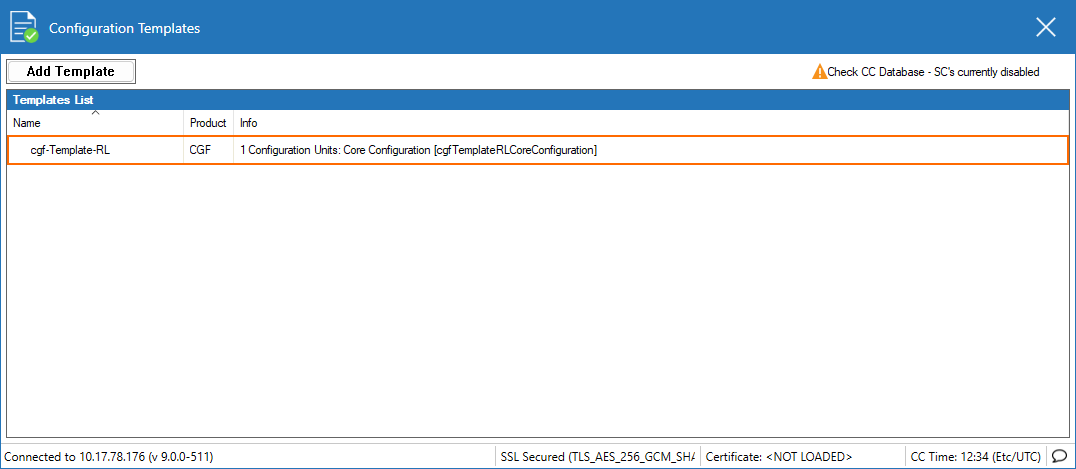 | 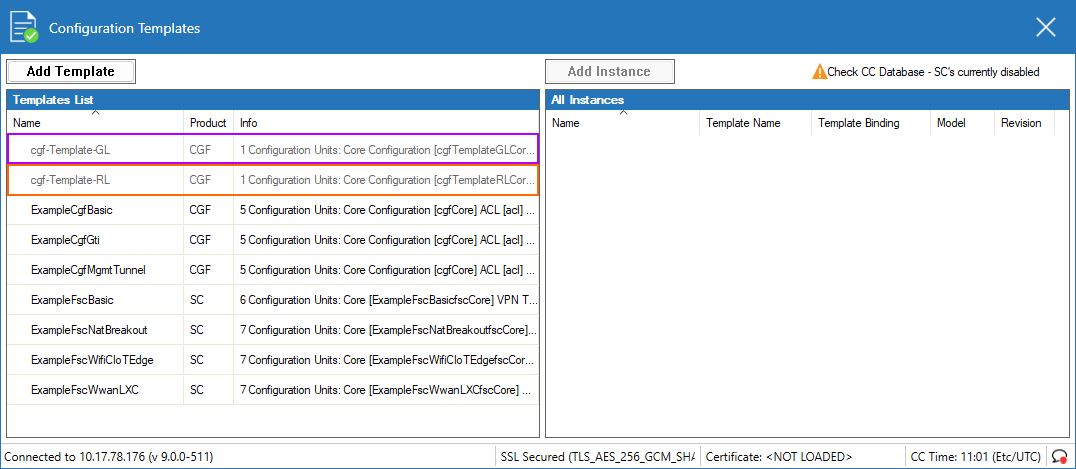 |
| Cluster Level | cgf-Template-CL |  | 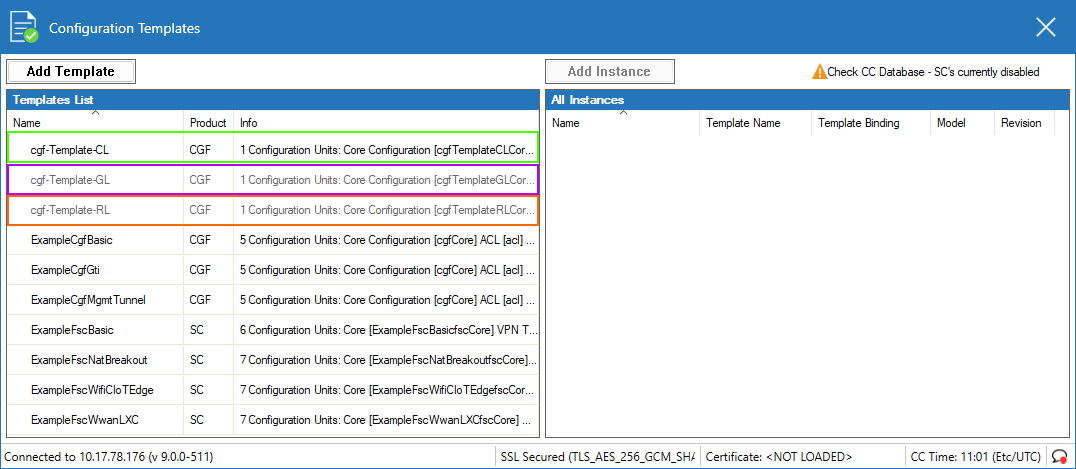 |
Entries in grey color indicate that they can only be modified on their original level.
How to Create/Derive a New Instance from a Template
Basically, creating a new instance is the procedure of duplicating a template on a certain level (global, range, or cluster), while referring it to the original template in terms of inheriting all settings from the template, and at the same time associating it with a certain type of operative instance, e.g., CGF, SC. When you create a new instance, you must be aware that an instance can require you to specify certain settings during creation, e.g., entering certain data for a password, that then will be implicitly associated with the new instance. For this, you must create the required parameter in the template editor.
The following example demonstrates:
- how to create a template on the global level
- how to derive an instance from that template that is weakly/strongly bound to the template
- how those new appliances look in the configuration tree
Step 1. Create a New Template on the Cluster Level in the Configuration Tree
Note that when opening the Configuration Template window on the cluster level, there will already be multiple predefined templates. The image below shows templates created both on the global and the range level.
- Log into your Control Center.
- Go to CONFIGURATION > Configuration Tree > Multi-Range > your range > your cluster > Configuration Templates.
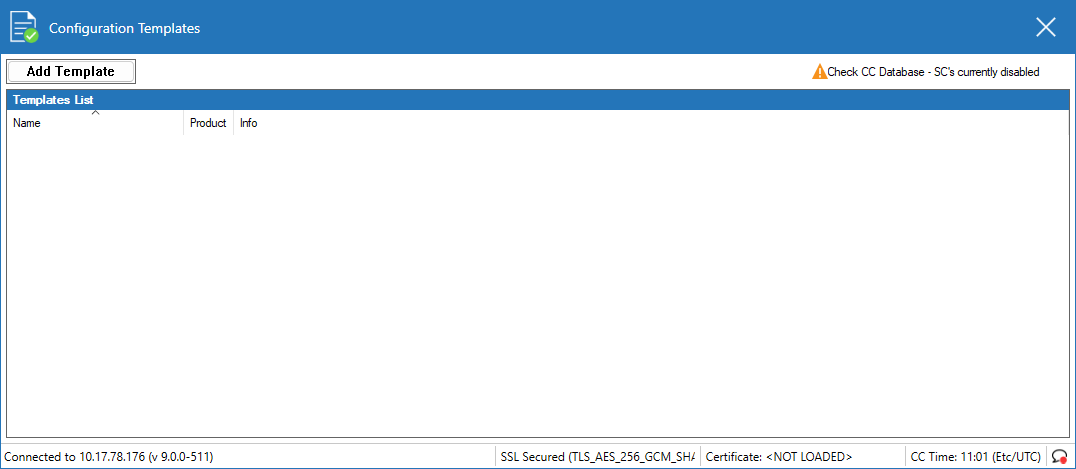
- The Configuration Templates window is displayed.
- Click Add Template.
- The Add new Template window is displayed.
- For Template Name, enter the name of your new template. In this example, the template is referred to by the name
cgf-Template-CL. - For Display Name, enter the name to be displayed
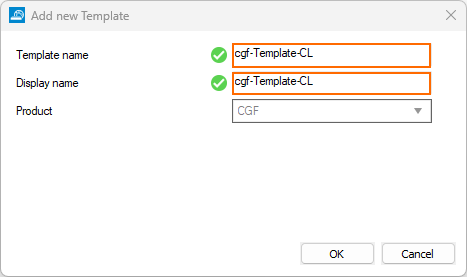
- Click OK.
- Click Activate.
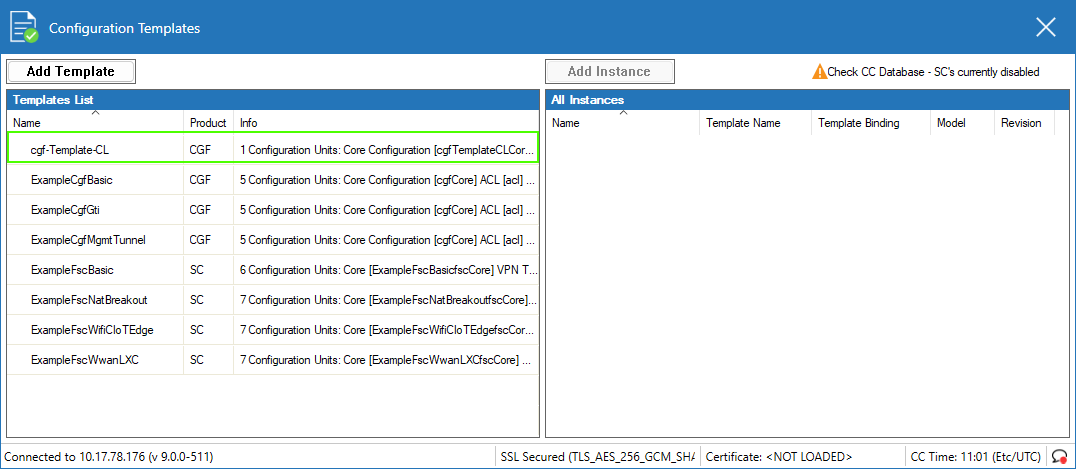
The new template you created is displayed in the left view listing the templates, and the green frame marks the new template createdon the cluster level.
If you want, you can repeat Step 1. for two new templates on the global and the range level (cgf-Template-GL, cgf-Template-RL). These two templates are also part of the following images.
Step 2. Create/Derive a New, Strongly Bound Instance from the Configuration Template created on the Cluster Level
- Right-click the template cgf-Template-CL in the left view.
- Select Lock Template from the list window.
- Click Add Instance.
- The Add new Template Instance window is displayed.
- For Instance name, enter the name for your instance, e.g.
my-CGF-instance-CL-sb. - For Display name, enter an individual name to be displayed at other places in the user interface.
- For Template Binding, select Strongly Bound.
- For Product Type, choose the product type that matches your requirements.
- For Appliance Model, choose the appliance model that matches your requirements.
- If you have the option to choose the Appliance Sub Model Type, select the appropriate model type.

- Click OK.
Step 3. Create/Derive a New, Weakly Bound Instance from the Configuration Template created on the Cluster Level
- Right-click the template
cgf-Template-CLin the left view. - Select Lock Template from the list window.
- Click Add Instance.
- The Add new Template Instance window is displayed.
- For Instance name, enter the name for your instance, e.g.
my-CGF-instance-CL-wb. - For Display name, enter an individual name to be displayed at other places in the user interface.
- For Template Binding, select Weakly Bound.
- For Product Type, choose the product type that matches your requirements.
- For Appliance Model, choose the appliance model that matches your requirements.
- If you have the option to choose the Appliance Sub Model Type, select the appropriate model type.
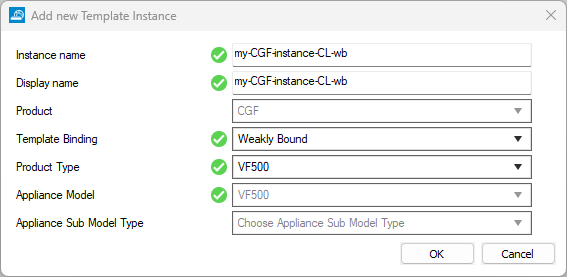
- Click OK.
Step 4. Check the Two New Instances
The new two instances are now displayed in the right list view of the Configuration Template window.
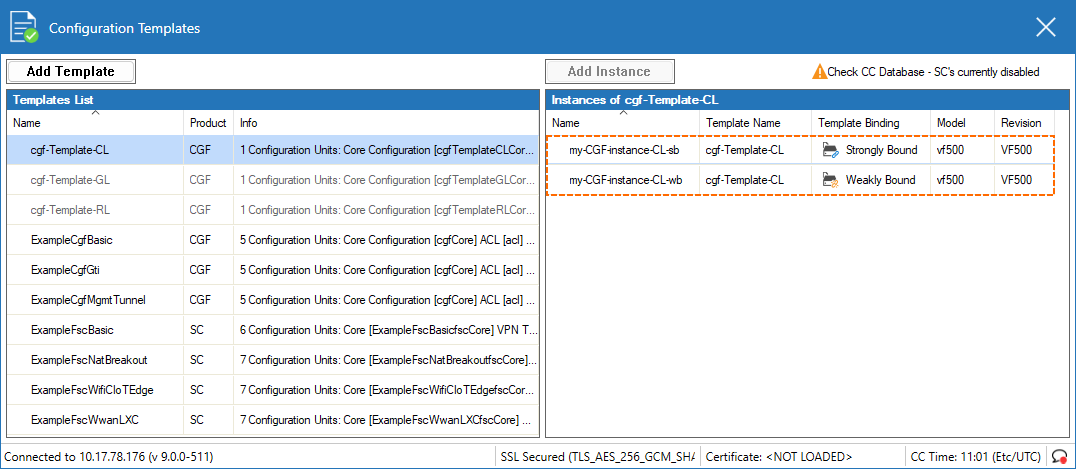
These two new instances now are also displayed in the configuration tree.
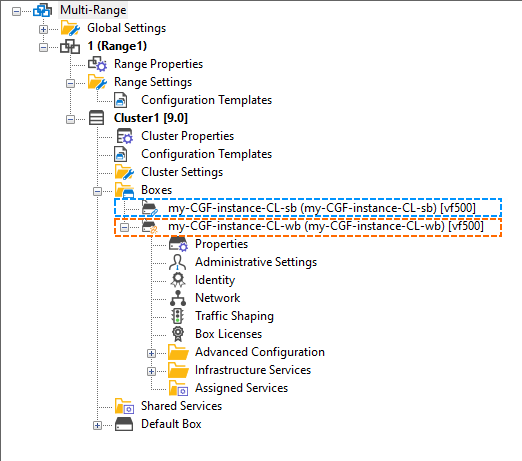
The strongly bound instance is displayed as a node that can not be expanded because all subordinated configuration nodes are fully managed by the underlying configuration template framework. Direct changes of the configuration parameters by the user are not possible. This is the safest way of managing large amounts of managed devices in the Control Center.
In contrast, the weakly bound instance is displayed as an ordinary node and enables classical manual configuration in the configuration tree without Configuration Template Manager. However, the price for this option is a potential for configuration conflicts between the automated and the manual configuration.
How to Inspect the Configuration Details for a Configuration-Templates-managed Box in the Configuration Tree
As you can see in the image above, firewall instances are displayed in two ways in the configuration tree:
- Strongly bound instances – The node is associated with an icon that is smaller than that of an ordinary, manually managed box and that shows a tiny blue pen. This indicates that the configuration can not be modified manually. Therefore, there is no leading '+' sign to expand the node. Double-clicking the node will immediately open the window for Configuration Templates.
- Weakly bound instances – The node shows a small '+' character left to the node's text description indicating that you can expand the configuration just as for ordinary, manually configured boxes. Also, there is an icon that is smaller than that of an ordinary, manually managed box that shows a tiny yellow pen. This indicates that the configuration may be manually modified although it has been created with Configuration Templates. Double-clicking the node will immediately expand the configuration in the configuration tree.
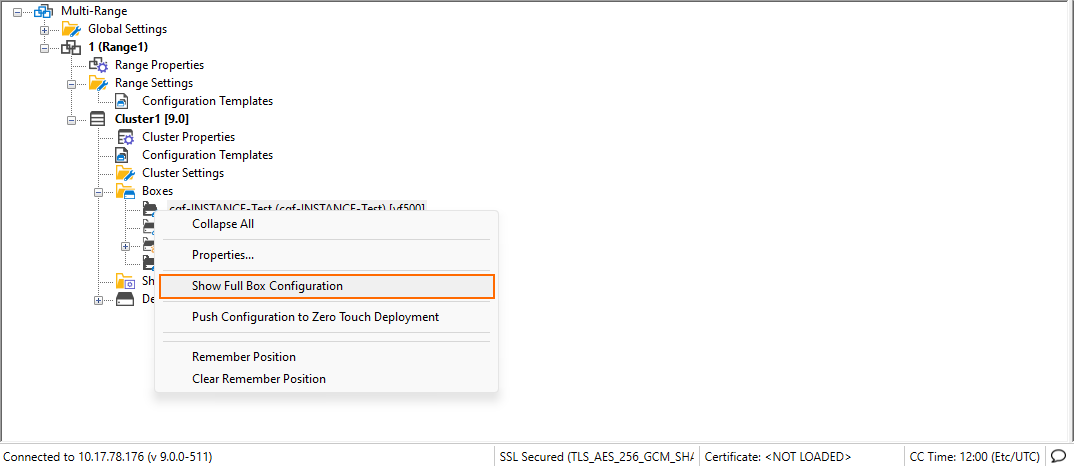
In some situations, however, it can be necessary to inspect the node's configuration in the configuration tree. You can expand the node of a strongly bound instance if you perform the following steps:
- Right-click the node of a strongly bound instance.
- Go to CONFIGURATION > Configuration Tree > Multi-Range > your range > your cluster > Boxes > your strongly bound instance.
- In the list window click Show Full Box Configuration.
After the box configuration node is expanded, you will see the sub-nodes of the instance with a leading 'key' icon indicating that the configuration is locked.
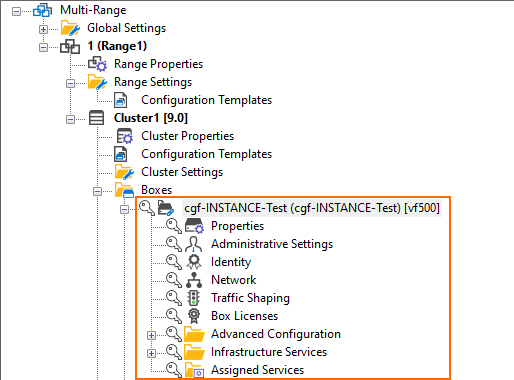
If you want to have such a node displayed without its subordinated nodes, you must reconnect with a new session to the configuration tree.