

You can configure ExpressRoutes in the WAN Connections. Follow the guide below to create an ExpressRoute in Microsoft Azure.
Before You Begin
- Allocate two /30 subnets that are not used anywhere else in your network topology. One subnet will be used for the primary link; the other will be used for the secondary link. From each of these subnets, you will assign the first usable IP address to your router because Microsoft uses the second usable IP for its router.
- A valid VLAN ID is required to establish this peering on. Ensure that no other peering in the circuit uses the same VLAN ID. For both primary and secondary links you must use the same VLAN ID. This information is provided from your provider.
- AS number for peering. You can use both 2-byte and 4-byte AS numbers. You can use a private AS number for this peering except for any number from 65515 to 65520.
- You must advertise the routes from your on-premises Edge router to Azure via BGP when you configure the private peering.
Step 1. Create an ExpressRoute in Microsoft Azure
- Log into the Azure portal: https://portal.azure.com
- In the left menu, click Create a resource and search for ExpressRoute circuits.
- Click +Create.
- The Create ExpressRoute window opens. In the Basics tab, specify values for the following:
- Subscription – Select your subscription.
- Resource group – Select an existing resource group or click Create new to deploy the ExpressRoute in an new resource group.
- Region – Select a region.
- Name – Enter a name for the ExpressRoute.
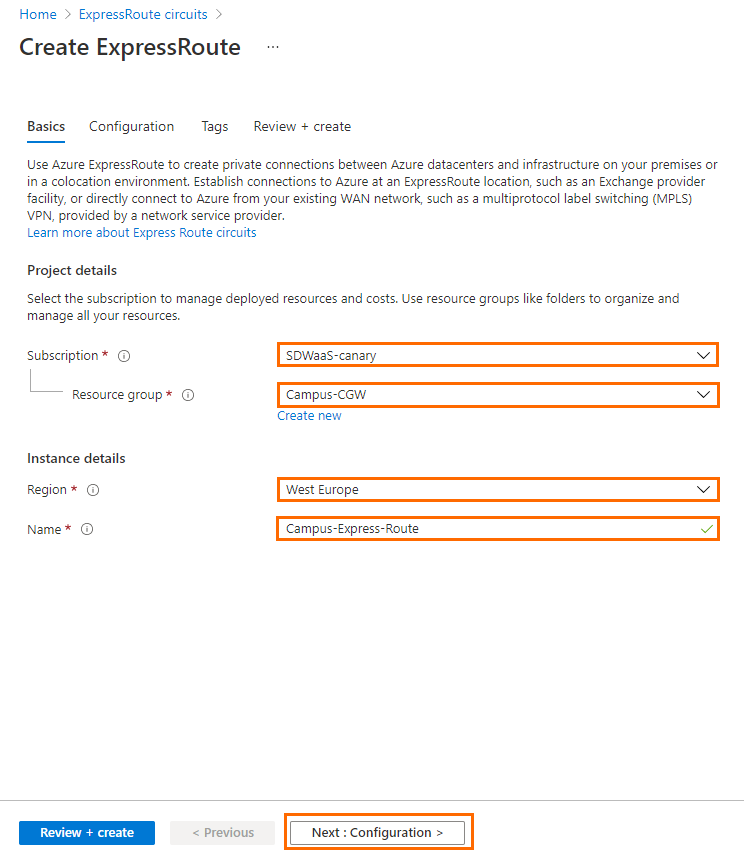
- Click Next:Configuration>.
- The Configuration blade opens. Specify values for the following:
- Port type – Select Provider.
- Create new or import from classic – Select Create new.
- Provider – Select your provider.
- Peering location – Select your peering location. This information is provided from your provider.
- Bandwidth – Select your bandwidth. This information is provided from your provider.
- SKU – Select your SKU.
- Billing model – Select a billing model.
- Allow classic operations – Select No.
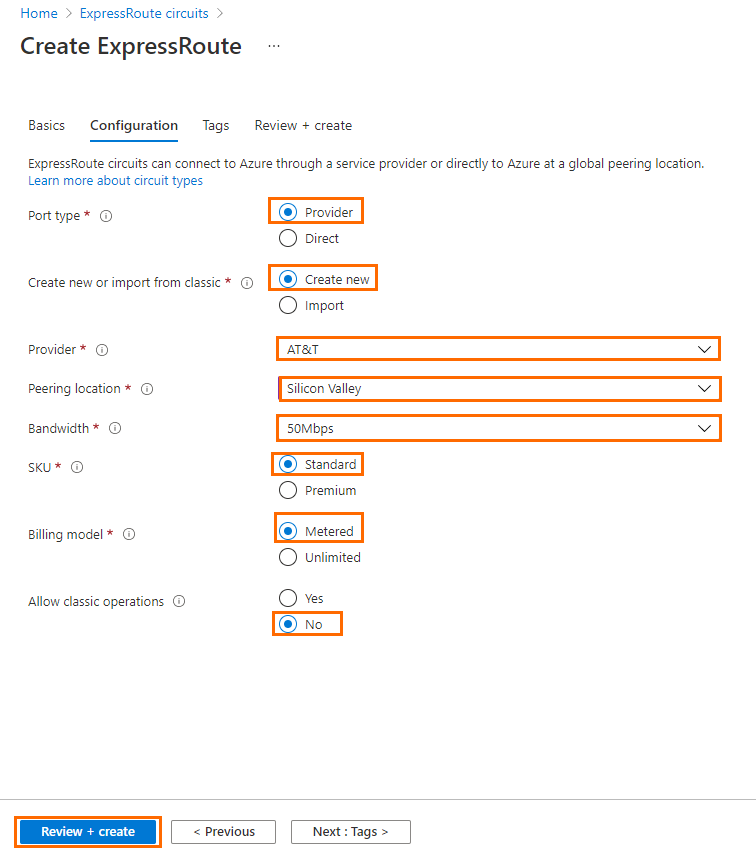
- Click Review + create.
- The Review + create blade opens.
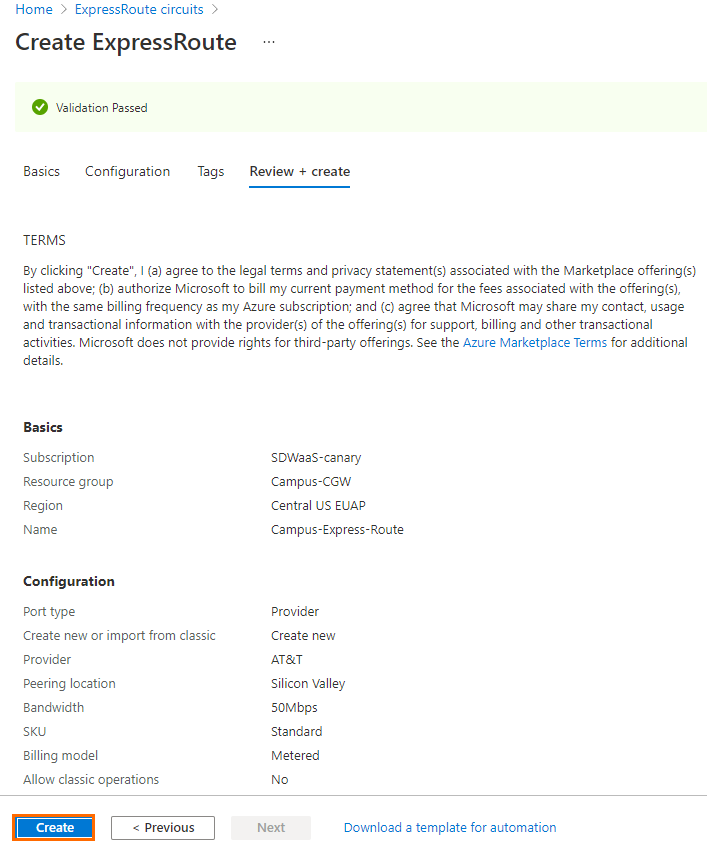
- Verify your settings and click Create.
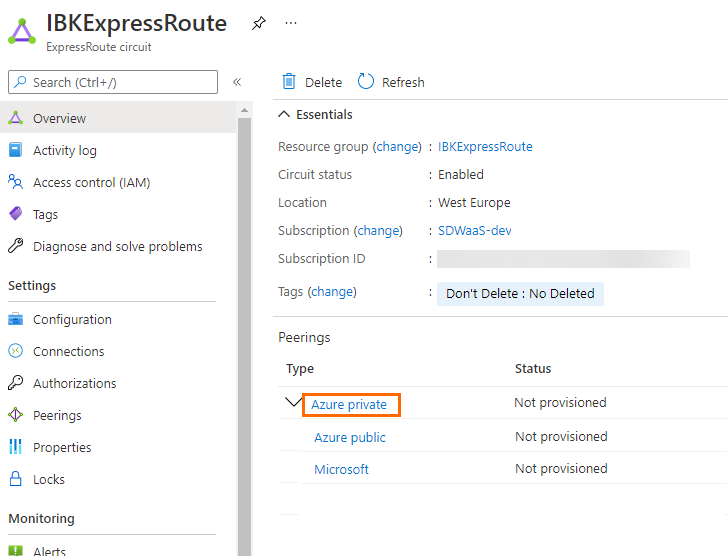
Step 2. Create a Private Peering
- Log into the Azure portal: https://portal.azure.com.
- Go to the Express Route created in Step 1. Verify that the Provider status is Provisioned.
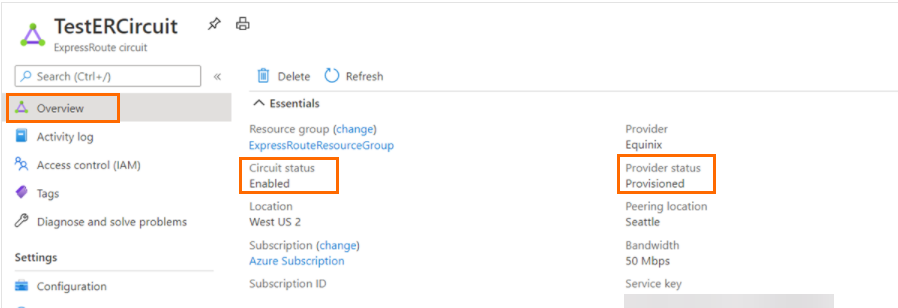
- In the Overview blade, click Azure private.
- The Private peering blade opens. Specify values for the following:
- Peer ASN – Enter your ASN number. It must be the same as configured in Barracuda SecureEdge. For more information, see How to Configure an ExpressRoute.
- Subnets – Select Both.
- IPv4 Primary subnet – Enter the primary subnet.
- IPv4 Secondary subnet – Enter the secondary subnet.
- VLAN ID – Enter the VLAN ID. This information is provided from your provider.
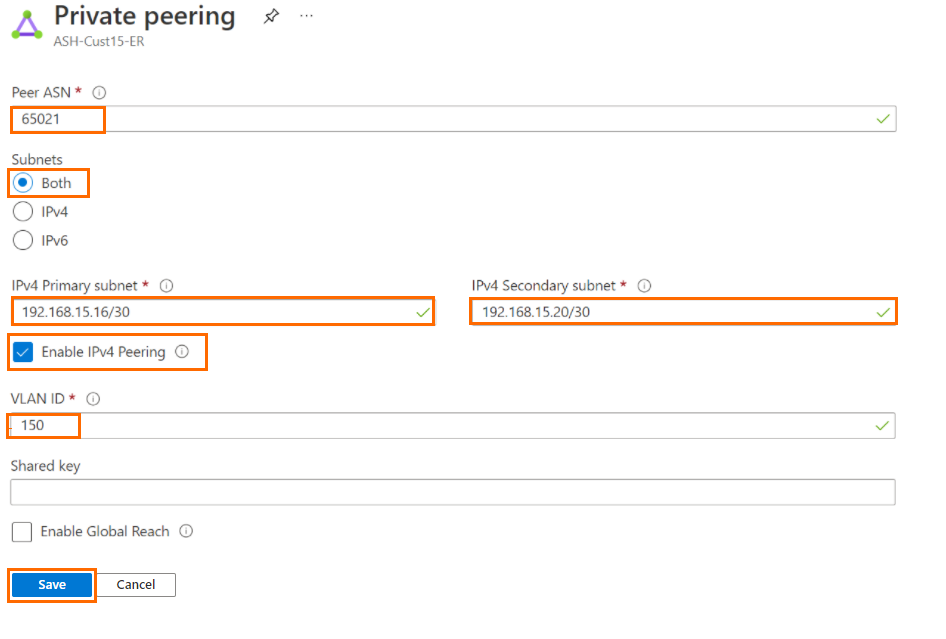
- Click SAVE.
Step 4. Create Express Route Gateway in Your Virtual WAN
- Log into the Azure portal: https://portal.azure.com.
- Go to the virtual WAN hub used for Barracuda SecureEdge. For more information, see How to Create a Microsoft Azure Virtual WAN.
- Click Hubs.
- Select the hub used for Barracuda SecureEdge.
- In the hubs menu click ... .
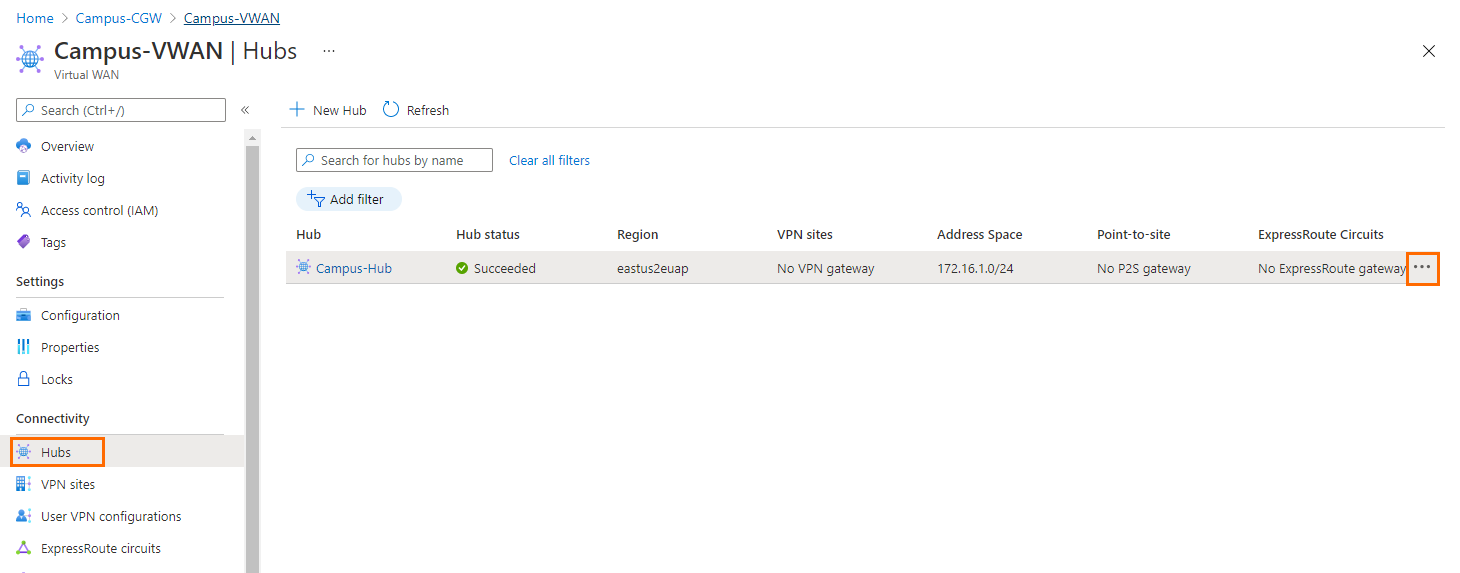
- Select Edit virtual hub.
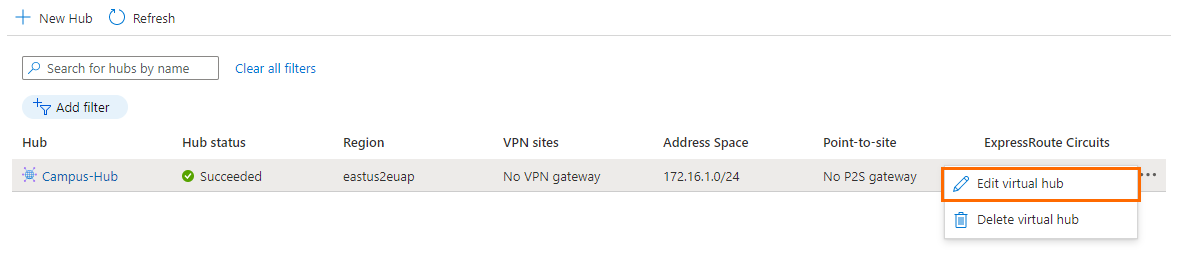
- The Edit virtual hub window opens. Specify values for the following:
- Include ExpressRoute gateway – Click to enable.
- Gateway scale units – Select the scale units.
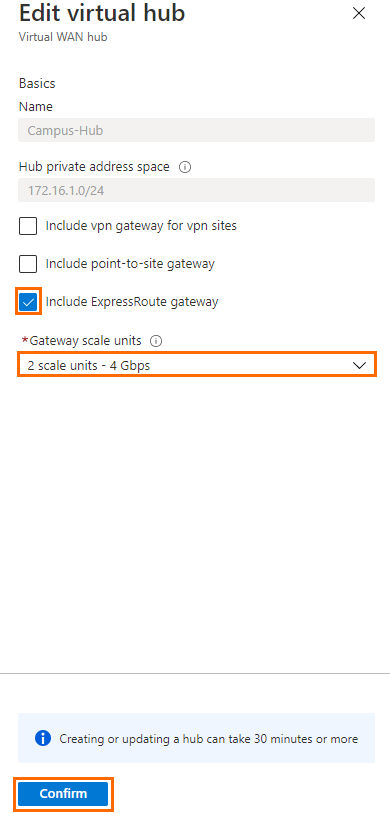
- Click Confirm. It takes about 30 minutes for the hub and hub resources to fully create.
Step 5. Connect the ExpressRoute and Virtual WAN
Continue with this step when the hub has finished deploying.
- Log into the Azure portal: https://portal.azure.com.
- Go to the virtual WAN edited in Step 4.
- Click Hubs.
- Select the hub edited in Step 4.
- In the hubs menu, click ExpressRoute.
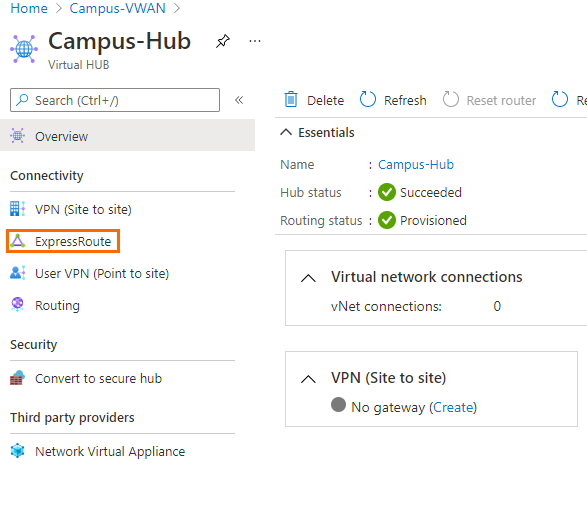
- The ExpressRoute blade opens.
- Select your ExpressRoute circuit and click Connect circuit(s).
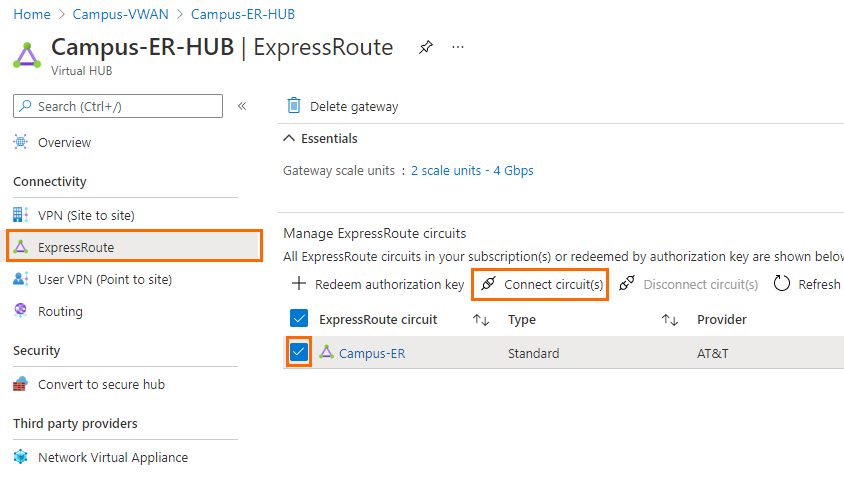
- Wait until the connection is established.
The ExpressRoute circuit can be used now.
Further Information
- For more information on the configuration of an ExpressRoute in Barracuda SecureEdge, see How to Configure an ExpressRoute.
- For more information on ExpressRoute circuits, see https://docs.microsoft.com/en-us/azure/expressroute/expressroute-howto-circuit-portal-resource-manager
- For more information on private peering, see https://docs.microsoft.com/en-us/azure/expressroute/expressroute-howto-routing-portal-resource-manager#private.
- For more information on the connection of a virtual WAN and ExpressRoute, see https://docs.microsoft.com/en-us/azure/virtual-wan/virtual-wan-expressroute-portal.