

This solution allows you to create a new hub in an existing virtual WAN, and then create a new Network Virtual Appliance (NVA) there and move all sites to the new hub. This is the preferred solution because it has limited downtime and offers you rollback capabilities if problems occur. For more information, see Virtual Router Upgrade for Virtual WAN with Barracuda NVAs.
Step 1. Retrieve the Name of the Existing Hub
Go to https://se.barracudanetworks.com and log in with your existing Barracuda Cloud Control account.
The chosen Tenant/Workspace is displayed in the top menu bar.
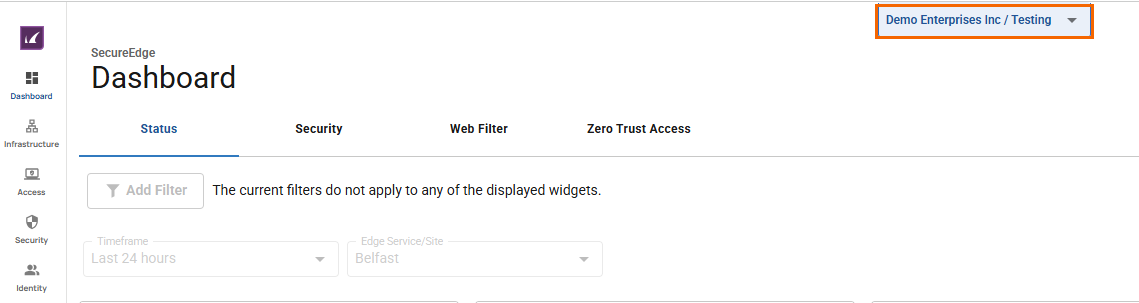
From the drop-down menu, select the workspace containing your Edge Service.
In the left menu, click the Infrastructure icon, and select Edge Services.
The Edge Services page opens. You will see the hub name.
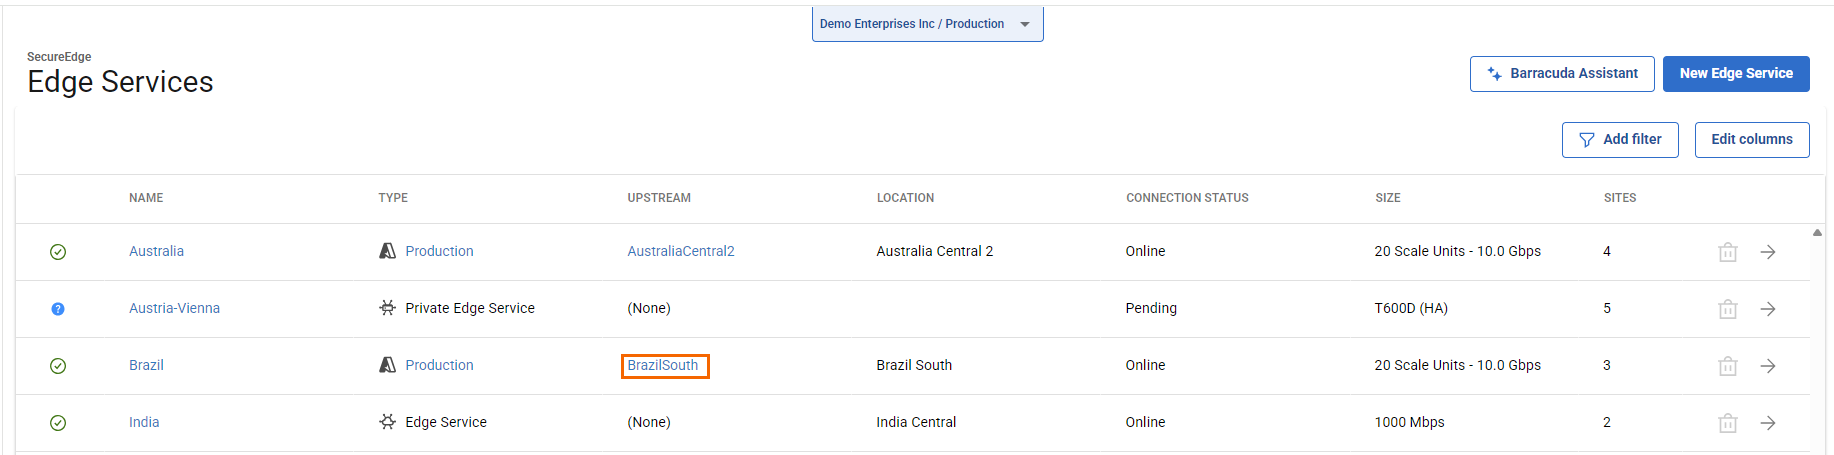
Write down the name.
Step 2. Create a New Hub in the Same Region
Log into the Azure portal: https://portal.azure.com
In the left menu, click Virtual WANs.
Select the virtual WAN containing the hub from Step 1.
In the left menu, click Hubs.
Click + New Hub.
The Create virtual hub blade opens. Specify values for the following:
Region – Select the same region as the original hub, e.g., West Europe.
Name – Enter a name for the hub, e.g., doc-vwan-hub.
Hub private address space – Enter the hub's address range in CIDR, e.g., 10.0.0.0/24 . Select a unique network that is dedicated for the hub only. Note that this address range must be different than the address range of the existing hub from Step 1.
Virtual hub capacity – Select the virtual hub capacity according to your requirements.
Hub routing preference – Select the hub routing preference, e.g., ExpressRoute. Note that ExpressRoute is the default setting but can be changed depending on your requirements.
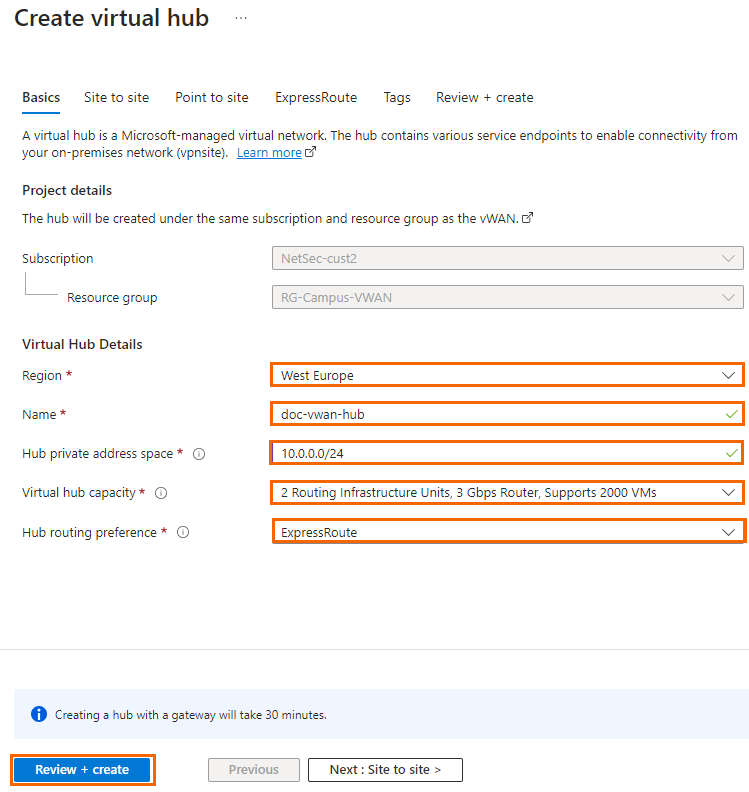
Click Review + create.
Review your settings and click Create to start the creation of the hub.
Step 3. (Optional) Disable the Azure Firewall in the Old Hub
This step is necessary only if your hub has the Azure firewall enabled.
Log into the Azure portal: https://portal.azure.com
In the left menu, click Virtual WANs.
Select the Virtual WAN containing the hub from Step 1.
In the left menu, click Hubs.
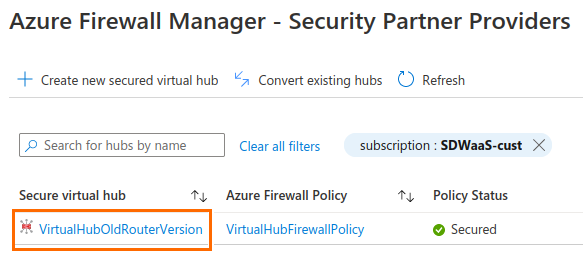
Click on your hub.
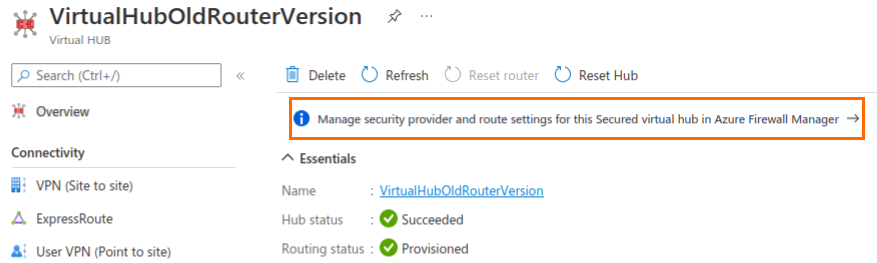
The hub Overview opens.
Click Manage security provider and route setting for this Secured virtual Hub in Azure Firewall Manager -> .
The Azure Firewall Manager Security Partner Providers blade opens.
Click on your hub.
In the left menu, click Security configuration.
In the Security configuration menu, specify values for the following:
Internet traffic – Select None.
Private traffic – Select Bypass Azure Firewall.
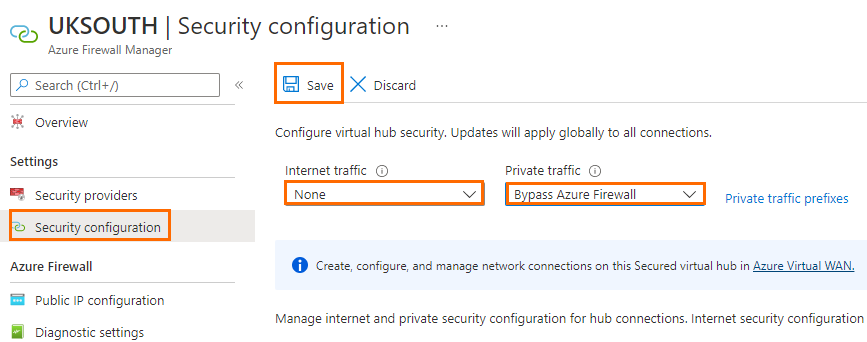
Click Save.
Step 4. Verify that the Hub Just Now Created Is Using the Newest Virtual Router Version
Log into the Azure portal: https://portal.azure.com
In the left menu, click Virtual WANs.
Select the Virtual WAN containing the hub from Step 2.
On the left side, click Hubs.
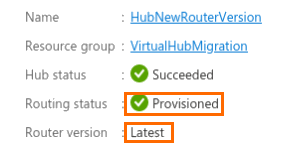
Click on the hub you created in Step 2.
Wait until the routing status becomes green and Provisioned is displayed.
Verify that the Router version is Latest.
Step 5. Deploy a New Edge Service Using the New Hub
Step 5a. Generate a Token in the Barracuda SecureEdge
Go to https://se.barracudanetworks.com and log in with your existing Barracuda Cloud Control account.
The chosen Tenant/Workspace is displayed in the top menu bar.
From the drop-down menu, select the workspace containing your Edge Service for Virtual WAN.
In the left menu, click the Infrastructure icon, and select Edge Services.
The Edge Services page opens. In the top-right corner of the window, click New Edge Service.
From the drop-down menu, select Edge Service for Virtual WAN.
The Generate Edge Service Token window opens.
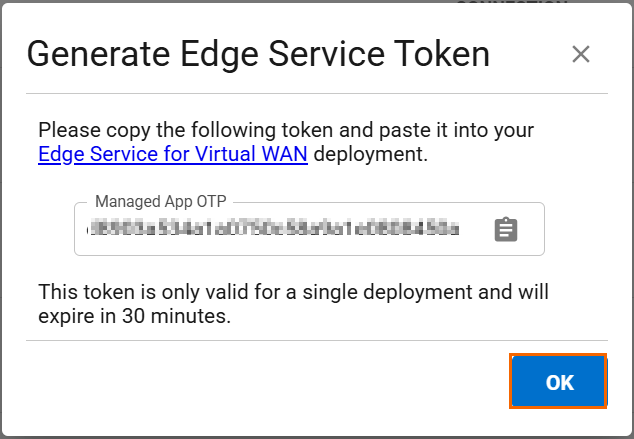
Click on the clipboard icon to copy the token to your clipboard.
Paste the token in a text file.
Click OK.
Step 5b. Deploy an Edge Service in Microsoft Azure
Log into the Azure portal: https://portal.azure.com.
In the left menu, click +Create a resource and search for Barracuda SecureEdge.
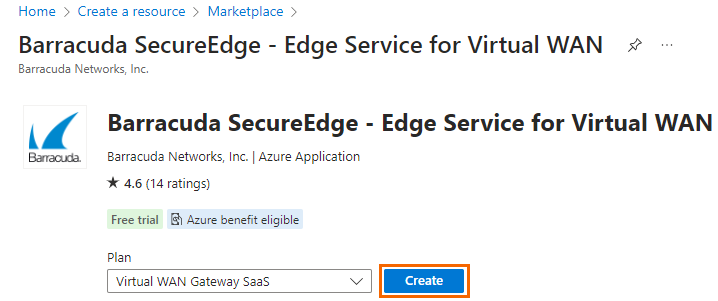
Click Barracuda SecureEdge - Edge Service for Virtual WAN.
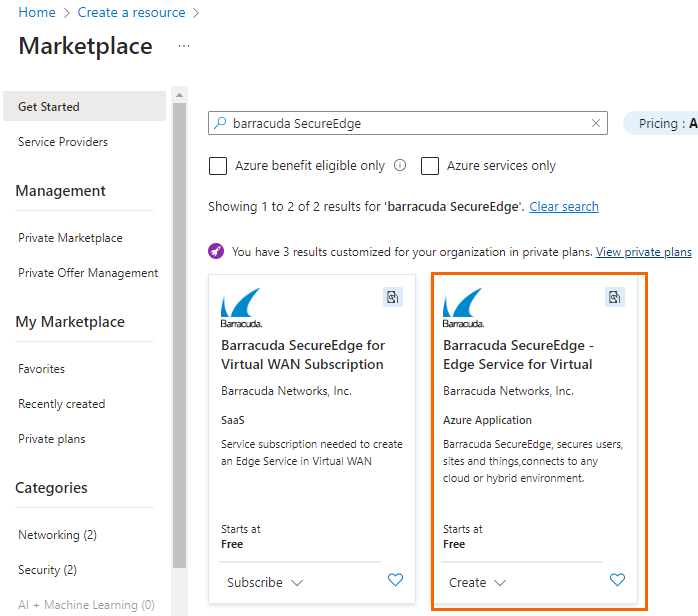
Click Create.
The Basics blade opens. Enter values for the following:
Subscription – Select subscription of the existing Edge Service from the drop-down menu.
Resource group – Select the resource group containing your original Edge Service.
Region – Select the region of your existing Edge Service.
Application name – Enter a name for the managed application.
Managed Resource Group – Enter a name for the managed resource group.
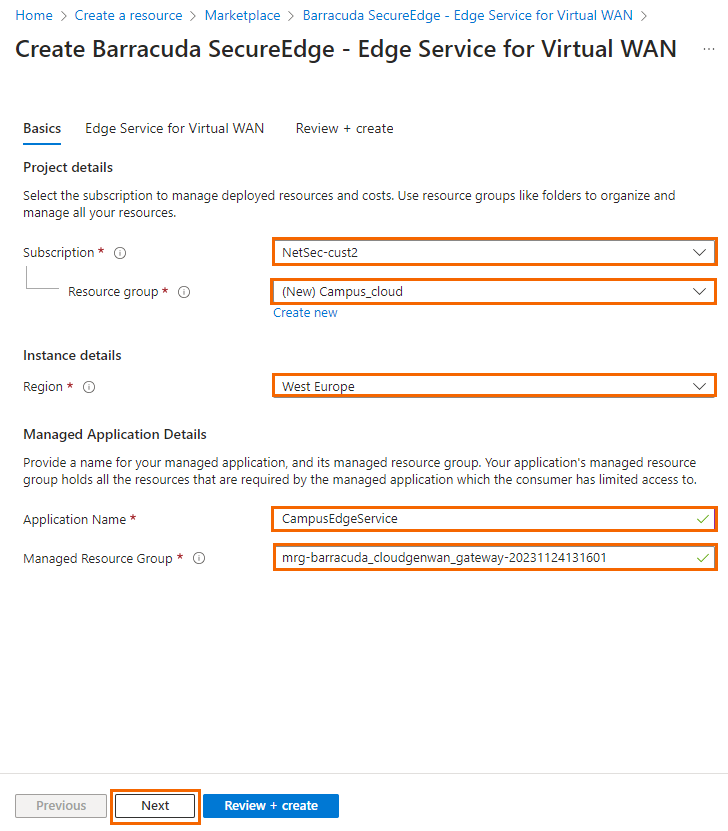
Click Next.
The Edge Service for Virtual WAN blade opens. Specify values for the following:
Virtual WAN hub – Select the hub created in Step 2.
NVA infrastructure scale unit – Select a scale unit from the drop-down menu.
Token – Enter the Edge Service token here that you retrieved in Step 5a.
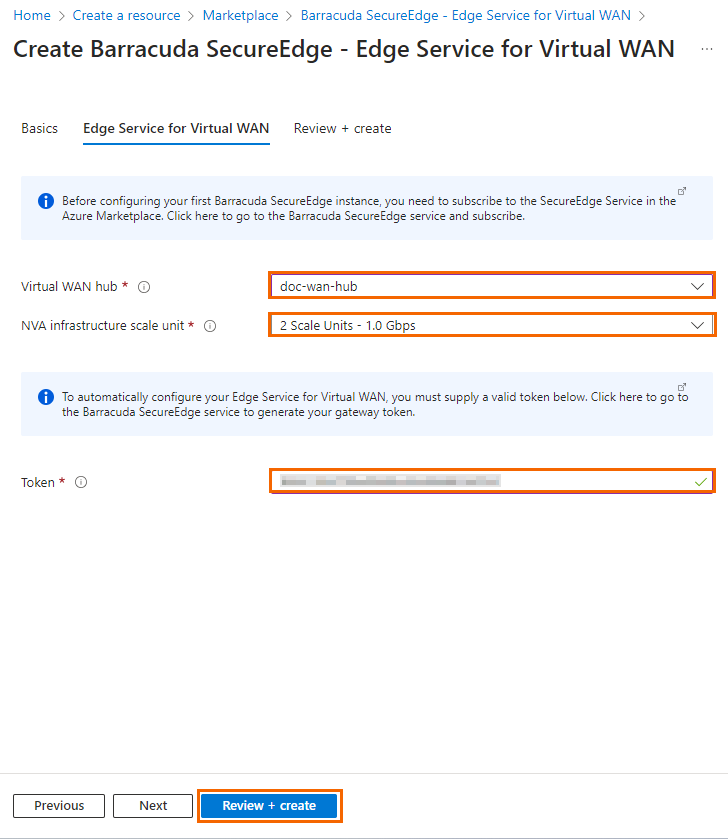
Click Review + create.
The Review + create blade opens.
Verify the values are correct, and select the check box next to I agree to the terms and conditions above.
Click Create.
Step 6. (Optional) Advertise VNET Prefixes to the Default Route Table of the New Hub
This step is necessary only if you have virtual networks associated to the old hub.
Log into the Azure portal: https://portal.azure.com.
In the left menu, click Virtual WANs.
Select the Virtual WAN containing the hub from Step 2.
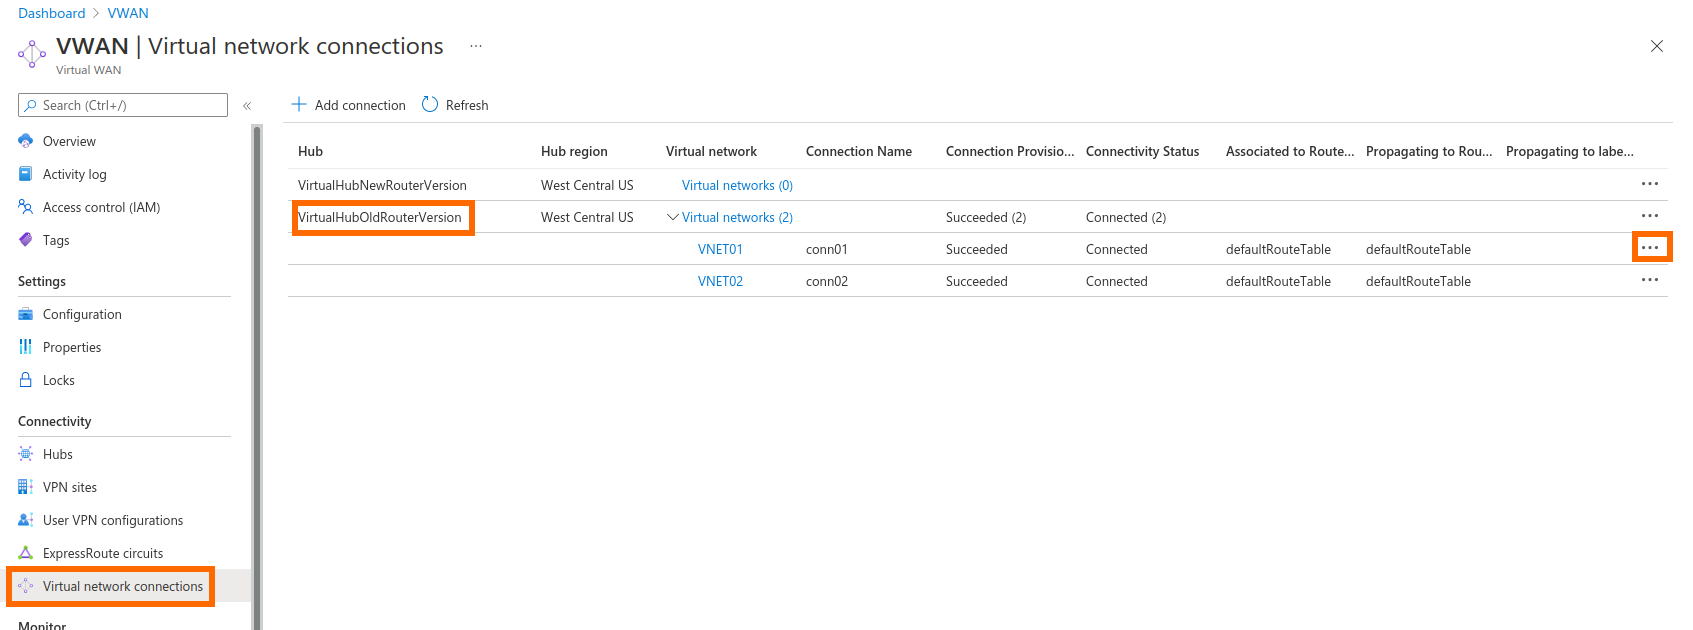
On the left side, click Virtual network connections.
Click ... next to the hub with the old virtual router version to edit the virtual network connections.
The Edit VNet Connection window opens.
From the Propagate Route Tables drop-down menu, select Default of the hub with the new virtual router version, created in Step 2.

Click Confirm.
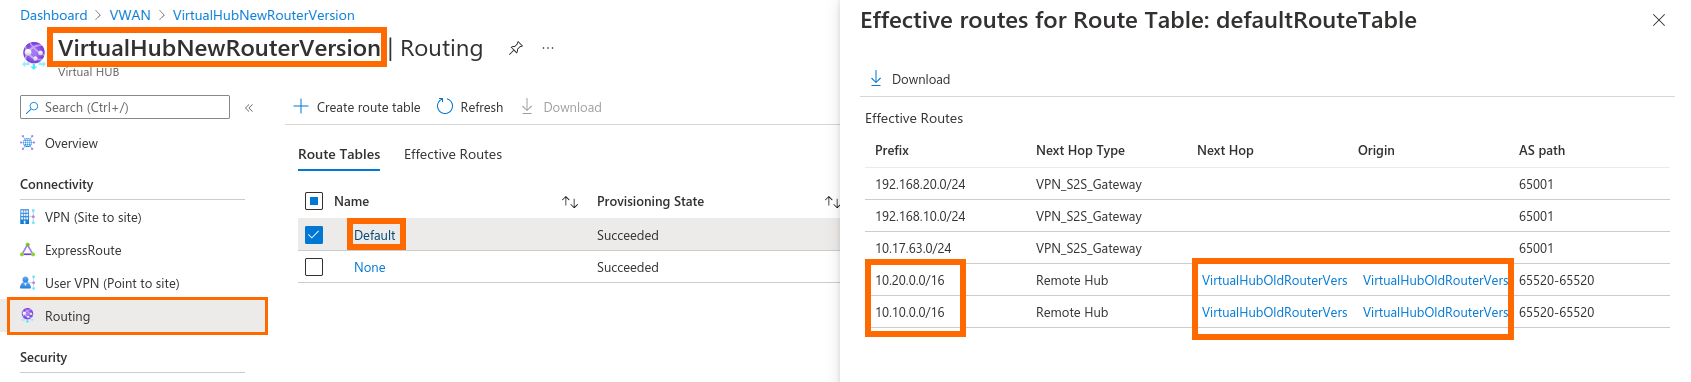
In the left menu, click Hubs.
Click on the hub you created in Step 2.
In the left menu, click Routing.
Click ... next to the Default routing table.
Verify that the routes propagated in this step have appeared.
Click X to close the window.
Step 7. Change the Edge Service of Your Sites
Change the Edge Service of all sites connected to the old Edge Service from Step 1 to the new Edge Service created in Step 5. For more information, see How to Change the Edge Service of a Site.
Step 8. (Optional) Move Virtual Network Connections from the Old Hub to the New Hub
This step is necessary only if you have virtual networks associated to the old hub.
Log into the Azure portal: https://portal.azure.com.
In the left menu, click Virtual WANs.
Select the Virtual WAN containing the hub from Step 2.
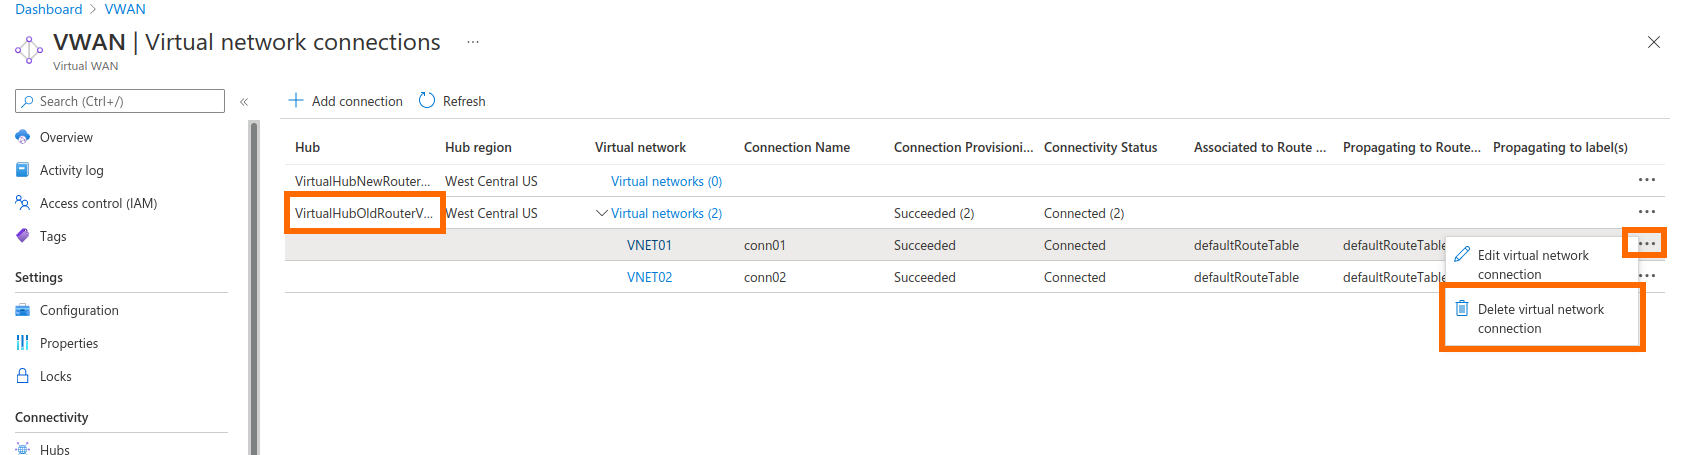
On the left side, click Virtual network connections.
Click ... next to the virtual network connections of the hub with the old virtual router version.
Click Delete virtual network connection.
Click + Add connection.
The Add connection window opens. Specify values for the following:
Connection name – Enter a name for the connection.
Hubs – Select the hub created in Step 2.
Subscription – Select your subscription.
Resource group – Select the resource group containing the virtual network.
Virtual network – Select the virtual network.
Propagate Route Tables – From the drop-down menu, select Default from the hub created in Step 2.
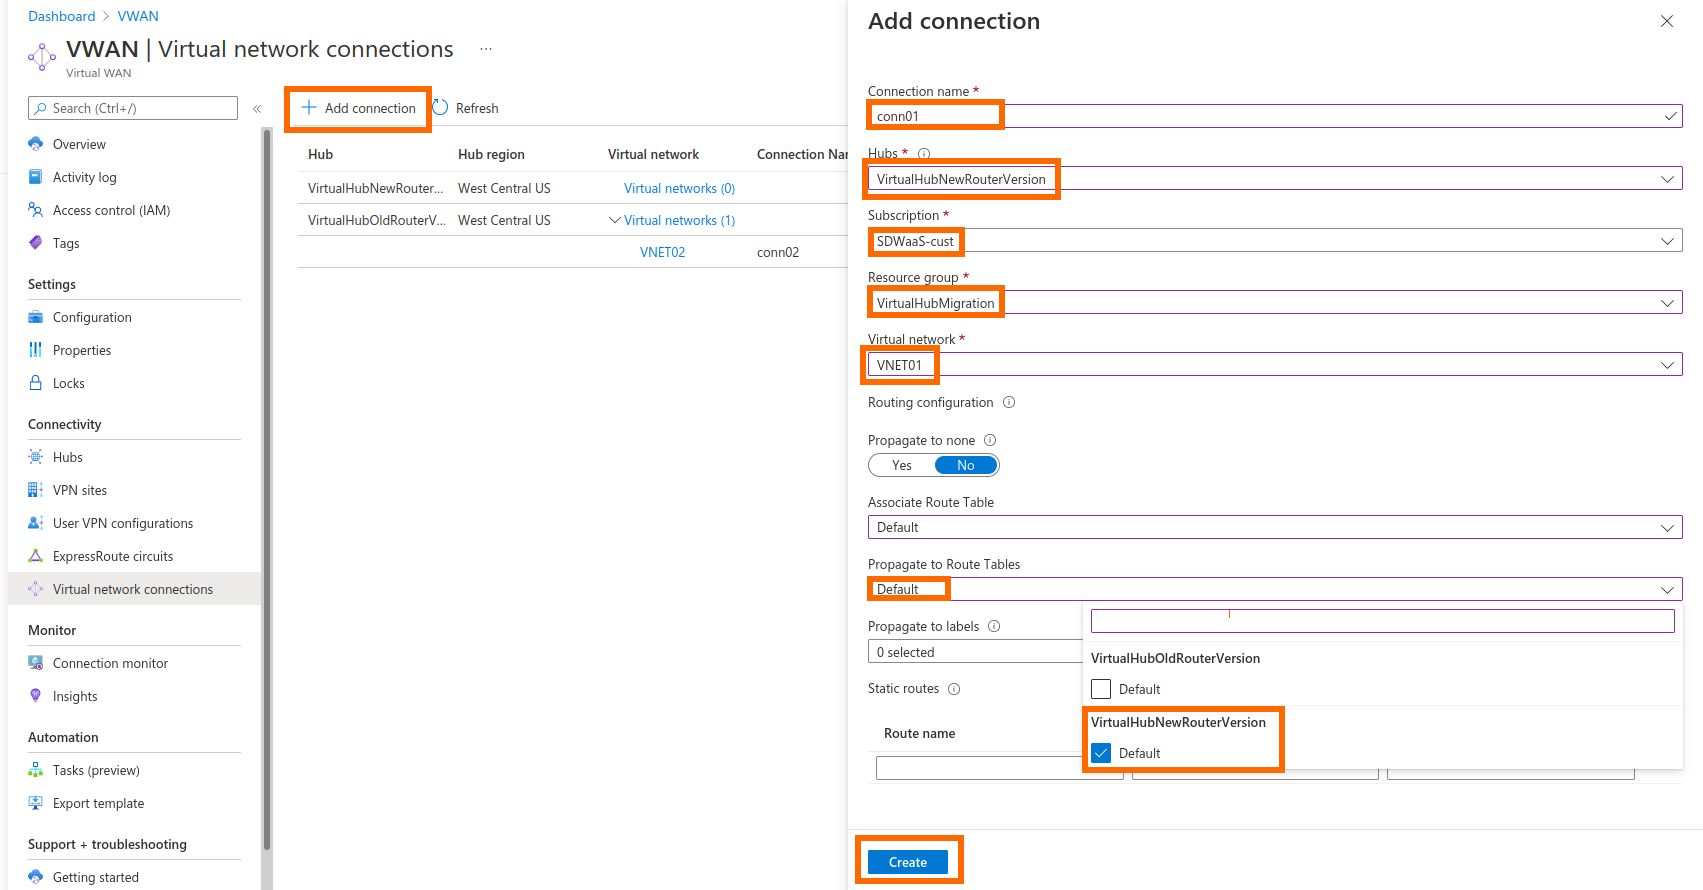
Click Create.
Next Steps
Delete the old hub.