

The Barracuda SecureEdge Manager allows administrators to configure an explicit Web Filter policy. Explicit Web Filter policies take precedence over predefined security policies. An explicit Web Filter rule blocks or allows URLs from specified sources. In addition, you can now either alert or warn users against suspicious traffic.
The following actions are available for the Explicit Web Filter policy :
- Allow – The user can access the website.
- Block – The user is blocked from viewing the website.
- Alert – The user is allowed to access websites in this category, but the action is silently logged.
Warn – The user is redirected to a warning page and must click Continue to access the requested website. Note that Continue will implicitly cause a security inspection.
Create an Explicit Web Filter Policy
- Go to https://se.barracudanetworks.com and log in with your existing Barracuda Cloud Control account.
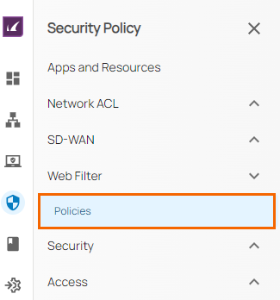
- In the left menu, click the Security Policy.
- Expand the Web Filter menu on the left and select Policies.
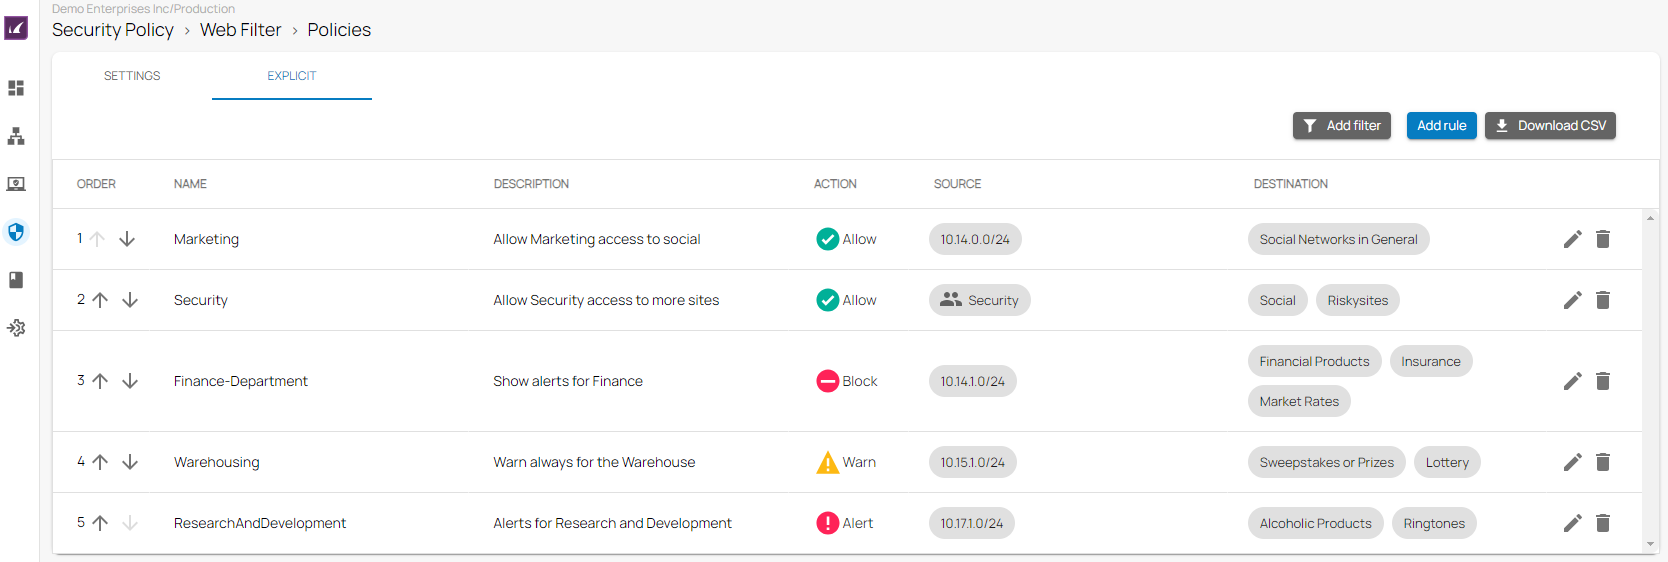
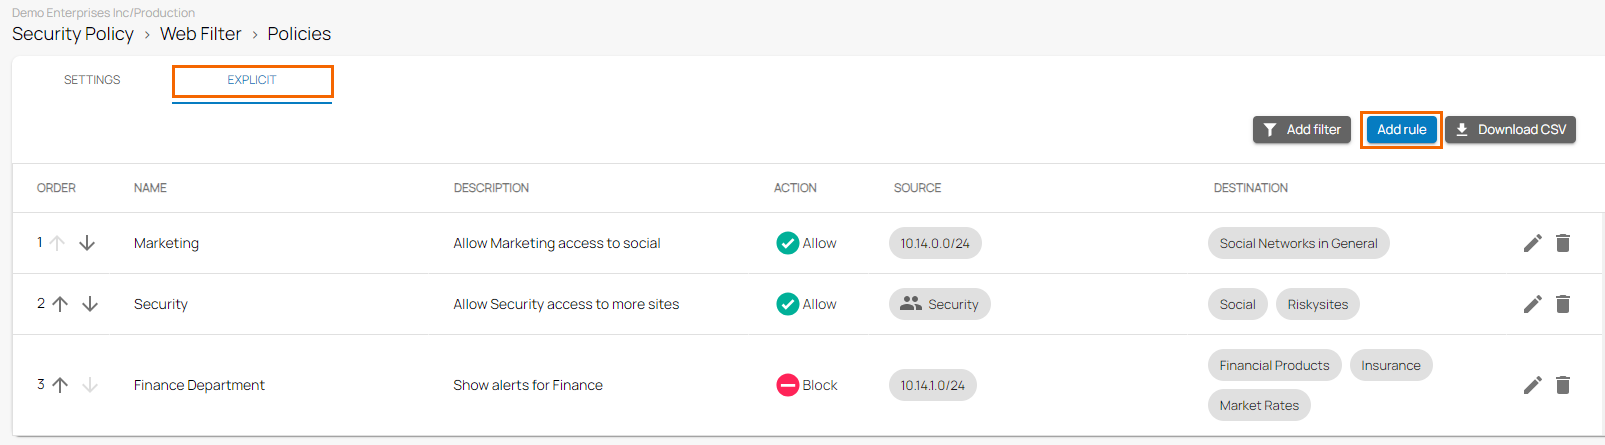
- The Policies window opens. Click the EXPLICIT tab.
- The EXPLICIT configuration window opens. To create a new rule, click Add Rule.
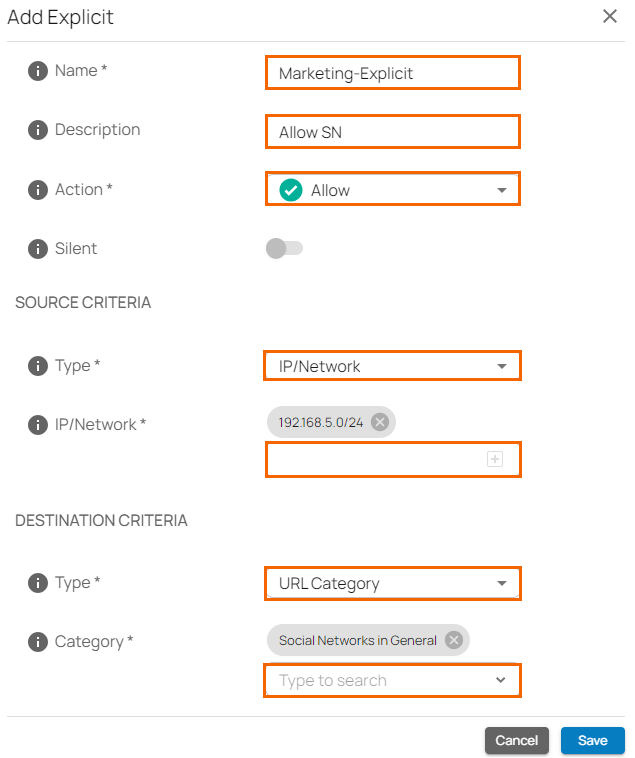
- The Add Explicit window opens. Specify values for the following:
- Name – Enter a unique name.
- Description – Enter a brief description.
- Action – Select an action type. You can choose between Allow, Block, Alert, and Warn.
If you select Action = Allow or Alert or Warn, the Silent field is disabled.
If you select Action = Block, you are provided with the option to silently block the rule:- Silent – Click to enable/disable. By default, Silent field is disabled.
- In the SOURCE CRITERIA section, specify values for the following:
- Type – Select a source type. You can choose between IP/Network, Site, and User/Group. For more information on User/Group, see How to Connect Your Microsoft Entra ID with Barracuda Cloud Control.
- IP/Network – Enter the IP address or network, and click +.
- In the DESTINATION CRITERIA section, specify values for the following:
- Type – Select destination type. You can choose between URL Category, Custom Categories, and Domain.
- If you select URL Category, select the categories from the drop-down menu to specify the categories you want to allow/block.
- If you select Domain, enter one or more domains and click +.
- If you select Custom Categories, select the custom category from the drop-down menu, or type to search.
- Type – Select destination type. You can choose between URL Category, Custom Categories, and Domain.
- Click Save.
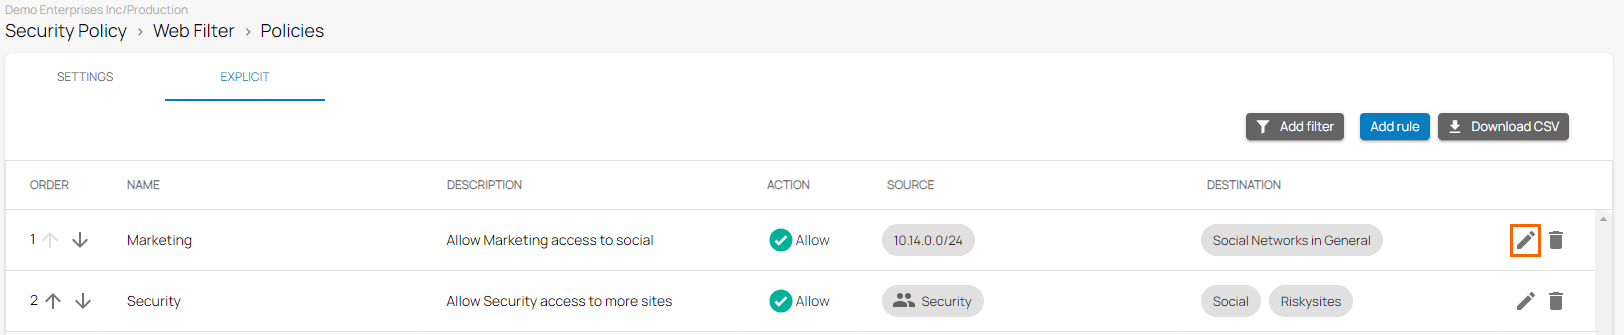
Edit an Explicit Web Filter Policy
- In the left menu, click the Security Policy.
- Expand the Web Filter menu on the left and select Policies.
- The Policies window opens. Click the EXPLICIT tab.
- The EXPLICIT configuration window opens. Click on the pencil icon next to the rule you want to edit.
- The Edit Explicit window opens. Edit the value you are interested in.
Click Save.
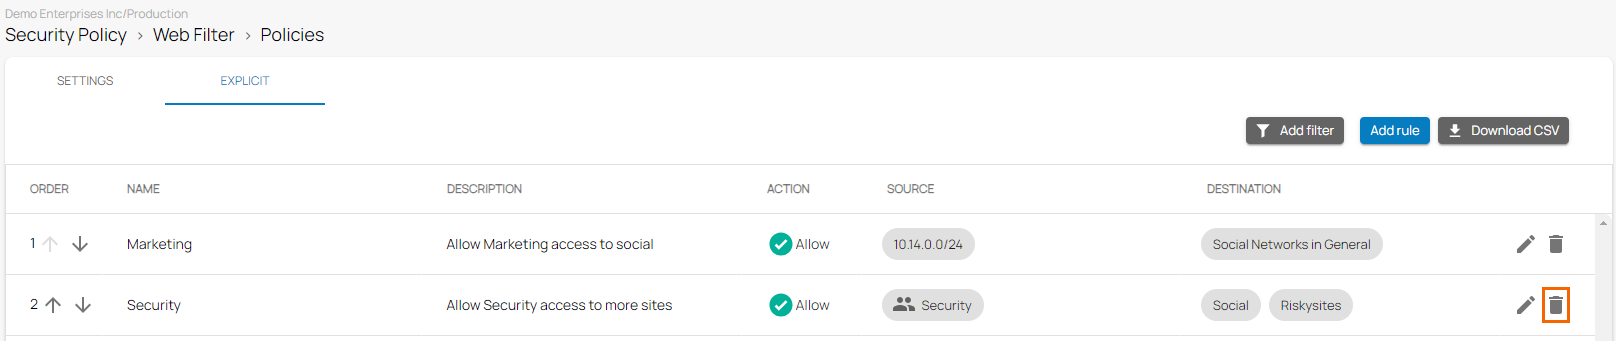
Remove an Explicit Web Filter Policy
- In the left menu, click the Security Policy.
- Expand the Web Filter menu on the left and select Policies.
The Policies window opens. Click the EXPLICIT tab.
The EXPLICIT configuration window opens. Click on the trash can icon next to the rule you want to remove.
- The Delete Rule window opens.
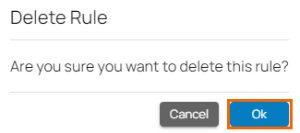
Click OK to confirm.