

Verify the following before configuring ArchiveOne:
You have installed ArchiveOne Service, ArchiveOne Admin, and the Search and Retrieval Website on a suitable server;
If necessary, you have installed a third-party storage manager;
You have calculated the correct sizing and disk locations on your ArchiveOne Service system, or fast connected storage, for the Index Base Directory and either Archive Cache Directory or Archive Base Directory.
Step 1. Configure ArchiveOne Admin
You can select to configure ArchiveOne Admin either using the Quick Start or Advanced configuration processes.
Quick Start Configuration Using Mailbox Archiving Wizard
The Mailbox Archiving Wizard allows you to quickly configure a set of repositories and policies by answering a few simple questions. The advantage of this approach is that you can let the system build and configure the various items instead of having to do it manually.
Use the following steps to configure ArchiveOne Admin using the Quick Start configuration process:
- From the Start menu, launch ArchiveOne Admin.
- Expand ArchiveOne Admin, right-click Status, and click Choose server.
When prompted for an Exchange server, choose the Exchange server name and click OK.
- Select Quick Start; the Mailbox Archiving Wizard displays.
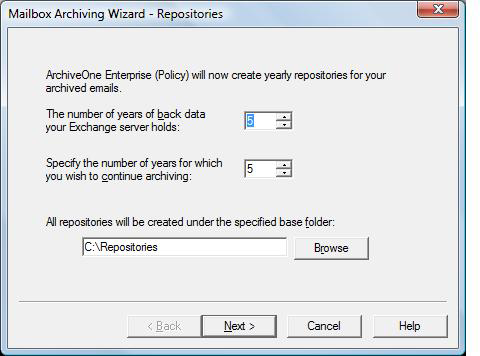
In the Repositories page, specify the number of years of back data for which you want to create a repository. You can also specify how many years of future archiving:
- Click Next. In the Policy Type page, select whether to create policies that archive messages based on their age, or to create policies based on the size of the mailbox:

- Click Next.
- If you selected Message Age, the Time Based Policies page displays:
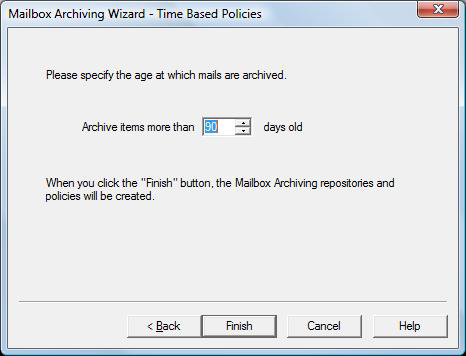
- Specify the age at which mail is to be archived.
- Click Finish.
- If you selected Mailbox Size, the Quota Based Policies page displays:
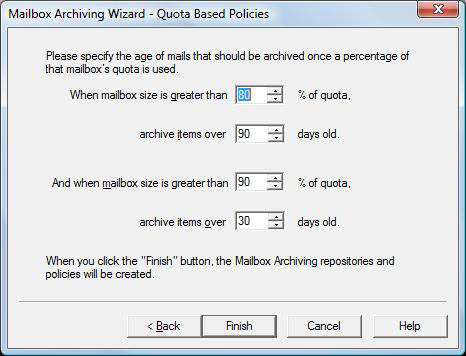
- Specify at what percentage of a mailbox's quota should items be archived.
- Click Finish.
- A set of repositories and policies are generated.
Advanced Configuration Using Repository Configuration Wizard
Use the Repository Configuration Wizard to manually build and configure ArchiveOne Admin.
Use the following steps to configure ArchiveOne Admin using the Advanced configuration process:
- From the Start menu, launch ArchiveOne Admin.
- Expand ArchiveOne Policy, right-click Status, and click Choose server.
When prompted for an Exchange server, choose the Exchange server name and click OK.
- Select Advanced; the Repository Configuration Wizard displays.
- In the Repository Name page, enter the repository name Standard, and then click Next.
- In the Storage Manager page, select the storage type you are using, and then click Next.
- In the Index location page, enter your Index Base Directory, for example C:\AOnePol\index. Click Next.
- In the Archive location page, enter your Archive Base Directory, for example, C:\AOnePol\archive, and enter your Archive Cache Size, and one of the following:
- If you are using CA BrightStor ARCserve Backup, select the device group name of your storage device, from the drop-down list.
- If you are using HP OpenView Storage Data Protector, select the device name of your storage device, from the drop-down list.
- If you are using QStar, click Browse navigate to and select the path to your Integral Volume.
- If you are using EMC2 Centera, enter the DNS names or IP addresses of the Centera access nodes to which you want to connect.
- Click Add.
- When you have entered all of the access nodes that you want to use, click Test access nodes. ArchiveOne attempts to connect to the Centera. If any nodes are not accessible, details are displayed and you can remove them from the list by highlighting them and clicking Remove.
- If Centera has supplied you with a Pool Entry Authorization file access profile, specify the file location on the ArchiveOne Service server.
- For Centera, the Archive Cache Directory and Archive Cache Size can be specified on the next page.
- If you are using PoINT (PowerFile or other hardware), enter the path to your PoINT system's repository drive including the name of the volume set in the location path, for example, I:\archive06.
- If you are using BridgeHead HT Data Repository, enter the name of your HT Data Repository (not to be confused with the name of your ArchiveOne Repository).
- If you are using a drive-mapped storage manager, enter the path to your storage manager drive or UNC. For example, \\mystorage\share.
- If you are using a storage manager provided by a Storage Controller Module, click Configure to configure the storage manager; consult the documentation provided with the Storage Controller Module for configuration details.
- Click Next.
On the Rate control page, leave rate controls disabled. Click Next.
- In the Retention page, select Indefinite. Click Next. The System Configuration Wizard launches.
In the Configuration Wizard page, click Next.
In the License page, if you have a full license, click Review or change license key, then enter the license key and click Test. If you do not have one, then an evaluation license is created for you. You may get a warning at this point since your configuration may not be correct for the license you are using, but you can correct this later in the wizard. Click Next.
In the Retrieval folder page, for the base public folder for retrievals, if you want to retrieve messages to public folders, click Browse and navigate to and select the public folder you want to use. If you do not select a public folder then when you later click to retrieve messages from the archive, you will be asked for details of a PST or mailbox to use. Click Next.
In the Search URL page, enter the URL you want to use for the Search and Retrieval Website. Click Next.
You can configure the remaining pages, or leave these until later if you prefer.
When you reach the final page, Click Finish.
- In ArchiveOne Admin, right-click Mailbox Manager, and click Add mailbox.
Select a mailbox to archive, click add, and then click OK. The configuration page for the mailbox displays. Verify it has used the repository name Standard and initially configured only the mailbox owner as being allowed to search the mailbox archive.
Click OK, and repeat step 19 for any other mailboxes you want to archive.
- If you are experimenting with search into mailbox archives using the Search and Retrieval Website as a user, configure your currently logged in user to be allowed to search into the archive of the mailboxes using the following step:
- In Mailbox Manager, select a mailbox, and view properties.
- Click Add and add the currently logged in user.
Repeat steps a and b for each user.
Configuration is now complete. To view the configured properties, in ArchiveOne Admin, expand Repositories, and click Standard, or right-click Status, and then click Properties.
To re-run the wizards, right click Status, and click Run Mailbox Archiving Wizard.