

How the Number of Enrollment Slots Works
The admin can create a device classification (Supervised, Managed, Personal) on the console dashboard and assign a number of slots to that classification. For example, if the admin creates a classification of Supervised and assigns 10 slots for that user, then there can be 10 devices (for this user) using this enrollment link with this classification.
Every time a device is enrolled with the enrollment token specific to this classification, the number of slots left are updated on the dashboard until the number of slots is 0.
The user can unenroll one device and re-enroll that device again with this enrollment link, and it would count against the number of slots. Or they can enroll multiple devices with this enrollment link, so that each of them counts against the number of slots.
Once the number of slots = 0, the user cannot enroll with this enrollment link unless the admin updates the number of slots on the dashboard again.
How to Manage Enrollments Slots
To edit the number of available enrollment slots:
- Go to Identity > Settings.
- Scroll down to the Enrollment section.
- Click the pencil icon to the right of Enrollment to edit the number of available enrollment slots:
- Default available slots – The number of enrollment token(s) used to enroll new devices per user; i.e., laptops, phones, iPad, etc. This setting defaults to 10 slots when you create a shareable link. The link expires in 2 weeks by default, but you can edit this timeframe. Each token is associated with just one Device Classification (Supervised, Managed, or Personal).
- New link expiration (in days) - the user has this many days to use the token before it expires.
- Click Save.
How to Add/Remove Slots for Each Device Classification
- Go to Identity > Users.
- Select a user using the check box as shown below, and then click on the icon to manage shareable links.
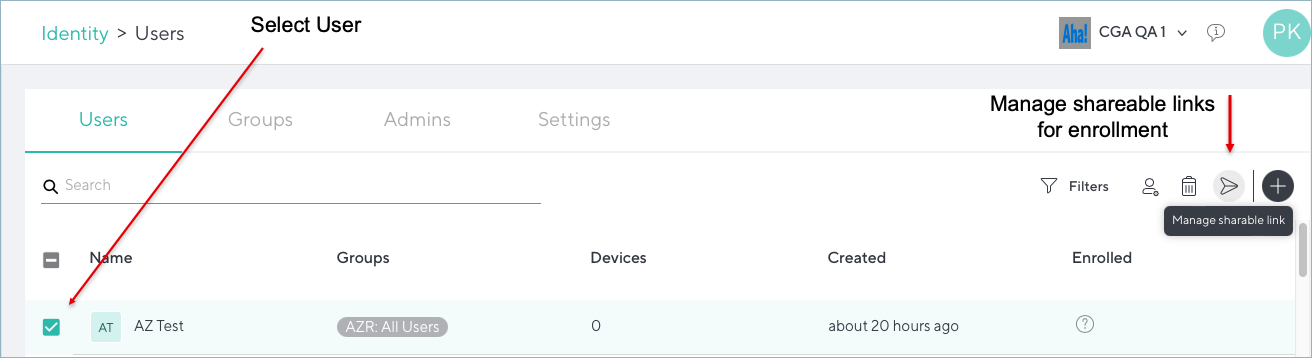
- On the popup, you can add or remove slots for each device classification type. This determines how many devices the user can enroll. Under Enrollment Settings, next to Format, you can toggle between Send Email (to user) or Send Shareable Link.
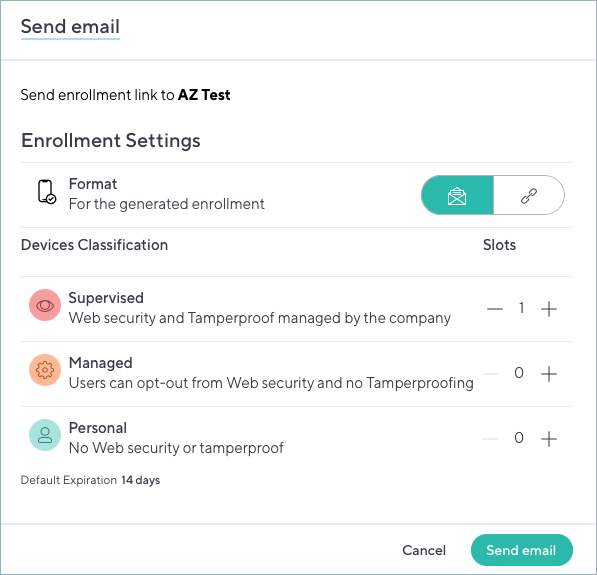
- Click Send Email (or shareable link, depending on which you selected) to notify the user of how many enrollment slots are available to them.
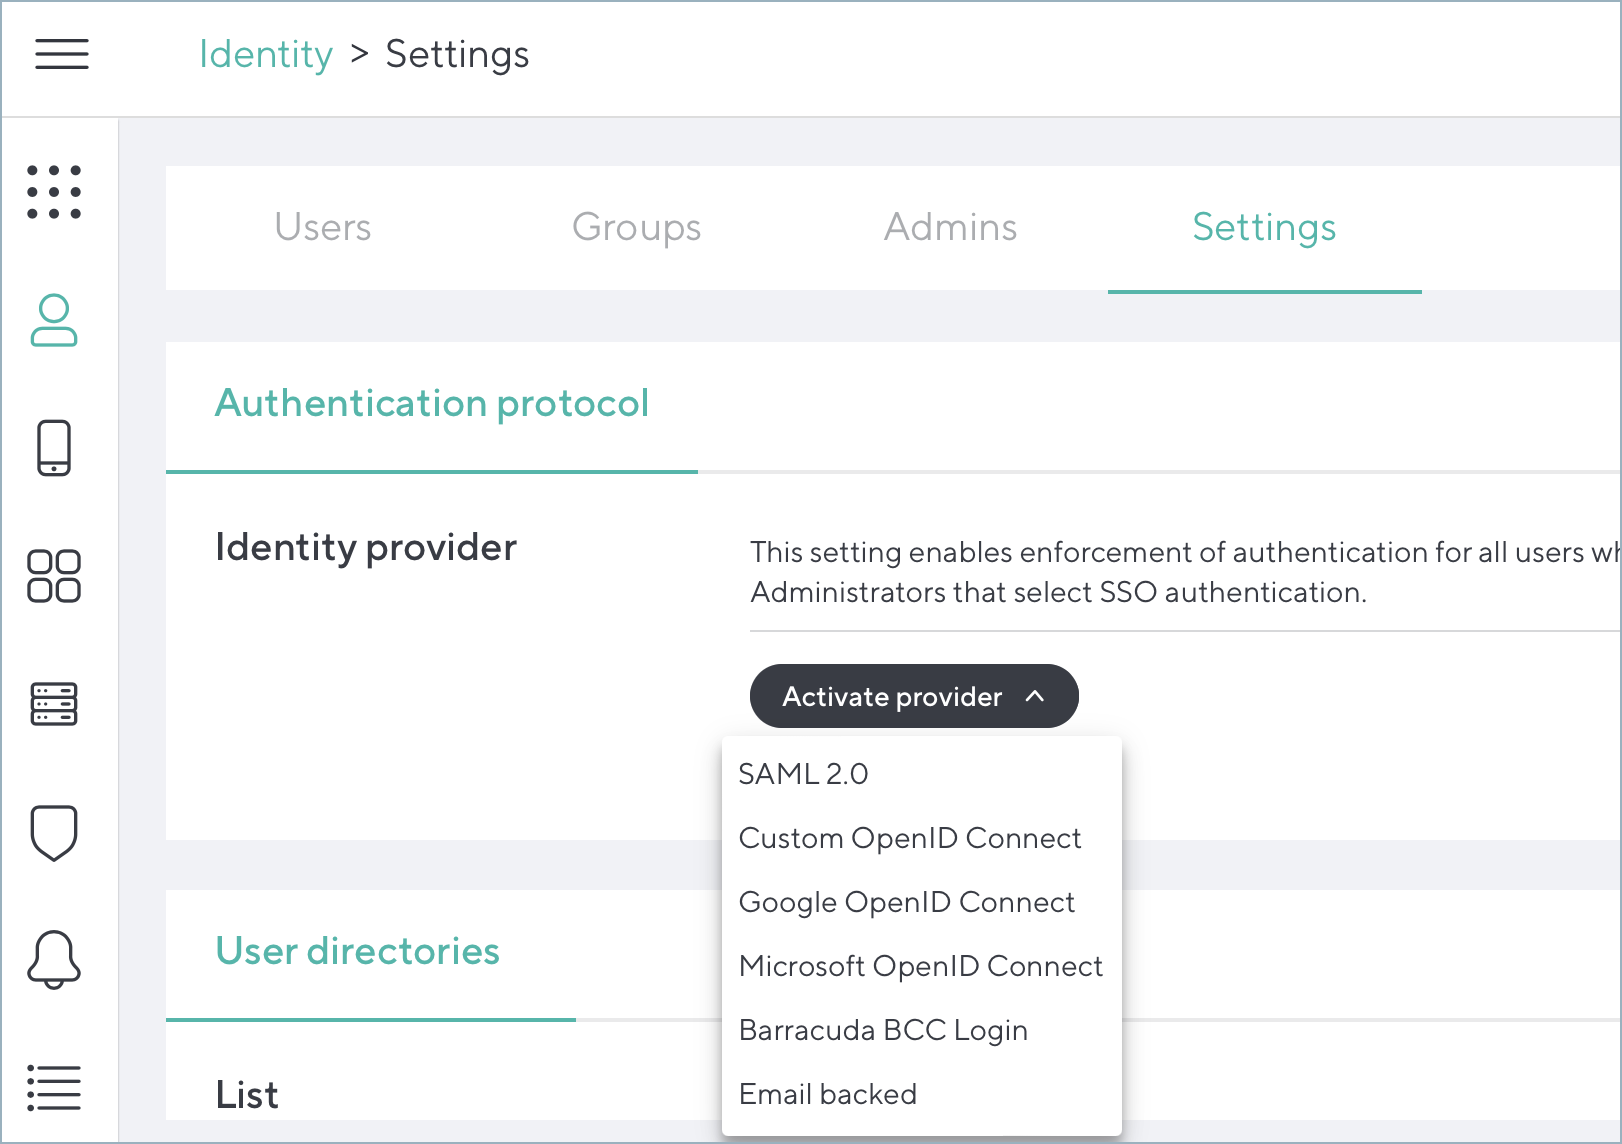
On the Identity > Settings screen in the CloudGen Access console, you can configure the following enrollment settings:
- Identity Provider – Provides for enforcement of authentication for all users when enrolling a new device and for Administrators that select SSO authentication.
- User Directories and Enrollment – See Add User Directory.