

In certain cases, it may be necessary to set the Log Analytics version of your CloudGen Firewall in Azure to a specific value. Follow the steps in this article to pin your Log Analytics version.
Before You Begin
- To enable log streaming to Log Analytics on your CloudGen Firewall, see How to Configure Log Streaming to Microsoft Azure Log Analytics.
Step 1. (optional) Disconnect the Log Analytics Workspace from Your CloudGen Firewall
This step is necessary only if your Log Analytics workspace is already connected to your CloudGen Firewall.
- Log into the Azure portal: https://portal.azure.com
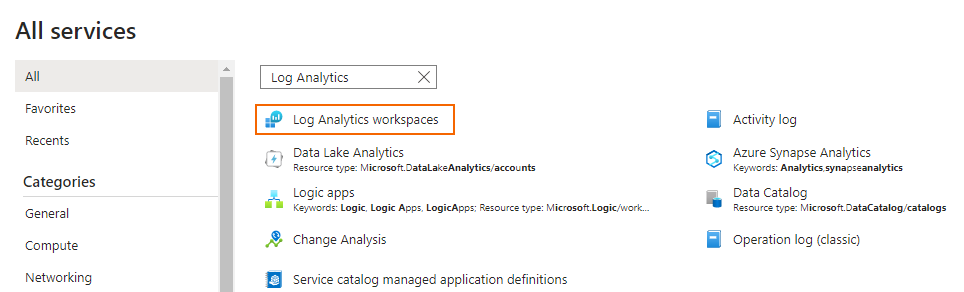
- In the left menu, click All Services and go to Log Analytics workspaces.
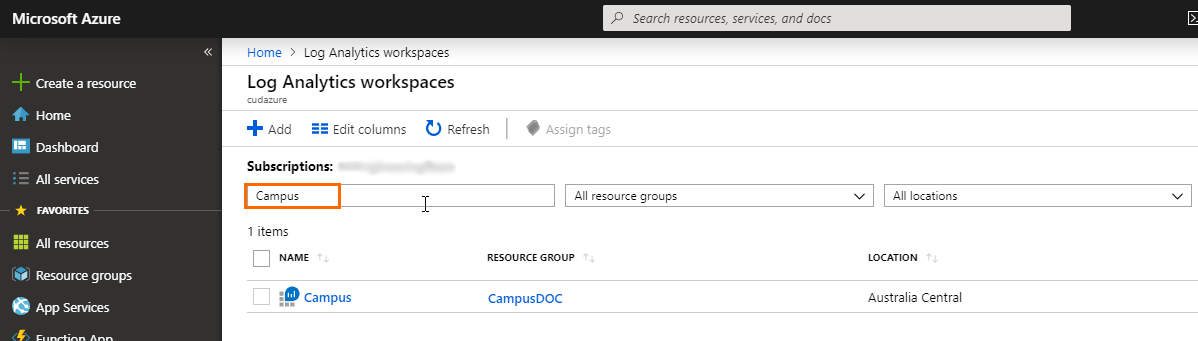
- In the search bar, enter the name of the Log Analytics workspace where your CloudGen Firewall is connected to.
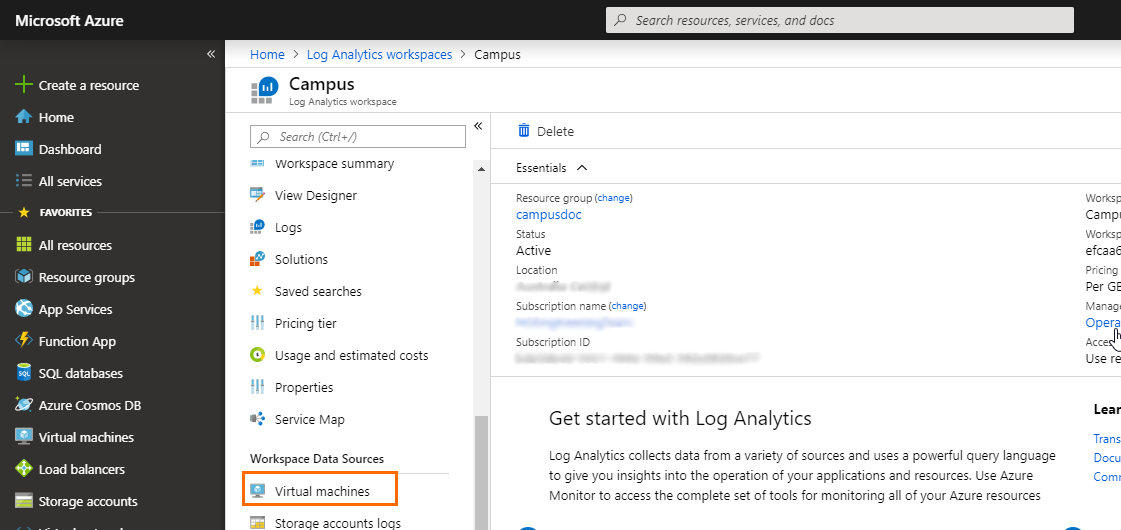
- To open the workspace, click on the entry of the Log Analytics workspace where your CloudGen Firewall is connected to.
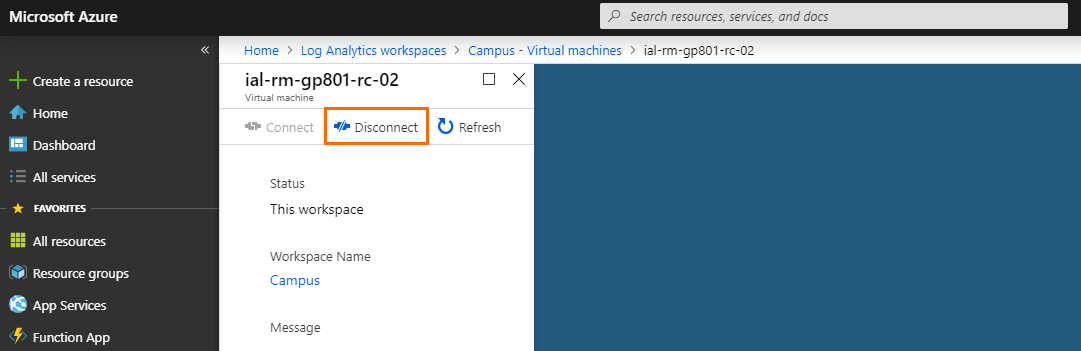
- Click on Virtual machines in the workspace.
- In the search bar, enter the name of your virtual machine to filter the results.
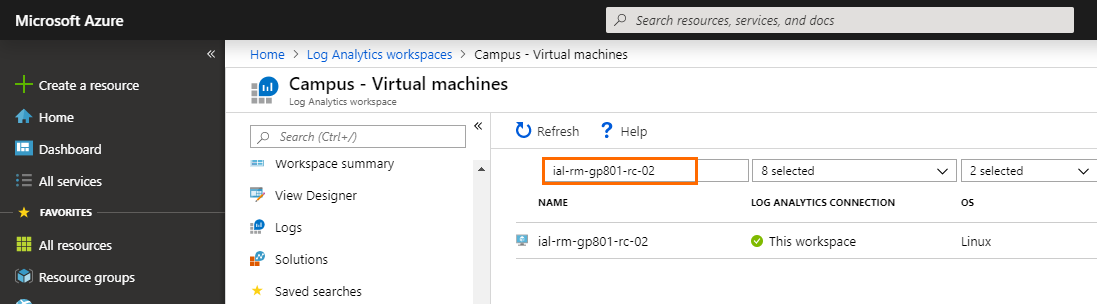
- Click on the entry of the virtual machine of the CloudGen Firewall you want to pin the Log Analytics version for.
- Click Disconnect to disconnect your CloudGen Firewall from the Log Analytics workspace.
- To confirm that you want to disconnect the virtual machine, click Yes.
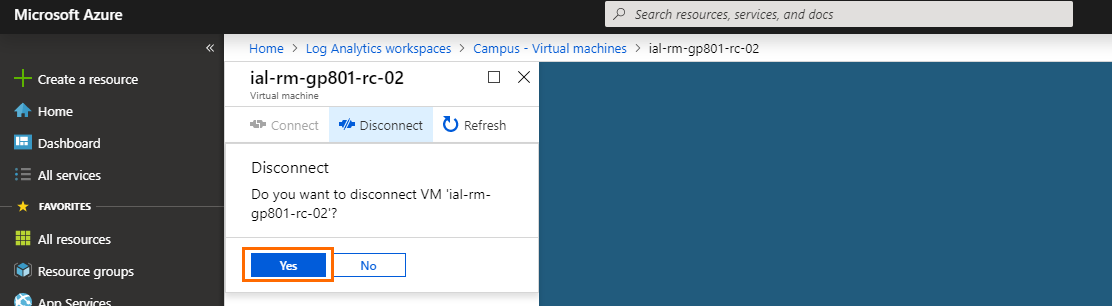
- Wait until you are informed that it is successfully disconnected.
Step 2. Set the Log Analytics Version
- Log into the Azure portal: https://portal.azure.com
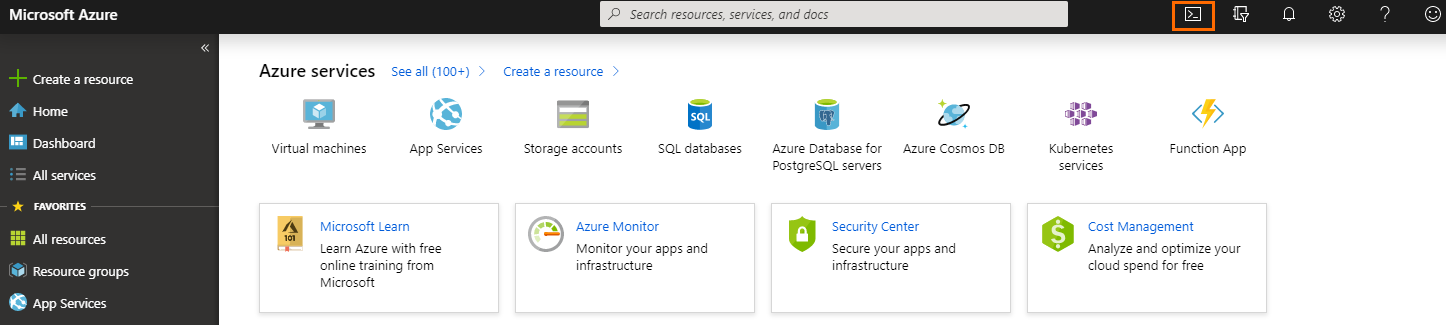
- To open the Cloud Shell, click on the shell icon in the upper-right corner.
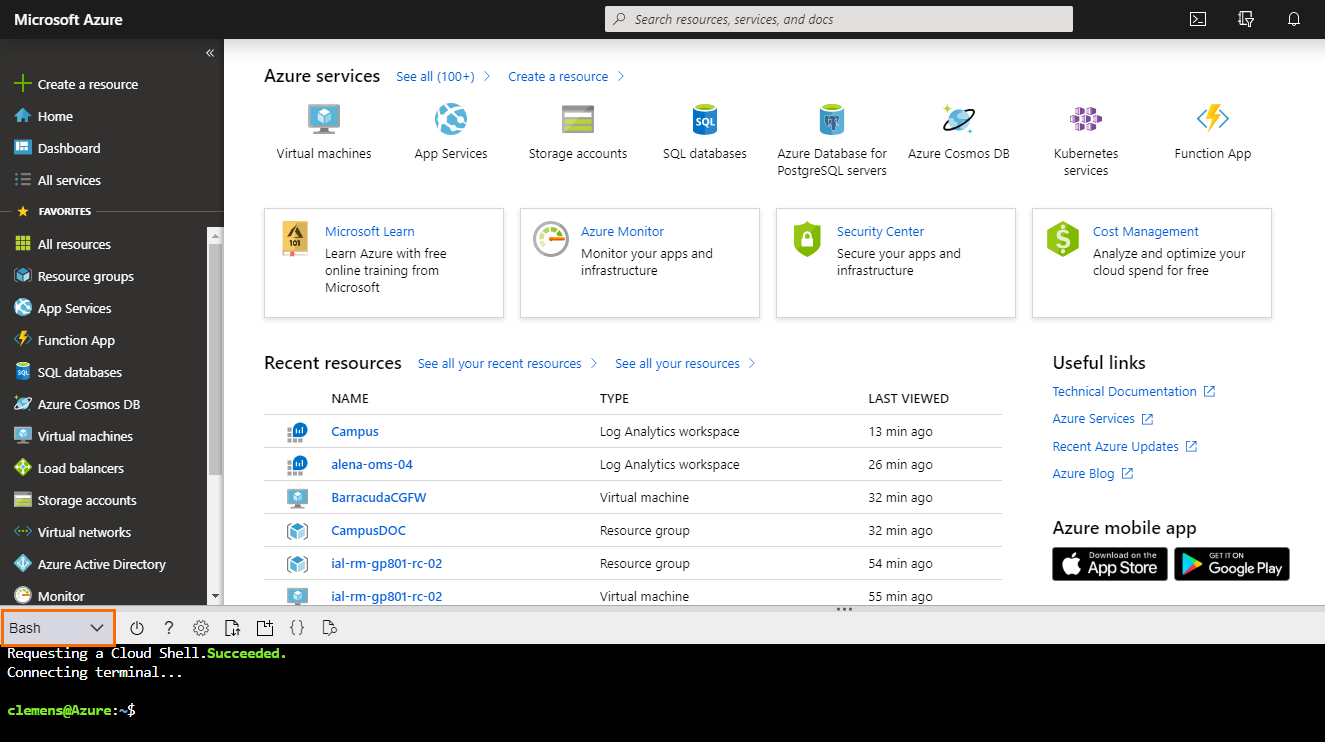
- Select Bash in the Cloud Shell menu.
- Enter the following command in the shell and press enter to run it:
az vm extension set --name OmsAgentForLinux --publisher Microsoft.EnterpriseCloud.Monitoring --version <version_number> --no-auto-upgrade --no-wait --force-update --protected-settings '{"workspaceKey": "<workspace_key>"}' --settings '{"workspaceId": "<workspace_id>"}' --resource-group "<rg_name>" --vm-name "<vm_name>" The Log Analytics version of your CloudGen Firewall is now set to the specified version.