

To stream log data and custom metrics from your firewall to a Log Analytics workspace in Microsoft Azure, you must connect the firewall VM to your Log Analytics workspace and configure syslog streaming on the firewall to send the syslog stream to Azure Log Analytics. For streaming logs to Log Analytics using the CEF format, you must configure Microsoft OMS Security as the streaming destination. On the Azure side, the virtual machines are connected to the Log Analytics workspace. All selected log files are then streamed to Azure Log Analytics, where they can be stored, analyzed, or processed. CloudGen Firewall boxes that run outside the Azure cloud can also be connected to a Microsoft Azure Log Analytics workspace. For more information, see How to Connect non-Azure CGFs to a Microsoft Azure Log Analytics Workspace.
Step 1. Create a Log Analytics Workspace
- Log into the Azure portal: https://portal.azure.com
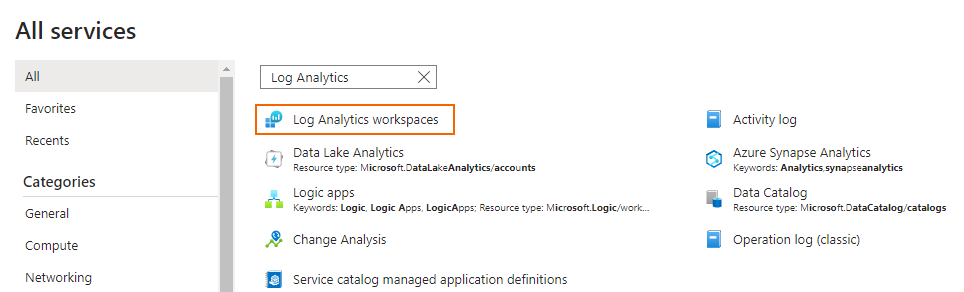
- Go to All services and search for Log Analytics.
- Select Log Analytics workspaces.
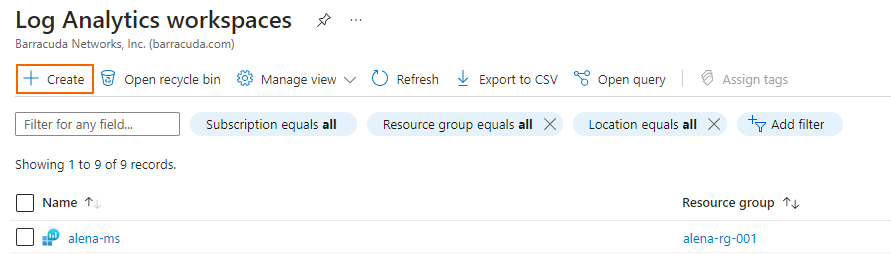
- In the Log Analytics workspaces blade, click Create.
- In the Log Analytics workspaces blade, enter the following information:
- Subscription – Select your subscription.
- Resource Group – Select an existing resource group, or create a new, dedicated resource group for your workspace.
- Name – Enter a name for the Log Analytics workspace.
- Region – Select the geographical location where the data for your workspace will be stored.
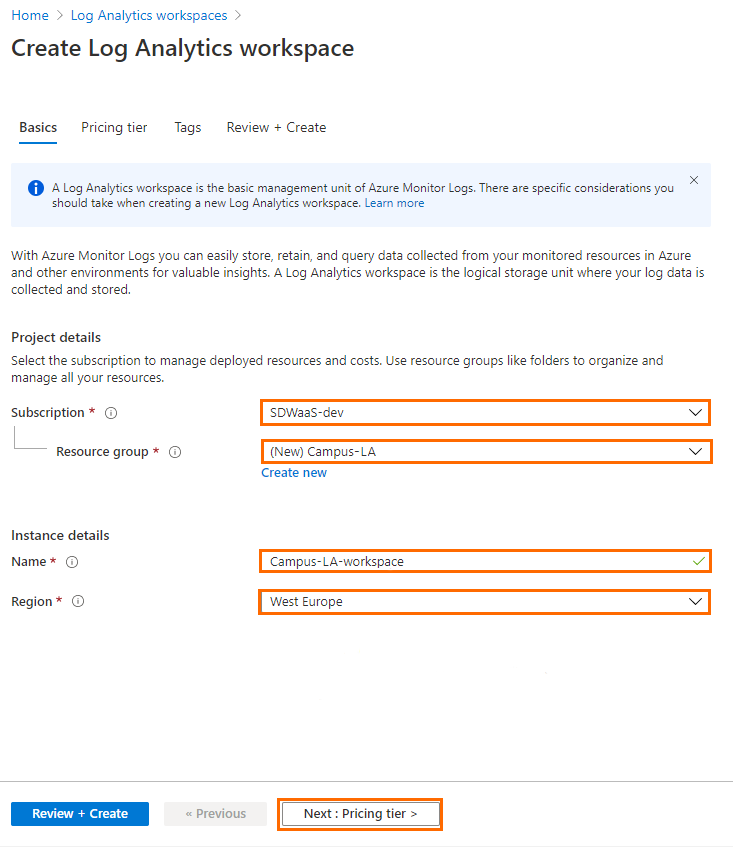
- Click Next : Pricing tier.
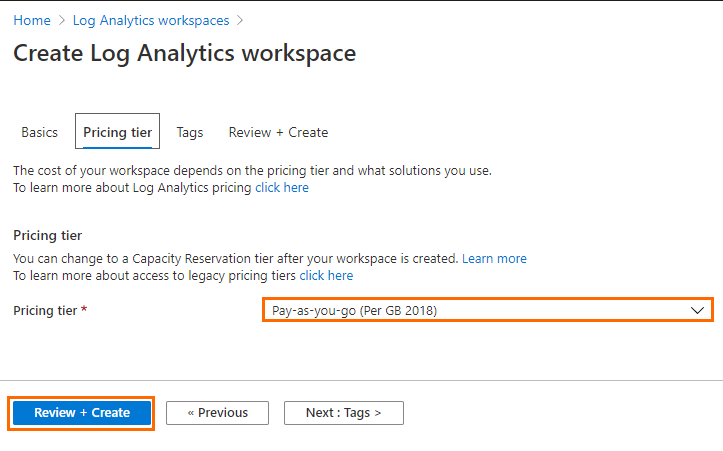
- The Pricing tier blade opens. Specify values for the following:
- Pricing tier – Select the pricing tier.
- Pricing tier – Select the pricing tier.
- Click Review + Create.
- The Review + Create blade opens. Verify your settings:
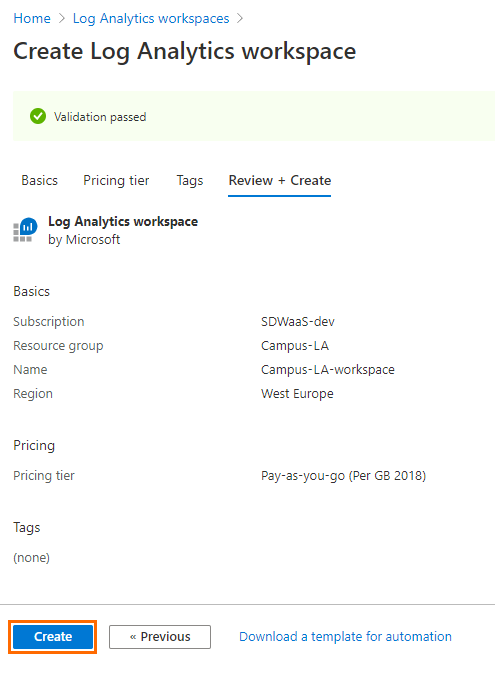
- Click Create.
- Click Refresh in the Log Analytics workspaces blade to display the new workspace.

Step 2. Install the Log Analytics Template
Install the Barracuda CloudGen Firewall Log Analytics ARM template to get the default dashboards, searches, and functions.
- The CloudGen Firewall ARM template to create a log analytics workspace is available on GitHub.
This template installs and configures all dashboards provided by the Barracuda CloudGen Firewall in the Log Analytics workspace. The Log Analytics workspace can be associated with a resource group created in any region.
Step 3. Connect Virtual Machines to the Log Analytics Workspace
- In the Azure portal, go to the workspace created in Step 1.
- In the Connect a data source section, click Azure Virtual machine (VMs).
- Search for the name of the CloudGen Firewall virtual machine that you want to connect to the workspace.
- Click the entry of your virtual machine.
- Click Connect.
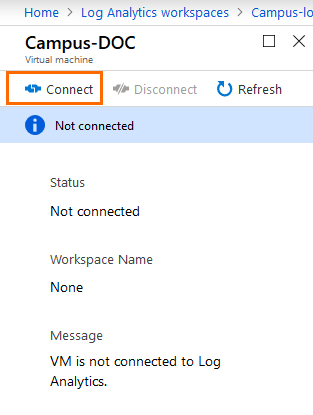
It may take a couple of minutes for the extension to be installed on the firewall.

Step 4. Enable Syslog Streaming on the Firewall VM
Enable syslog streaming on the Barracuda CloudGen Firewall.
- Go to CONFIGURATION > Configuration Tree > Box > Infrastructure Services > Syslog Streaming.
- Click Lock.
- Set Enable Syslog Streaming to yes.
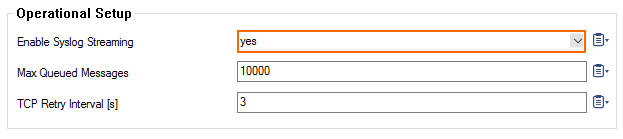
- Click Send Changes and Activate.
Step 5. Enable Detailed Firewall Reporting
- Go to Configuration Tree > Infrastructure Services > General Firewall Configuration.
- Click Lock.
- In the left menu, select Audit and Reporting.
- Under Log Policy, set the Activity Log Mode to Log-Pipe-Separated-Key-Value-List.
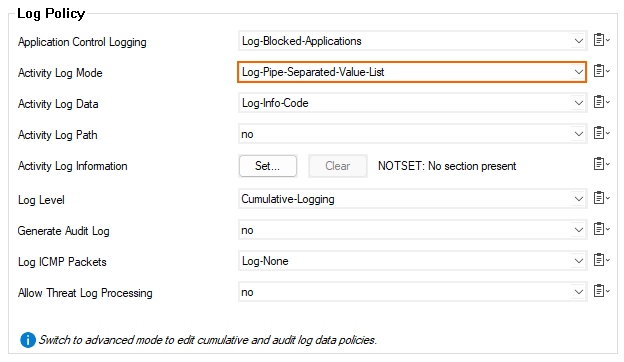
- Click Send Changes and Activate.
Step 6. Configure Logdata Filters
Define profiles specifying the log file types to be transferred / streamed. Log files are classified into top level, box level, and service level log data sources.
- Go to CONFIGURATION > Configuration Tree > Box > Infrastructure Services > Syslog Streaming .
- In the left menu, select Logdata Filters .
- Click Lock.
- In the Filters table, click + to add a new filter. The Filters window opens.
- Enter a Name.
- Click OK.
- In the Data Selection table, add the Top Level Logdata log files to be streamed. You can select:
- Fatal_log
- Firewall_Audit_Log – The firewall audit log must be enabled and configured, and Audit Delivery must be set to Syslog Proxy. For more information, see How to Enable the Firewall Audit Log Service. Alternatively, the firewall audit log can also be streamed as a part of the firewall service logs.
Panic_log

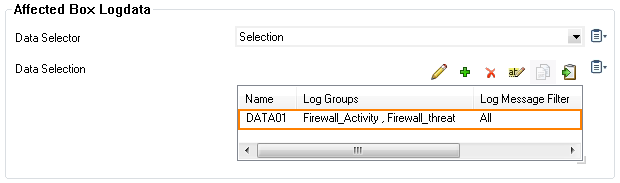
- Configure the Affected Box Logdata filters:
- From the Data Selector list, select which files for this category are streamed:
- All – All box level logs are streamed.
- None – Box level logs are not streamed.
- Selection – Only box level log files defined in the Data Selection list are streamed.
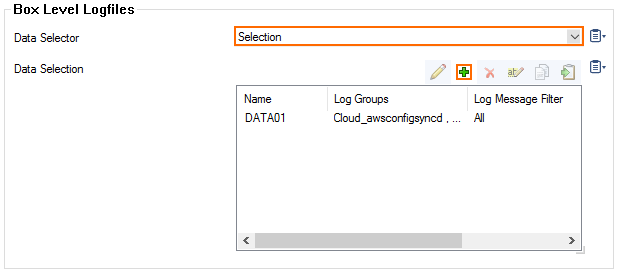
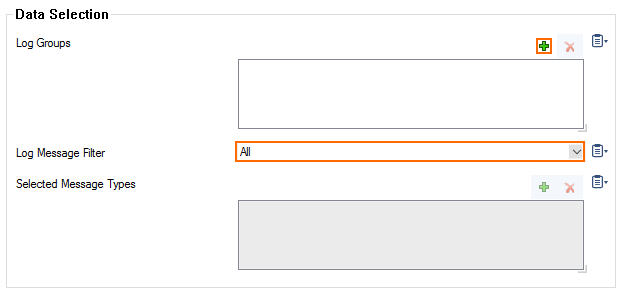
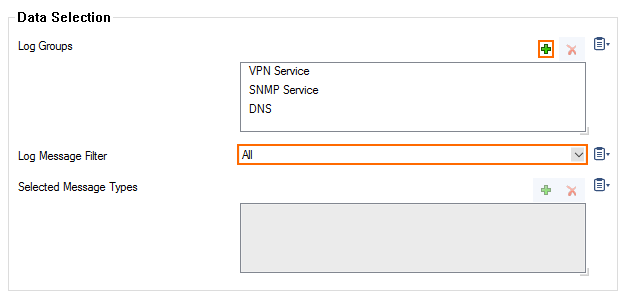
- (Selection only) Click + to add custom filters to the Data Selection table.
- In the Log Groups table, click +.
- (only for Microsoft Azure Log Analytics and standard syslog streaming) From Log Groups, select the box level log files, or select Other to enter a user defined log group pattern to stream log files matching this pattern.
- (optional for logfile streaming using CEF) From Log Groups, select Firewall-Activity-Only and Firewall-Threat-Only.
- (optional) From the Log Message Filter list, select the message types from the log group that is streamed.
- (Selection only) In the Selected Messages Types table, click + to add message types.
- Click OK.
- From the Data Selector list, select which files for this category are streamed:
- Configure the Affected Service Logdata filters:
- From the Data Selector list, select which files for this category are streamed:
- All – All service logs are streamed.
- None – Service level logs are not streamed.
- Selection – Only service level log files defined in the Data Selection list are streamed.
- (Selection only) Click + to add custom filters to the Data Selection table.
- In the Log Groups table, click +.
- Select the box level log files, or select Other to enter a user defined log group pattern to stream log files matching this pattern.
- (optional) From the Log Message Filter list, select the message types from the log group that are streamed.
- (Selection only) In the Selected Messages Types table, click + to add message types.
- Click OK.
- From the Data Selector list, select which files for this category are streamed:
Click Send Changes and Activate .
Step 7. Configure Azure Log Analytics as the Logstream Destination
Configure the firewall to send the syslog stream to Microsoft Azure Log Analytics.
- Go to CONFIGURATION > Configuration Tree > Box > Infrastructure Services > Syslog Streaming .
- In the left menu, select Logstream Destinations .
- Click Lock.
- In the Destinations table, click + to add a new filter. The Destinations window opens.
- Enter a Name.
- Click OK.
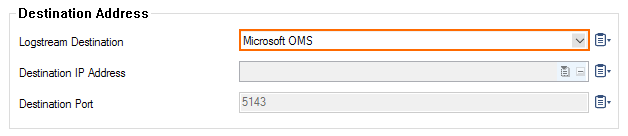
- (only for Microsoft Azure Log Analytics and standard syslog streaming) From the Logstream Destination list, select Microsoft OMS.
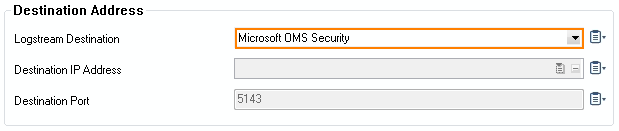
- (optional for logfile streaming using CEF) From the Logstream Destination list, select Microsoft OMS Security.
- Click OK.
- Click Send Changes and Activate.
Data sent to Log Analytics will show up under the Syslog tag in Azure Log Analytics. Data sent to Microsoft OMS Security can be found under CommonSecurityLog, which requires Security and Audit to be enabled in the workspace (select Configure monitoring solutions and search for the solution).
Step 8. Configure the Logdata Streams to Azure Log Analytics
Combine the logdata filters and logstream destination to a logdata stream.
- Go to CONFIGURATION > Configuration Tree > Box > Infrastructure Services > Syslog Streaming.
- In the left menu, select Logdata Streams .
- Click Lock.
- In the Streams table, click + to add a new syslog stream. The Streams window opens.
- Enter a Name.
- Click OK.
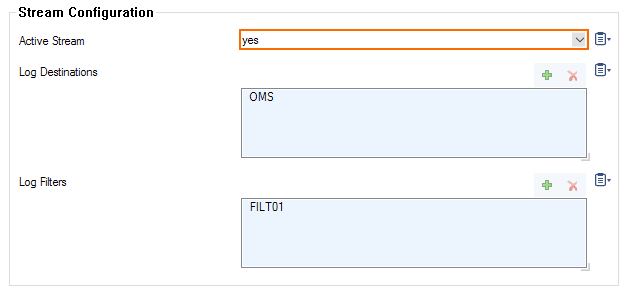
- Set Active Stream to yes.
In the Log Destinations table, click + and select the logstream destination configured in Step 5.
- In the Log Filters table, click + and select the logdata filter configured in Step 4. Choose either OMS or OMS Security as your log destination.
- Click OK.
- Click Send Changes and Activate.
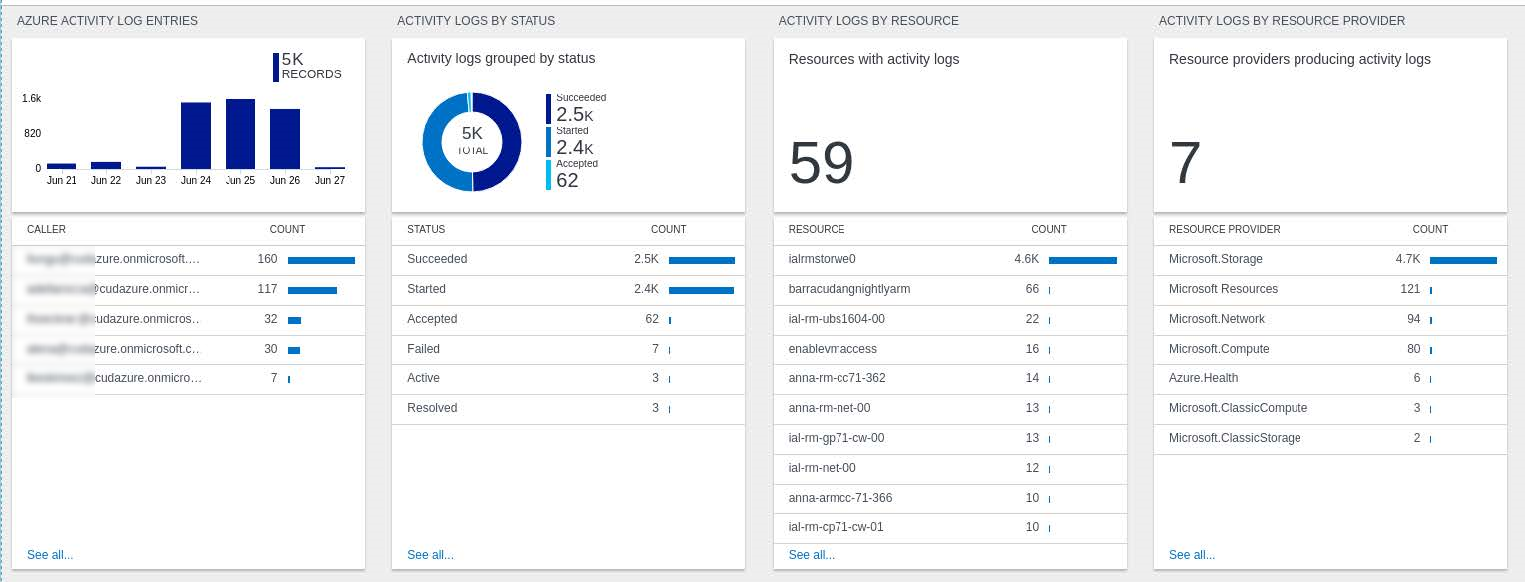
All logs covered by the logdata filter are now streamed to Microsoft Azure Log Analytics. It might take some time for logs to be displayed in the Azure Log Analytics portal.