

Use this article to deploy the Barracuda Cloud Archiving Service component for Exchange Server 2007 and 2010 in your environment. You must set up Barracuda Email Security Service before Barracuda Cloud Archiving Service.
Step 1. Activate the Service
- Log into Barracuda Cloud Archiving Service, and click Set up to the right of Cloud Archiving Service:

- Select your geographic location from the Country drop-down menu, and click Activate.
Step 2. Add Users to Your Barracuda Cloud Control Account
Add users through AD authentication and associate a role and whose mail can be viewed with an AD user or group, or manually configure and assign roles to local accounts in the web interface.
Understanding Roles
- User – Able only to view messages accessible to the account, either because the username for the account is also that of the sender or recipient of a message, or because it has been given explicit access to view an email address via Alias Linking.
- Auditor – Able to create and activate policies, and view, search, and export any messages to/from the domains to which they have access. Additionally, Auditors can save and name an Advanced search for re-execution at a later time from the Saved Searches tab. To create a "Domain Auditor" (an auditor with access to only a subset of the domains on your Barracuda Cloud Archiving Service), set the role to Auditor and specify at least one domain. If no domains are specified, then all messages in the entire Barracuda Cloud Archiving Service are accessible. No auditor account has access to any system or network configuration information on the Barracuda Cloud Archiving Service.
- Admin – Able to view all items from any user, not just those listed for the account. Also able to create and activate policies, and can make other system or network changes.
Active Directory Configuration
Use AD authentication to store and administer Barracuda Cloud Archiving Service user accounts via your organization's LDAP or Azure AD.
Add LDAP Active Directory
Use the following steps to set up Barracuda Cloud Control LDAP authentication:
Log into https://login.barracudanetworks.com/ as the account administrator, and go to Admin > Directories.
- Click Add Directory > LDAP Active Directory ; the Create Directory wizard displays. In the Info page, specify the following details:
- Enter a name to represent the directory in the Directory Name field.
- Toggle User / Group Sync to On to synchronize with AD.
- Toggle Authenticate to On to allow users to authenticate using their LDAP AD credentials. When toggled Off, users must authenticate using their Barracuda Cloud Control credentials.
- Optionally, enter the administrator contact email address.
- Click Save & Continue.
- In the Host page, enter the following details for your LDAP host:
LDAP Host IP address
LDAP Host Port
Base domain name
Username
Password
Select the Connection Security as STARTTLS, LDAPS, or None.
- Click Add Domain; the domain is added to the Domains field. Click Verify.
- Click Test to verify connectivity. If the connection is successful, Connected displays. If the connection fails, verify the entered LDAP host details. Click Continue.
- In the Domains page, click Add domain to add the domain to the AD configuration. Complete this step for each domain you want to add.
- To verify you own the domains you plan to include in your AD configuration, select the manner in which to verify the domains:
- Copy a META tag to your domain header, or
- Add a TXT record to your host's DNS management settings
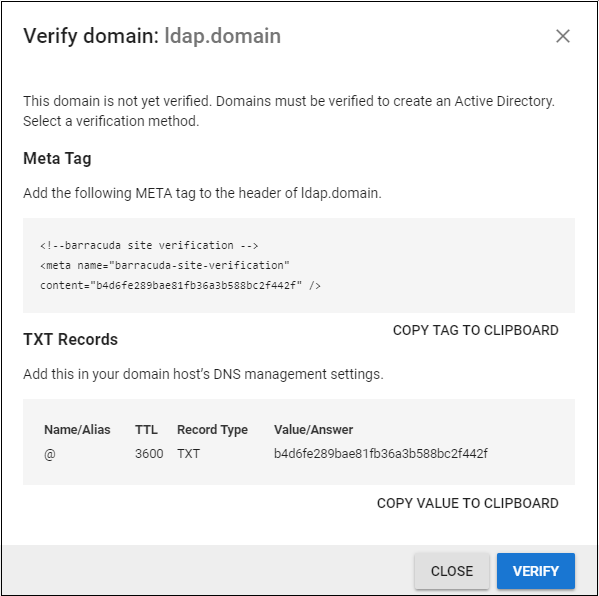
Click Verify. Once the domain is verified, it is added to the Directories table in the Admin > Directories page in Barracuda Cloud Control.
Add Azure Active Directory
Associate a Role
- Go to the Users > LDAP User Add/Update page.
- In the LDAP User/Group field, enter the User or Group name to which the permissions apply.
- Select the Role for the specified user or group account:
- User Role – Specify mailbox addresses to include or exclude from the account:
Include these Addresses – Enter a mailbox address that you wish to make available to the specified account, and then click Add.
Exclude these Addresses – Enter a mailbox address that you wish to hide from the specified account, and then click Add.
Auditor Role – Configure the desired permissions:
Domains – Enter a domain for which the auditor can view mail, and then click Add.
Saved Search – Define Saved Searches on the Basic > Search page, and then select the desired Saved Search from the drop-down menu to filter the auditor's search results.
Exclude these addresses – Enter a mailbox address that you want to hide from the specified account, and then click Add.
Admin Role – Specify mailbox addresses that you want to hide from the specified account, and then click Add.
- User Role – Specify mailbox addresses to include or exclude from the account:
Click Save.
Manually Add Local Accounts
Step 3. Set Up Journaling
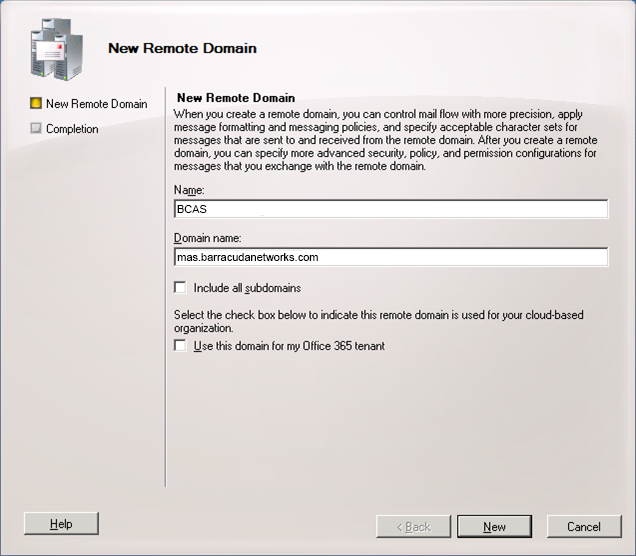
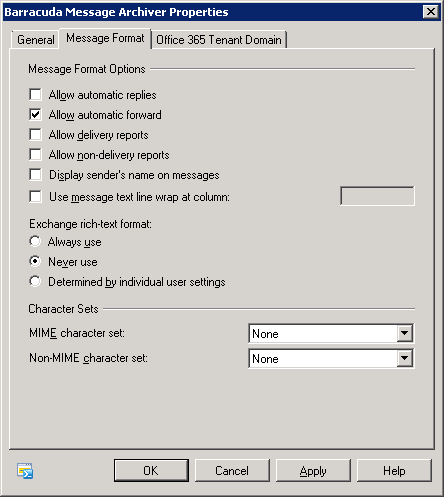
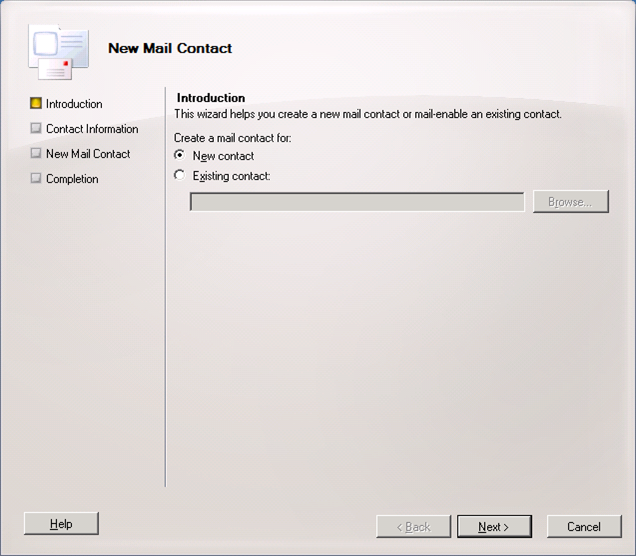
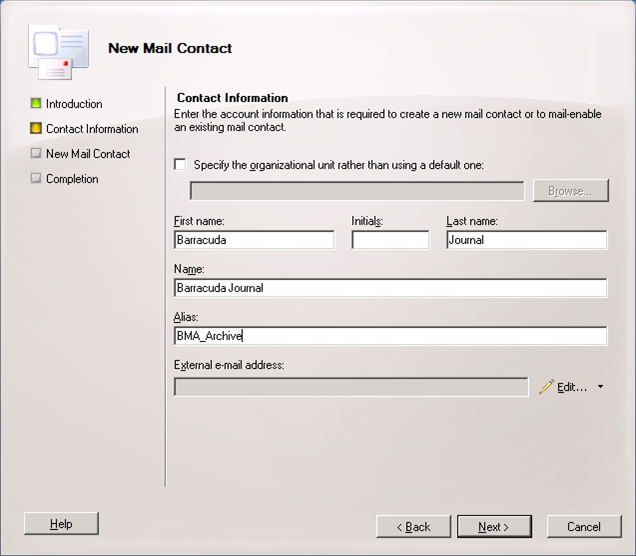
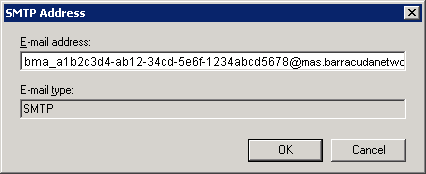
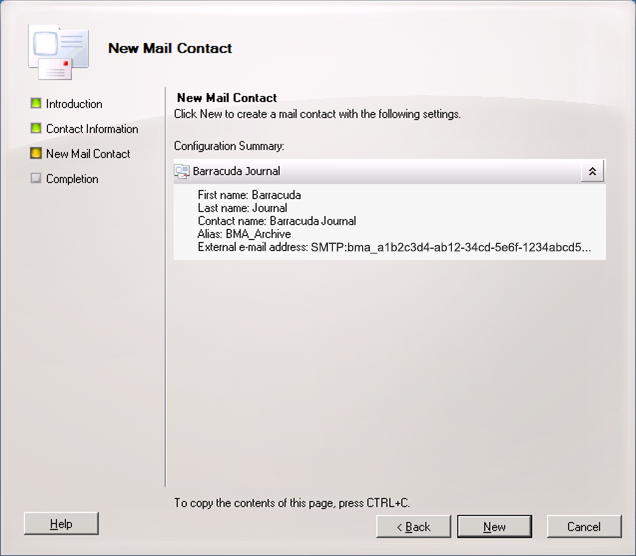
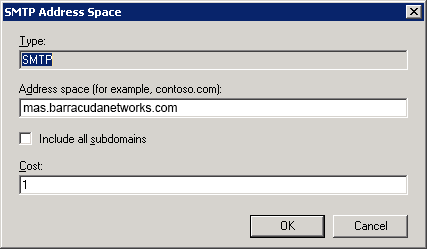
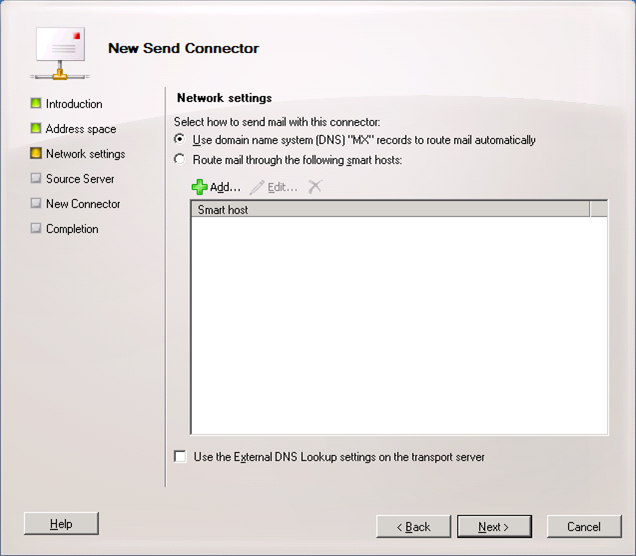
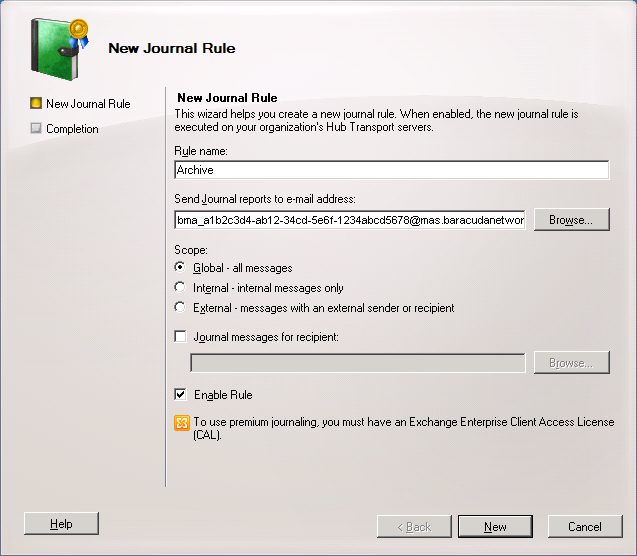
Once the Barracuda Cloud Archiving Service is configured to receive SMTP traffic, you must complete the following from the Exchange Management Console (EMC) of each Exchange Server that will be journaling directly into the Barracuda Cloud Archiving Service: Step 1. Create Remote Domain The Remote Domain must match the Mail Contact that is the recipient of journaled messages as it is used by the Exchange Server for routing all SMTP Journal traffic. Use the following steps to create a remote domain: In the Name field, type BCAS, and in the Domain name field, type your region-specific MAS hostname, for example: mas.barracudanetworks.com In the Exchange rich-text format section, select Never Use: Step 2. Create Mail Contact The Mail Contact is the account that is to act as a "holding location" for journaled messages. The email address associated with this account is the designated recipient. Use the following steps to create a Mail Contact: Click Edit to the right of the External e-mail address field, and in the SMTP Address dialog, enter the journaling address from the Mail Sources > SMTP Journaling page in the Barracuda Cloud Archiving Service web interface: Step 3. Create Send Connector In the Address space field, type your region-specific MAS hostname, for example: mas.barracudanetworks.com Step 4. Create Journaling Rule Both the Standard and Enterprise versions of Microsoft Exchange Server 2007 and 2010 support Standard and Premium Journaling. Open the EMC, and complete the following steps to add a journaling rule:

Use Case Examples
This section includes a set of examples you can walk through to further evaluate the Barracuda Cloud Archiving Service.
Example 1. Add a User in the Auditor Role who can View and Search Mail without Domain Limits.
The Barracuda Cloud Archiving Service supports three user roles:
- User – The user can view and search content associated with their own mailbox and any shared mailboxes.
- Auditor – The auditor can view all items from any user, and can create and activate policies. Note that the auditor role can be restricted to specific domains and Saved Searches by the Admin role.
- Admin – The admin can view all items from any user, create and activate policies, and make system and network changes.
In this example, the administrator adds Ryan in the auditor role without domain limits:
Step 1: Create a Saved Search
On the Basic > Search page, click Advanced. Select Email > Entire Message > contains, and type
petition*as the first set of search criteria.- Click the + symbol to the left of the search parameter, select Email > Domain > contains, and type
corporatenamehere.com:

- Click Search to execute the search and verify that the provided search parameters return the expected results.
- Click Save Search, type Petition Audit in the Search Name field:
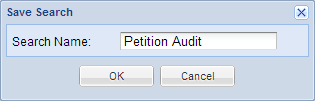
- Click OK; the search is added to the Saved Searches page.
Step 2: Add User
- On the Users > LDAP User Add/Update page, enter the user's email address,
rdouglas@corporatenamehere.com, in the LDAP User/Group field. - Select Auditor from the Role drop-down menu.
- Leave the Domain field blank to allow Ryan to access all items from all domains.
- From the Saved Search drop-down menu, select Petition Audit:
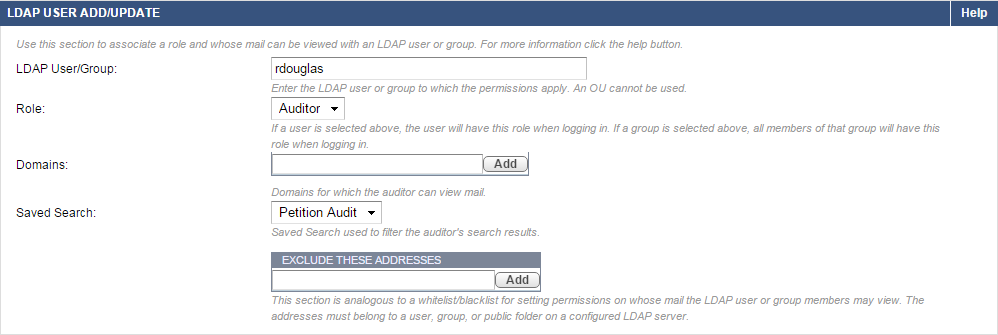
- Click Save at the top of the page to add the new user.
Ryan is added as a user with the auditor role, and the Petition Audit Saved Search criteria is automatically applied to all searches performed by Ryan.
Example 2. Create a Litigation Hold (Auditor Role Only).
A user with the auditor role can create litigation holds which prevent messages matching the criteria of a specific Saved Search from being removed from the Barracuda Cloud Archiving Service. On the Basic > Search > Saved Search page, litigation hold details include:
- Auditor – The account name of the auditor who created the Litigation Hold
- Saved Search – The name of the Saved Search associated with this Litigation Hold
- Hold End Date – The date and time when this Litigation Hold expires
Before an auditor can set up a litigation hold, the administrator must first enable litigation holds by completing the following steps:
- Log into the Barracuda Cloud Archiving Service, and go to the Policy > Retention page.
- Set Enable Litigation Holds to Yes, and click Save.
In this example, Sue is a user with the auditor role at a large corporation, and has been asked to set up a litigation hold to retain all emails related to the user 'Dallen' from their client 'CorpName'. Sue uses the following steps to set up the litigation hold:
- Log into the Barracuda Cloud Archiving Service in the auditor role.
- Go to the Basic > Search page, and click Advanced.
- Select Email > Domain > contains, and type @corpname.com as the domain name. Click the + symbol to the left of the search parameter.
- Select Email > From/To/Cc > contains, and type dallen as the second set of search criteria:

- Click Search to execute the search and verify that the provided search parameters return the expected results.
- Click Save Search, and type dallen - Litigation Hold as the Saved Search name:
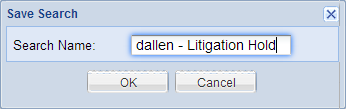
- Click OK. Click the Saved Searches tab:

- In the Actions column, click Apply Litigation Hold. In the Apply Litigation Hold window, to hold the associated emails indefinitely, click None, or you can specify a specific expiry date.
- For this example, select Specific Date, click the Calendar icon, and select the date to end the litigation hold.
- Click OK to apply the litigation hold.
Once a litigation hold is added, it displays in the Litigation Holds section on the Policy > Retention page when a user is logged in using the admin role:

Example 3. Create Retention Policies
By default, automated message purging on the Barracuda Cloud Archiving Service is disabled. If you enable this ability, the Global Retention Policy and any Saved-Search retention policies are compared to all archived messages once a week. You can allow these messages to be deleted from the Barracuda Cloud Archiving Service based on the Saved Search retention policies. Note that before you can create a Saved Search retention policy, you must create at least one Saved Search in the Basic > Search > Advanced Search page.
A Saved Search retention policy enables you to automatically expire messages matching a specified saved search. Use this feature to create exceptions to the Global Retention Policy.
In this example, Kari is the administrator and wants to set the maximum age of a set of archived messages before they are permanently purged from the archive. Kari uses the following steps to set up a retention policy based on a Saved Search:
- Go to the Basic > Search page, and create a Saved Search with the desired criteria.
- Go to the Policy > Retention page, and set Allow automatic message deletion to Yes.
- Note the value of the Policy Length that is set for the Global Retention Policy.
- Click Add Retention Policy, and set the retention policy criteria:
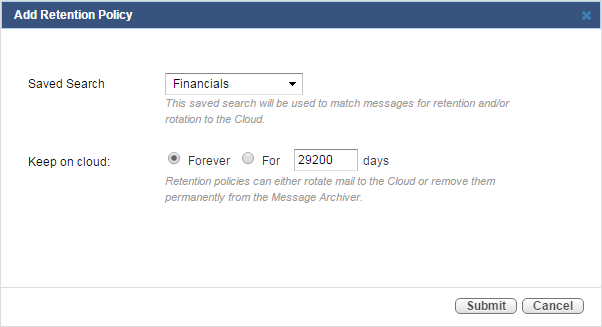
- Click Submit to save the Saved Search retention policy, and then click Save in the Policy > Retention page and add it to the table.
Example 4. Search Mail Using the Web Interface.
There are two search modes on the Basic > Search page:
- Basic – Run a search based on a word or phrase across all messages accessible by your account.
- Advanced – Run a complex search query based on multiple criteria; note that you can save queries for future use.
When you initially go to the Basic > Search page, all messages accessible by your account display in the message list in the Standard tab.
Use the Basic Search mode to perform a quick search across all of your messages. Use Advanced Search mode to perform complex search queries based on selected attributes.
In this example, Uma works in a real estate office. She recently closed a sale for property on Hernandez Avenue with M. Beckly. The procedure in the office is to burn a CD with all correspondence regarding a sale once the sale is complete. Uma needs to search for all messages related to the sale, and then export the messages to a .zip file:
- Log into the Barracuda Cloud Archiving Service as a user.
- Go to the Basic > Search page, and click Advanced.
- Select Email > From/To/Cc > contains, type
becklyas the first set of search criteria, and then click the + symbol to the left of the search parameter. - To the right of the first set of search criteria, click AND to toggle to OR.
- Select All > Entire Message > contains, and type
hernandez:

- Click Search to execute the search and verify that the provided search parameters return the expected results.
- In the results window, use Ctrl- and Shift-click to select all of the messages to include in the .zip file.
- Click the Tools menu, and select Export Messages; in the Export Messages dialog box, specify the export details:
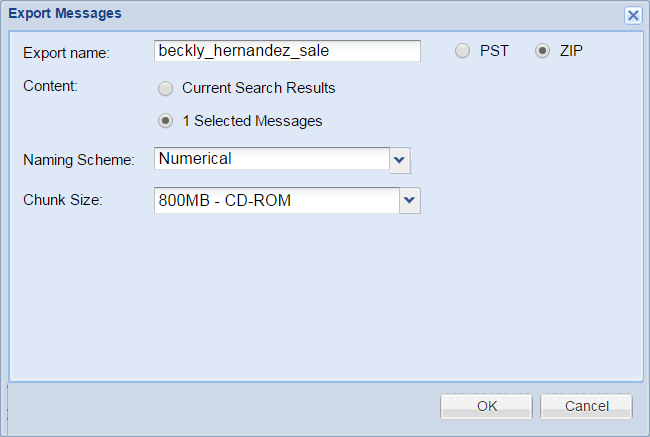
- Click OK. Go to the Tasks tab to view the download progress. Once the download is complete, select the export, and click Download to save the .zip file to your local system.
Uma can now burn the .zip file to a CD to place in M. Beckly's customer file.
Example 5. Set Up Authorized Search of Another User's Email.
In this example, Abe is a legal assistant for Dale. Dale often needs Abe to search through his email on his behalf. To avoid sharing Dale's LDAP credentials with Abe, the administrator creates a local user account with entitlements so that Abe can access Dale's email:
Step 1. Administrator Creates a Local User Account
- Login to the Barracuda Cloud Archiving Service as the account administrator.
- Go to the Users > LDAP User Add/Update page.
- Type Abe's email address,
abe@corporate.com, in the Email Address field, and select User from the Role drop-down menu. - In the Include These Addresses field, type Dale's email address,
dale@corporate.com:

- Click Add, and click Save.
Step 2. Abe Searches Dale's Email
Dale asks Abe to search his account for all email correspondence with MarilynCorp during May, 2015.
- Abe logs in to the Barracuda Cloud Archiving Service.
- Go to the Basic > Search page, and click Advanced.
- Select Email > Entire Message, and type MarilynCorp as the first set of search criteria.
- Click the + symbol to the left of the search parameter. To the right of the first set of search criteria, leave the value as AND.
- Select Email > Date > on or after , click in the associated field, and type or select the date 2015-05-01.
- Click the + symbol to the left of the search parameter. To the right of the first set of search criteria, leave the value as AND.
- Select Email > Date > on or before , click in the associated field, and type or select the date 2015-05-31:

- Click Search to execute the search.
Step 3. Abe Saves Search Results
Abe now saves the search results as a .csv file that his manager, Dale, can download from the Tasks tab.
- Once the search results are returned, from the Tools menu, click Save Results as CSV.
- In the Export Name field, type MarilynCorpArchive:
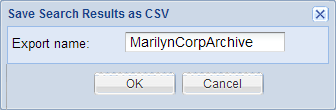
- Click OK. The .csv file is now available for download from the Tasks tab.
- Dale selects the item in the table, and clicks Download to save the .csv file to his local system.
Example 6. View Statistics.
View operating status on the Basic > Dashboard page when you log in to the Barracuda Cloud Archiving Service using either the auditor or administrator role as described in the following table. Please note statistics are cached and may take up to thirty minutes to appear.
| Status Type | Description |
|---|---|
| Message Statistics | A snapshot of archived email, appointments, contacts, distribution lists, notes, and tasks. |
| Performance Statistics (1) | Current operating status and performance of the Barracuda Cloud Archiving Service. |
| Storage Statistics (1) | Statistics on the amount of data stored on the Barracuda Cloud Archiving Service by hour, day, and total. |
| Subscription Status (1) | Current status of your Barracuda Cloud Archiving Service subscription. |
| Email Statistics | Breakdown of message traffic and policy violations for the last 24 hours and last 30 days. |
| Note: (1)Statistics for this item are not visible when a user is logged in with the auditor role. | |
Example 7. Tools and Add-Ins.
You can download and install Barracuda Cloud Archiving Service tools and add-ins to your local system.
Barracuda Cloud Archiving Service Outlook Add-In – The Barracuda Cloud Archiving Service Outlook Add-in allows users to perform various functions with messages that are stored on your organization's Barracuda Cloud Archiving Service, including:
- Synchronization of your archived folders with Outlook
- Search for archived messages and other Microsoft Outlook data, such as Contacts
- View and interact with (forward, reply to, etc.) all of your archived Outlook items
- Archive messages
Barracuda Cloud Archiving Service Standalone Search Utility – The Stand-Alone Search Utility provides access to the search features of the Barracuda Cloud Archiving Service for Mac OS X and Microsoft Windows users. This utility allows users to search through their own archived messages directly from their desktop without needing to log in to the Barracuda Cloud Archiving Service web interface, and perform actions such as forwarding or replying to the located messages.