

The Barracuda SecureEdge Manager allows administrators to enforce private points of presence (points of entry) in the Barracuda SecureEdge environment. In Barracuda SecureEdge, you can configure three different types of private points of presence: Firewalls, Edge Services, and Sites.
Configure Private Points of Presence
Open https://se.barracudanetworks.com/ in your web browser and log in with your existing Barracuda Cloud Control account.
The chosen Tenant/Workspace is displayed in the top menu bar.

From the drop-down menu, select the workspace your private points of presence should be assigned to.
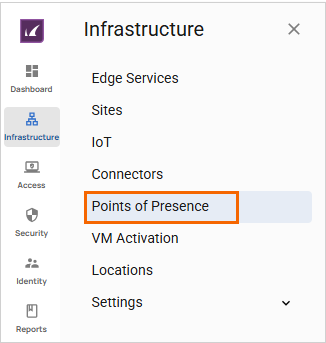
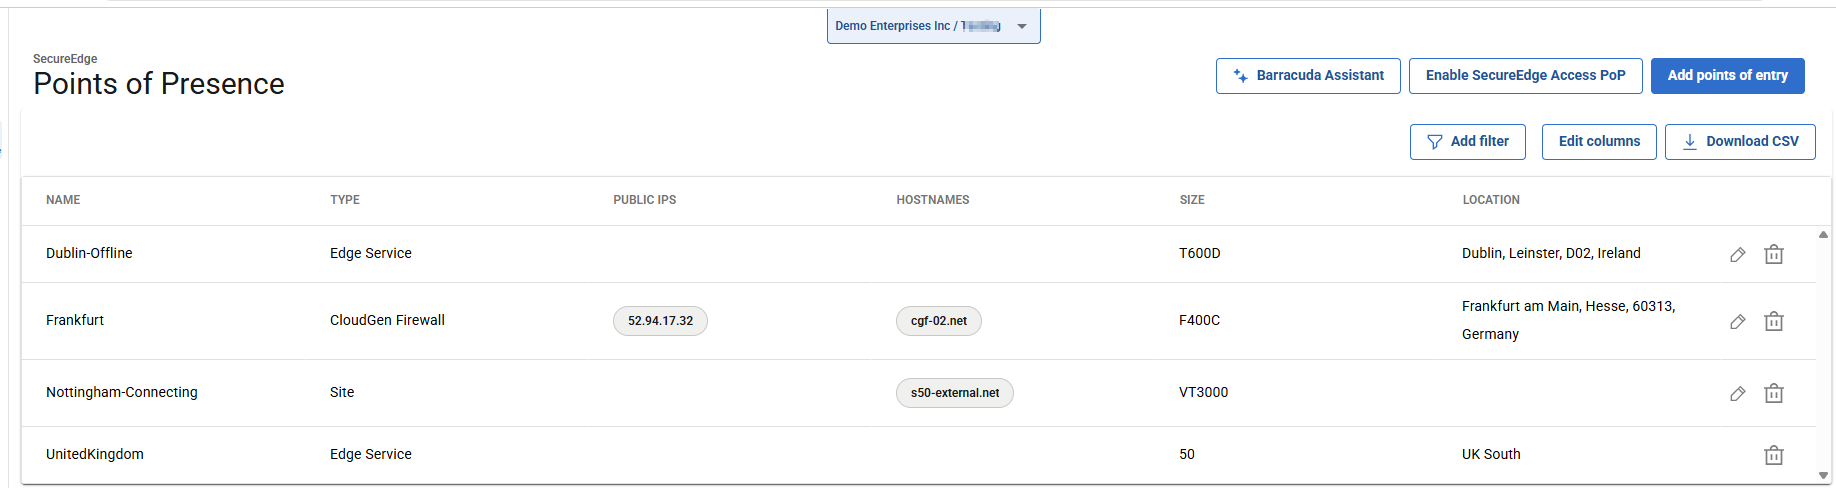
In the left menu, click the Infrastructure icon, and select Points of Presence.
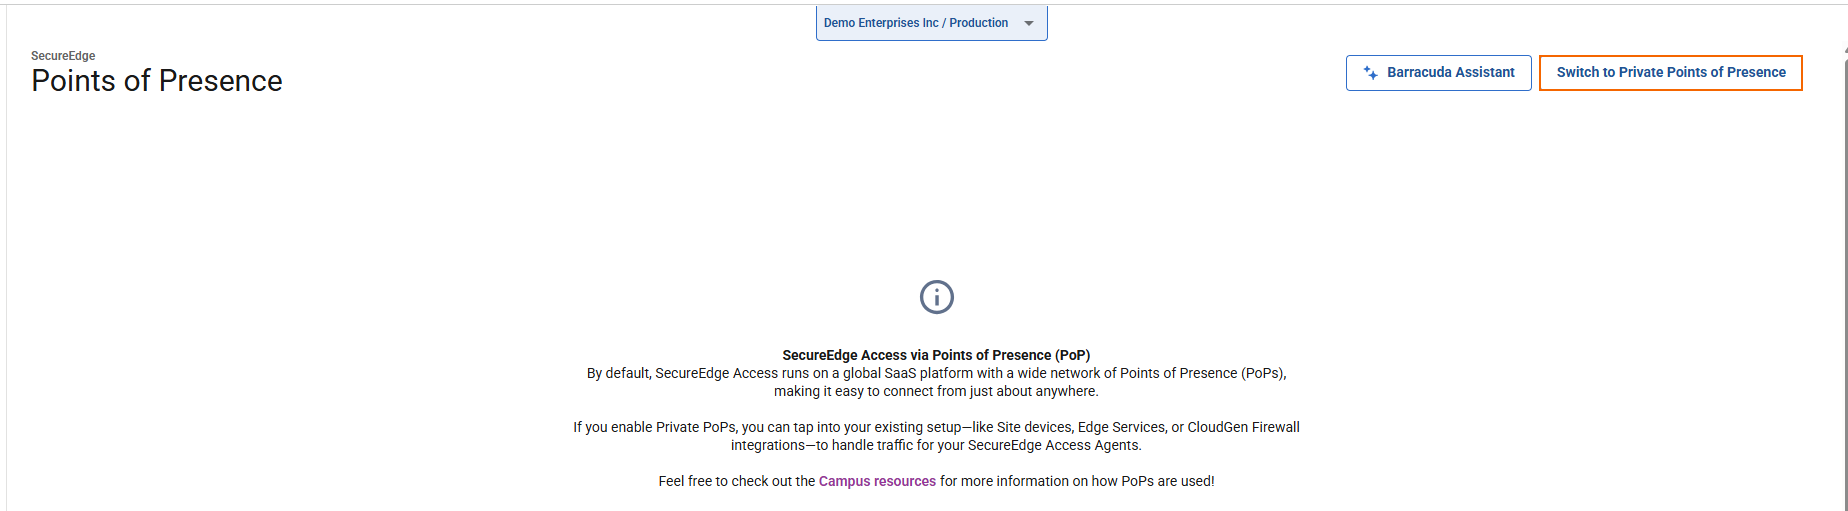
The Points of Presence page opens. Note: By default, SecureEdge Access via PoPs is enabled.
To configure private points of presence, click Switch to Private Points of Presence.
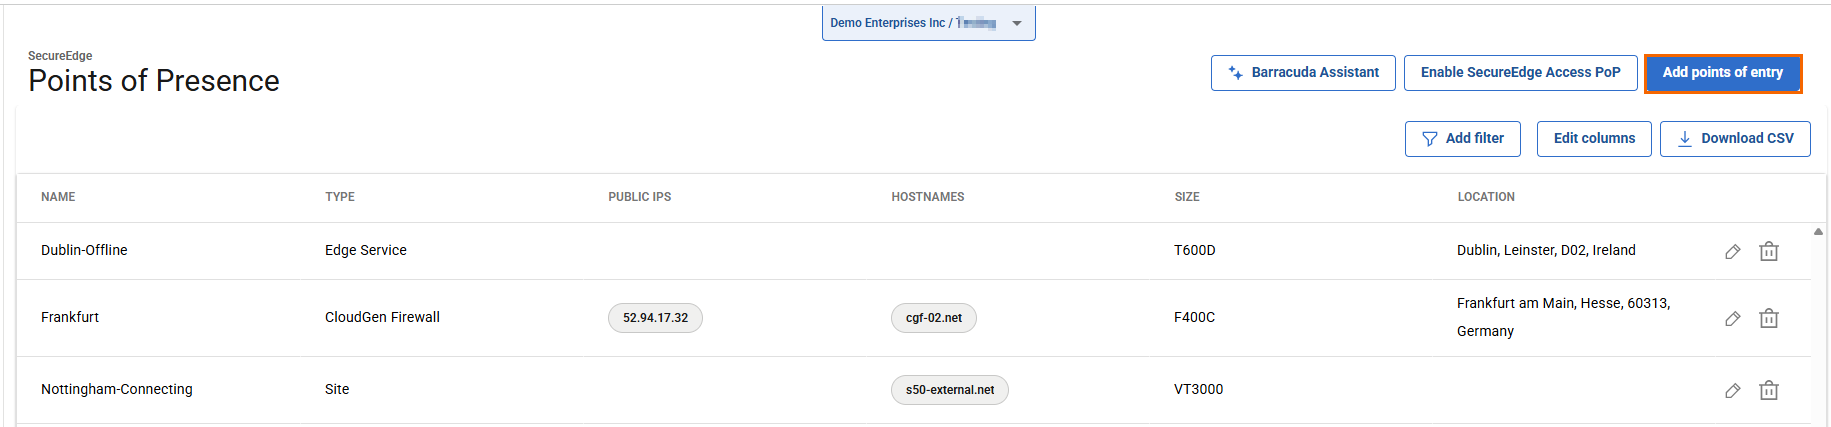
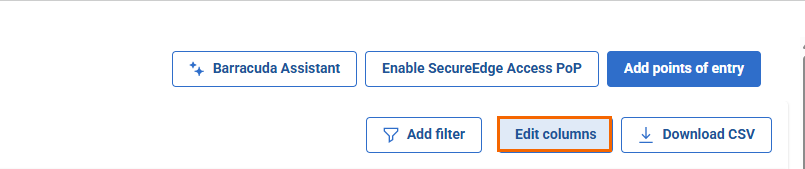
In the top-right corner of the window, click Add points of entry.
The Add Private Points of Presence page opens. Select a private point of presence. You can choose among the following:
Firewalls – Select the firewall from the drop-down list, or type to search.
Edge Services – Select the edge service from the drop-down list, or type to search.
Sites – Select the site from the drop-down list, or type to search.
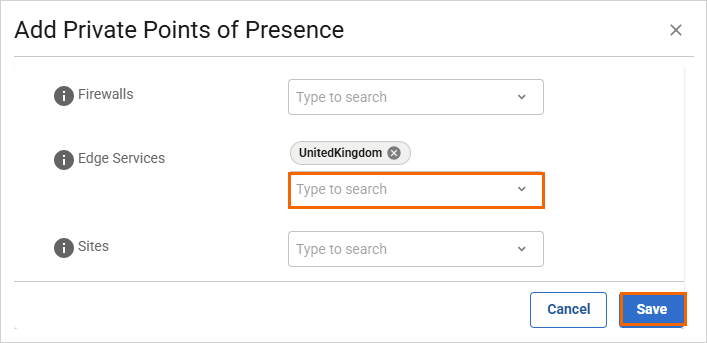
Click Save.
After configuration is finished, you can see that a new Edge Service has been enrolled in the Barracuda SecureEdge environment.
Edit an Existing Private Point of Presence
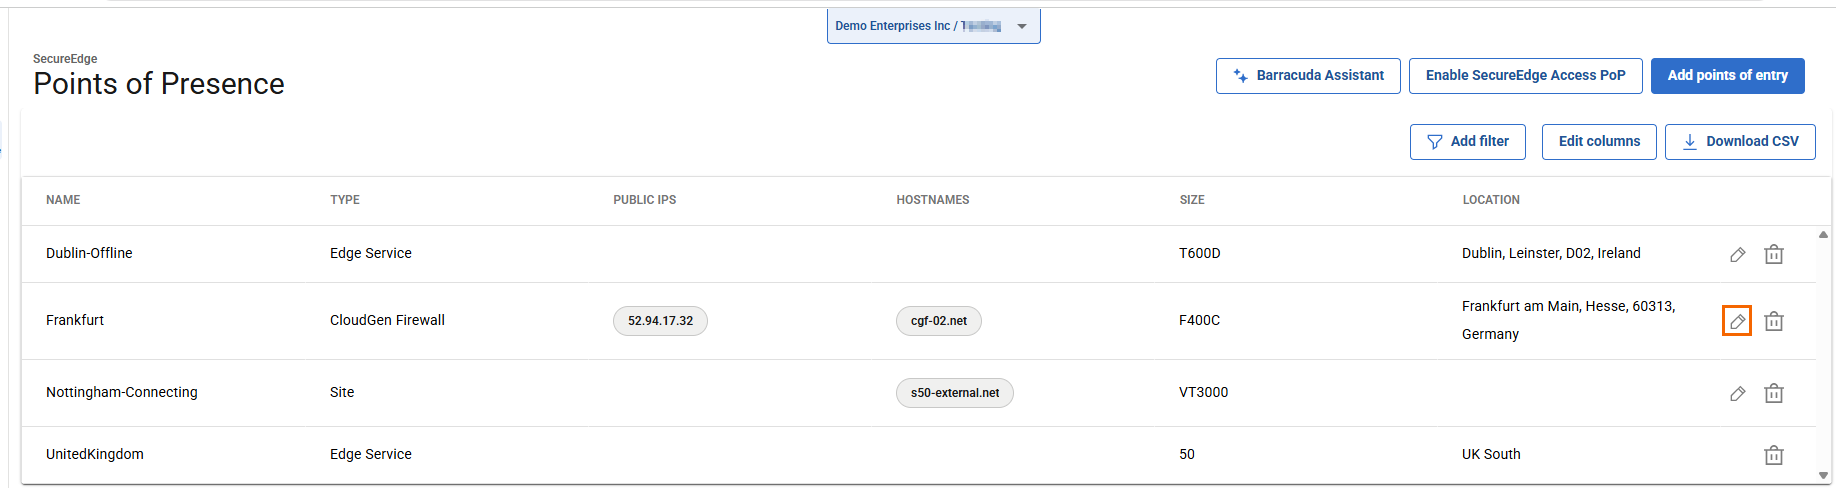
To edit an existing private point of presence for a CloudGen Firewall:
Go to Infrastructure > Points of Presence.
Click on the pencil icon next to the firewall you want to edit.
The Edit Private Point of Presence window opens. Edit the value you are interested in.
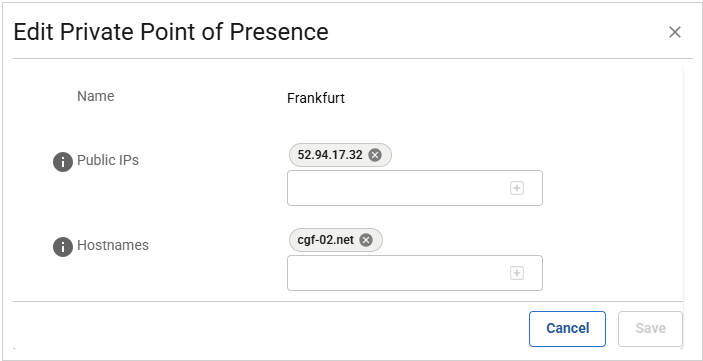
Click Save.
Remove an Existing Private Point of Presence
Go to Infrastructure > Points of Presence.
Click on the trash can icon next to the private point of presence for firewalls, edge services, or sites you want to remove.

The Delete Private Point of Presence window opens.
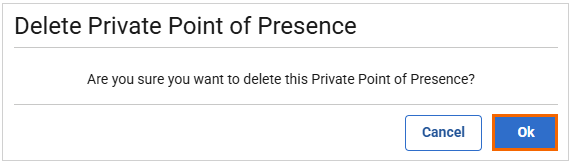
Click OK to confirm.
(Optional) Edit Visible Columns
To get more detailed information on private points of presence, click Edit columns.
The Edit Visible Columns page opens.
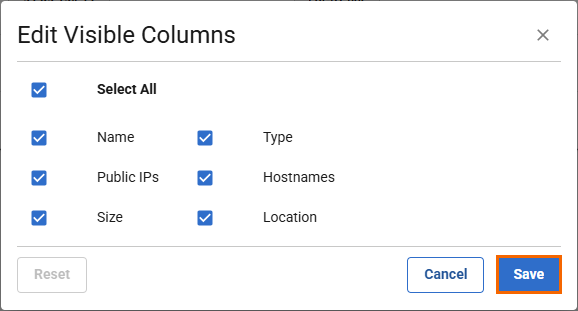
Select the field names you wish to display the columns for, and click Save.
Filtering Features
You can add filters to view specific content on the page. Click Add Filter in the top-right corner of a page, and select the criteria you wish to search for.

To reset the filter, click Clear Filters.
(Optional) Enable SecureEdge Access PoP
To enable SecureEdge Access via PoP:
On the Points of Presence page, click Enable SecureEdge Access PoP in the top-right corner.

For more information, see Understanding Points of Presence (PoPs) and Points of Entry (PoEs).