

The SecureEdge Dashboard displays the entry point into the SecureEdge Access wizard via the Status dashboard. The SecureEdge Access wizard is a self-explanatory, step-by-step guide.

The Benefits of Using the SecureEdge Access Setup Wizard
It provides an easy, step-by-step process to set up all your components or infrastructures required in SecureEdge for ZTNA use cases.
It allows administrators to input information in a prescribed order.
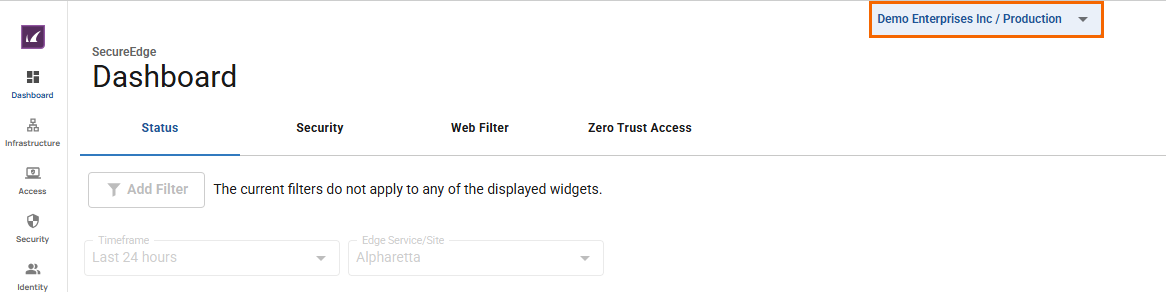
On the Status dashboard page, you can see an overview of your existing complete/incomplete configuration and the entry point link to the wizard itself.
After deploying the basic SecureEdge infrastructure and getting ZTNA deployed, you can verify the capabilities of the SecureEdge ZTNA solution.
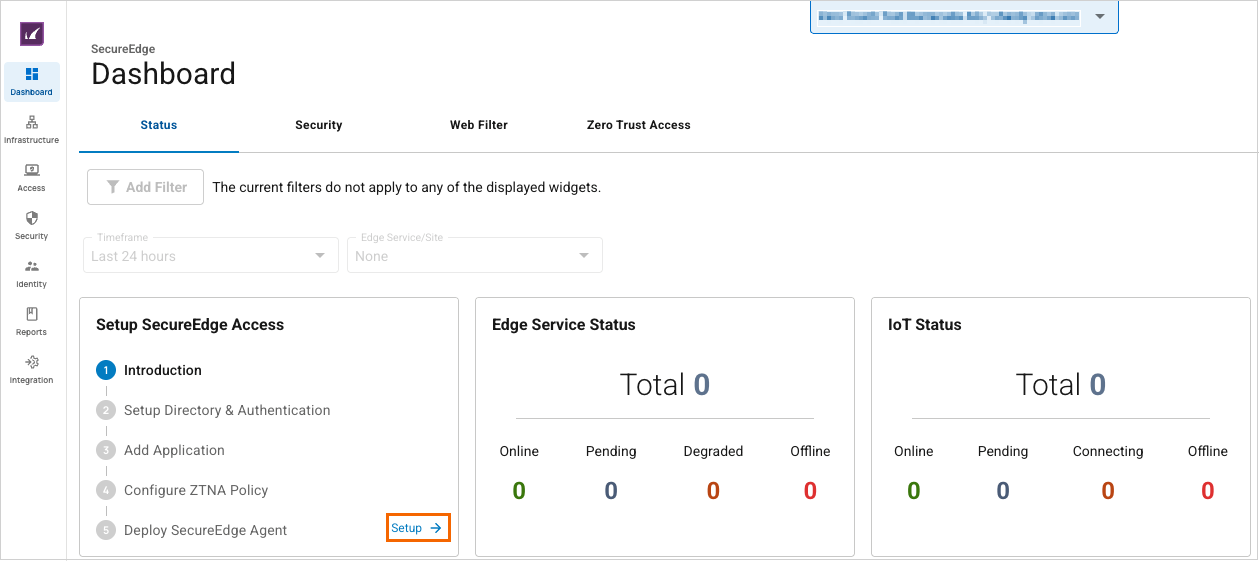
The Set Up SecureEdge Access card/widget allows you to do the following:
The entire card/widget steps are clickable and will open the wizard from your previous point of configuration.
The card/widget displays the completion status of the individual wizard steps with a green check mark. If a wizard step displays a green check mark, you can proceed with next step. In addition, you can see relevant resources that you have already deployed, and verify the deployment status.
You can change the Setup SecureEdge Access card appearance per workspace.
You can drag-and-drop the ZTNA card.
You can always edit the dashboard to show/hide the Setup SecureEdge Access card and save it in your dashboard.
After completing the simple wizard process, you can add more advanced ZTNA settings in the SecureEdge Manager.
Verify the Status of the SecureEdge Access Setup
Go to https://se.barracudanetworks.com and log in with your existing Barracuda Cloud Control account.
The chosen Tenant/Workspace is displayed in the top menu bar.
Click the expandable drop-down menu and select the workspace you want to access information on the dashboard for.
Click the Dashboard icon. The Status dashboard page opens. In the Setup SecureEdge Access section, you can verify the status of your deployed infrastructure. For example, if you have not completed the step (“Configure ZTNA Policy”), the wizard will take you there.

To start from scratch, proceed with the following steps:
Step 1: Introduction
After selecting the workspace for SecureEdge Access configuration, go to the Status dashboard.
In the upper-left corner, locate the Setup SecureEdge Access wizard.
Click Setup to start the wizard.
The ZTNA page opens with a brief introduction to ZTNA and key information about the wizard. Note that SecureEdge Access will be created using Points of Presence (PoP).
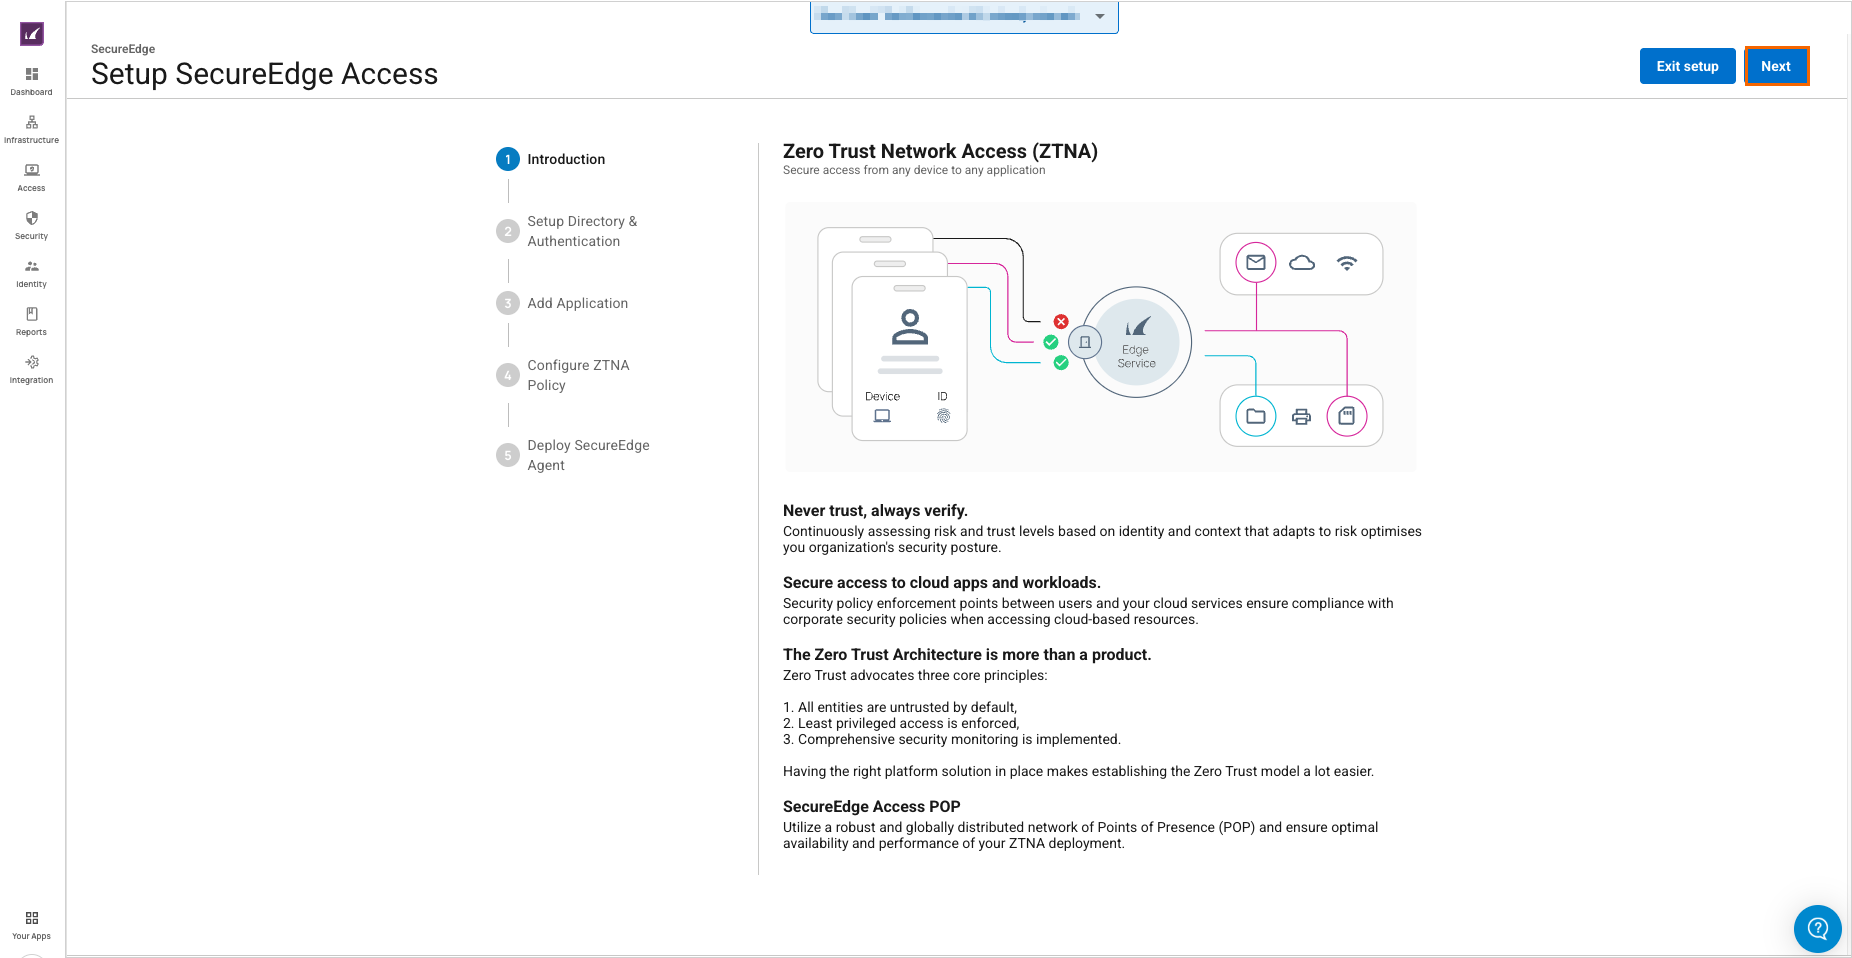
Click Next. After completing the first step, the Introduction icon displays a green check mark.
For more information on points of presence, see How to Configure SecureEdge Access via Points of Presence.
Step 2: Setup Directory & Authentication
The Setup user directory and authentication page opens. Complete the following steps:
Create a local user directory. To add a user, you must specify the username and email. Click + Add user.
Repeat this process for up to 5 users.
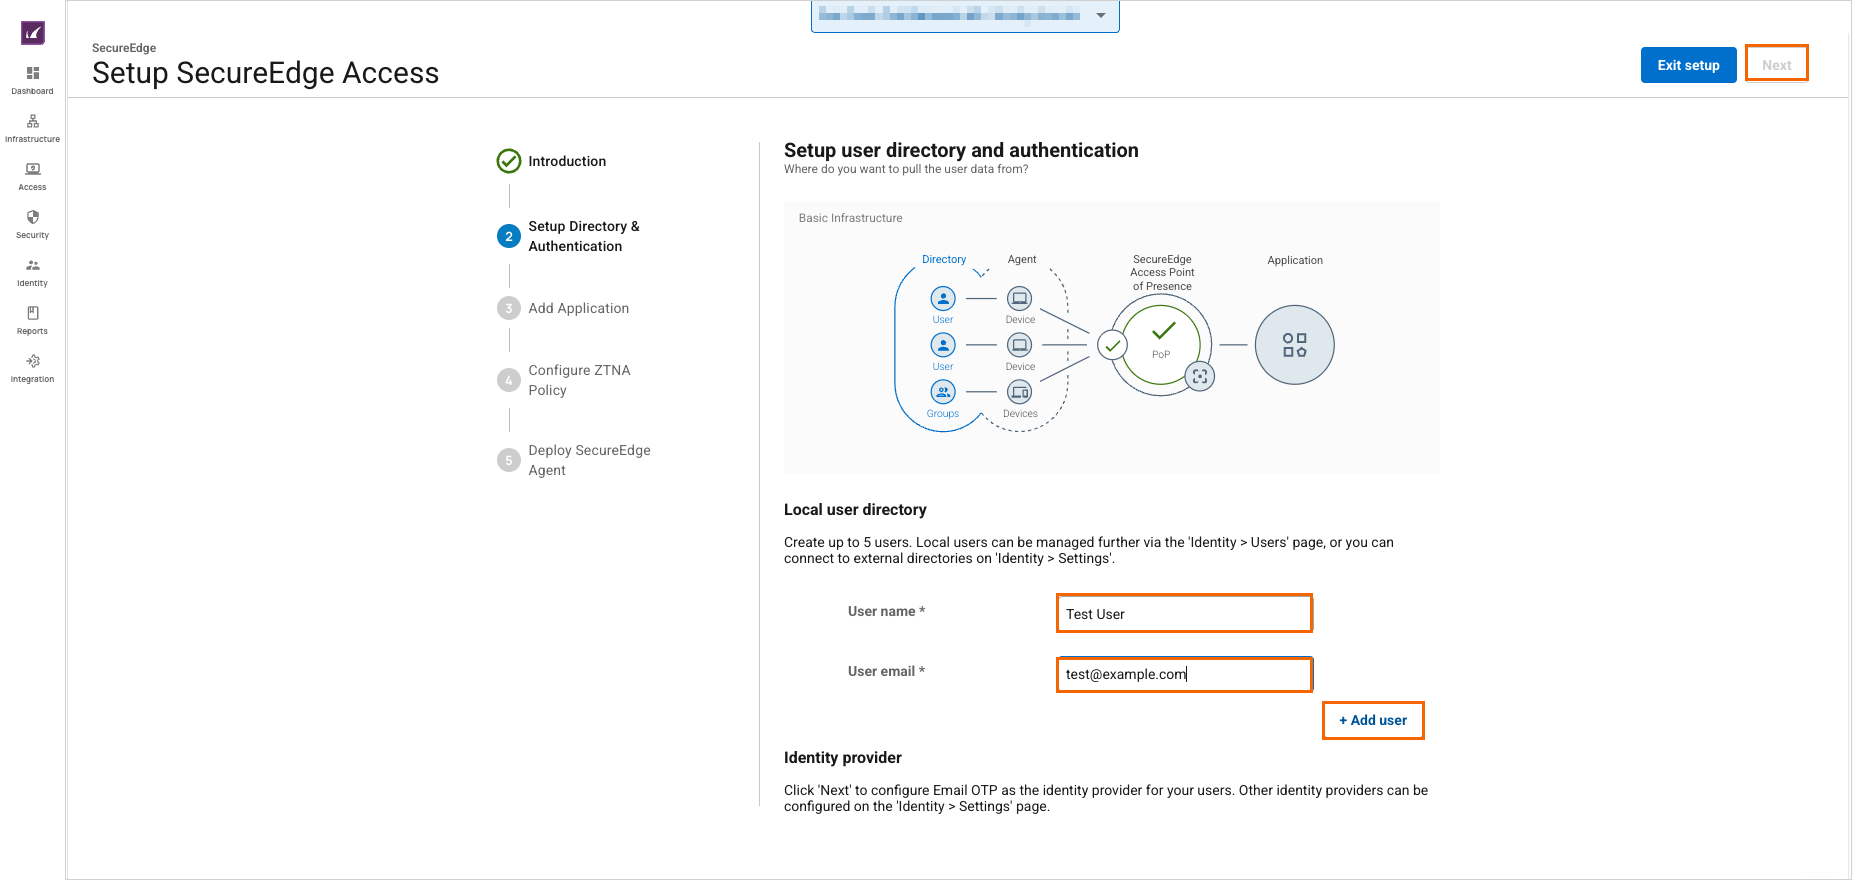
Click Next. The Setup Directory & Authentication icon displays a green check mark upon successful completion.
For more information on identity providers and user directories, see Identity Management.
Step 3: Add Application
Define one application to initiate ZTNA. You can add more applications hosted anywhere later. This application will be listed in the SecureEdge Access Agent app catalog.
Specify values for the following:
Application Type – Select application type. You can choose either a Predefined SaaS Application or Public Custom Application.
If you select the application type Predefined SaaS Application, specify the values for the following:
In the Select one application section, specify the value for the following:
Application – Select the application from the drop-down menu or type to search.
In the Add application to the agent catalog section, specify the values for the following:
Display Name – Enter the display name.
Launch URL – Enter the URL.
If you select application type Public Custom Application, specify the values for the following:
In the Add application to the agent catalog section, specify the values for the following:
Display Name – Enter the display name.
Launch URL – Enter the URL.
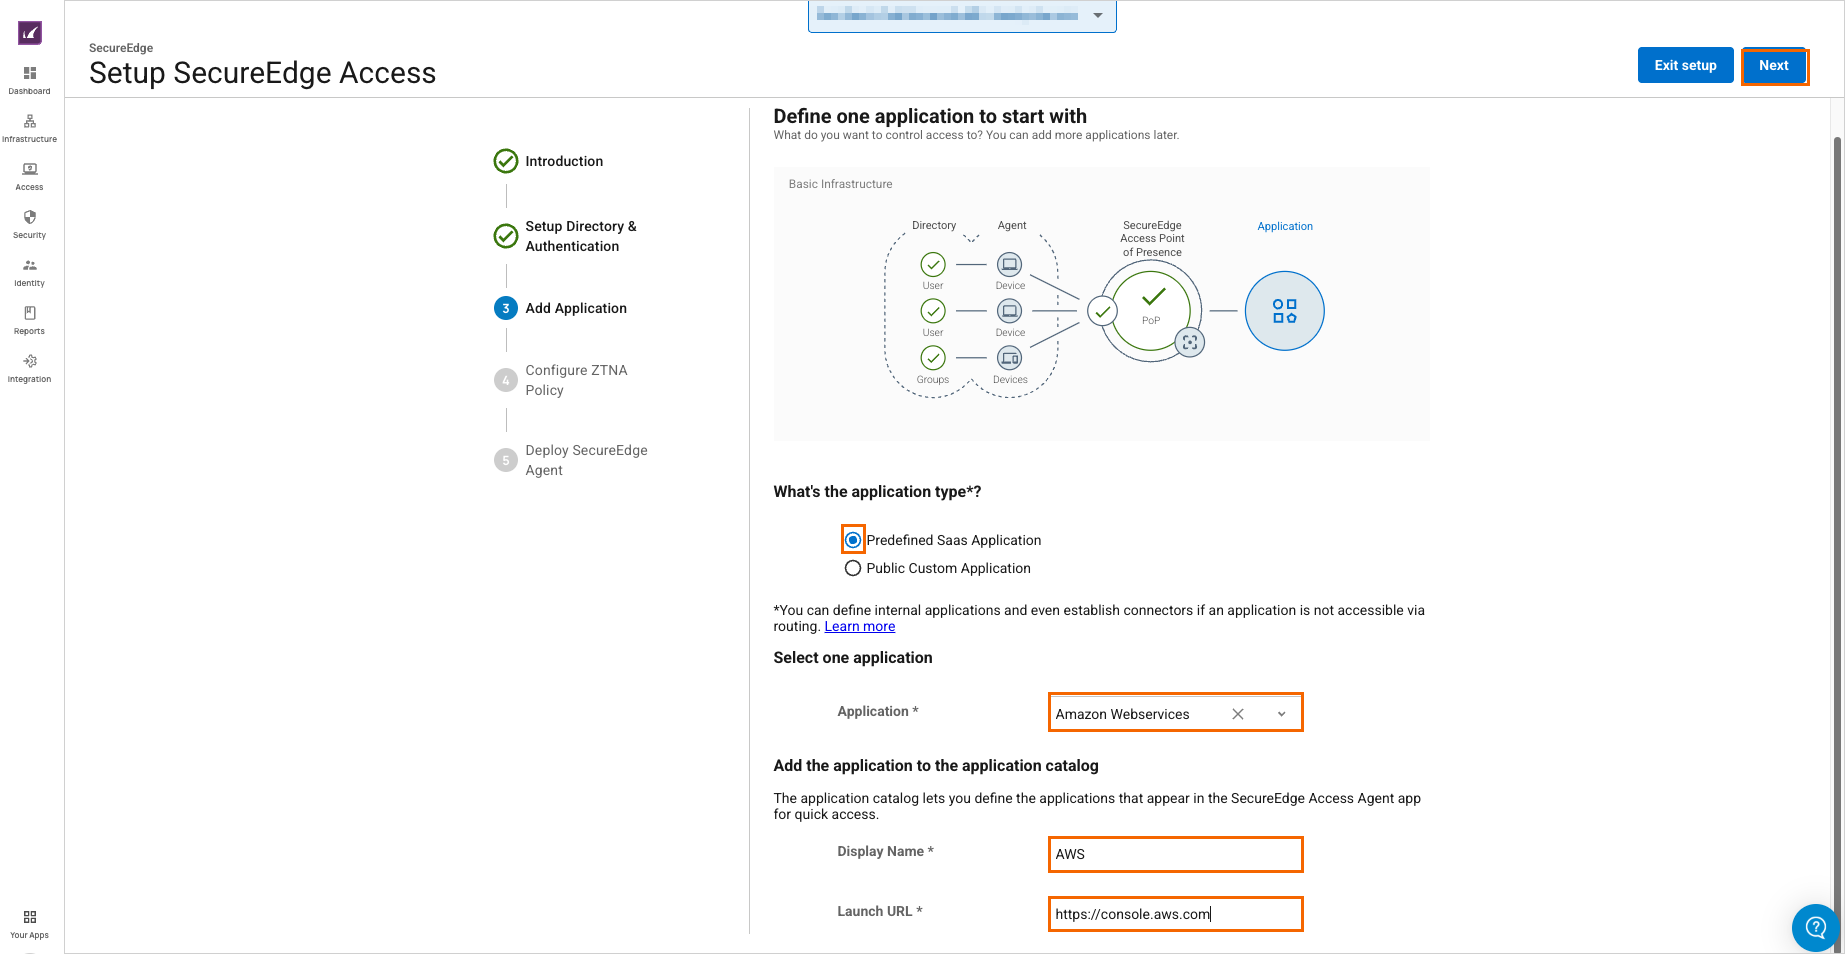
Click Next. After successfully completing this step, the Add Application icon displays a green check mark.
For more information, see How to Configure Application Catalog Entries.
Step 4: Configure ZTNA Policy
In this step, you create a Zero Trust Access policy for the previously created application. In addition, you can add users this policy should apply to.
Specify the values for the following:
Application – Note that the previously defined application has already been selected.
Users – Select (or unselect) users to grant access to this application.
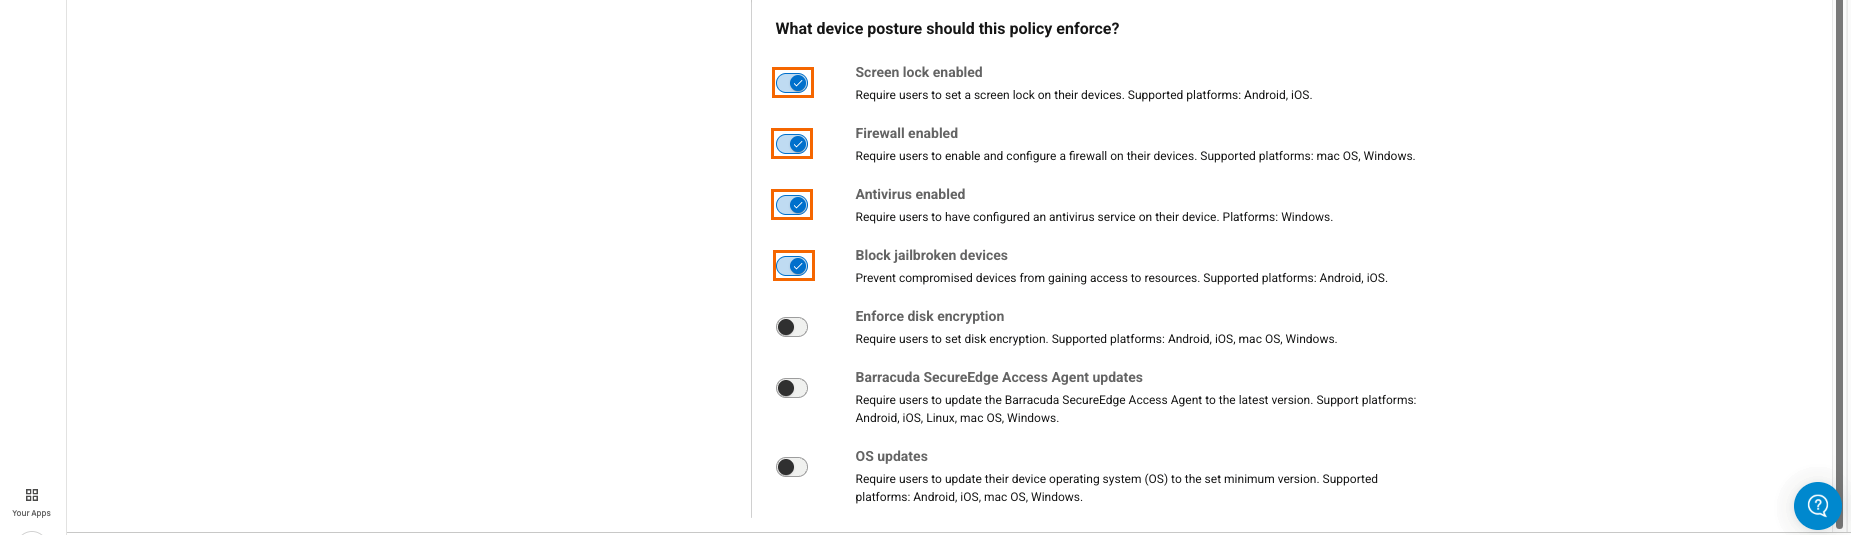
What device posture should this policy enforce – Select the security features that users, groups, and devices must fulfill to be able to access this application.
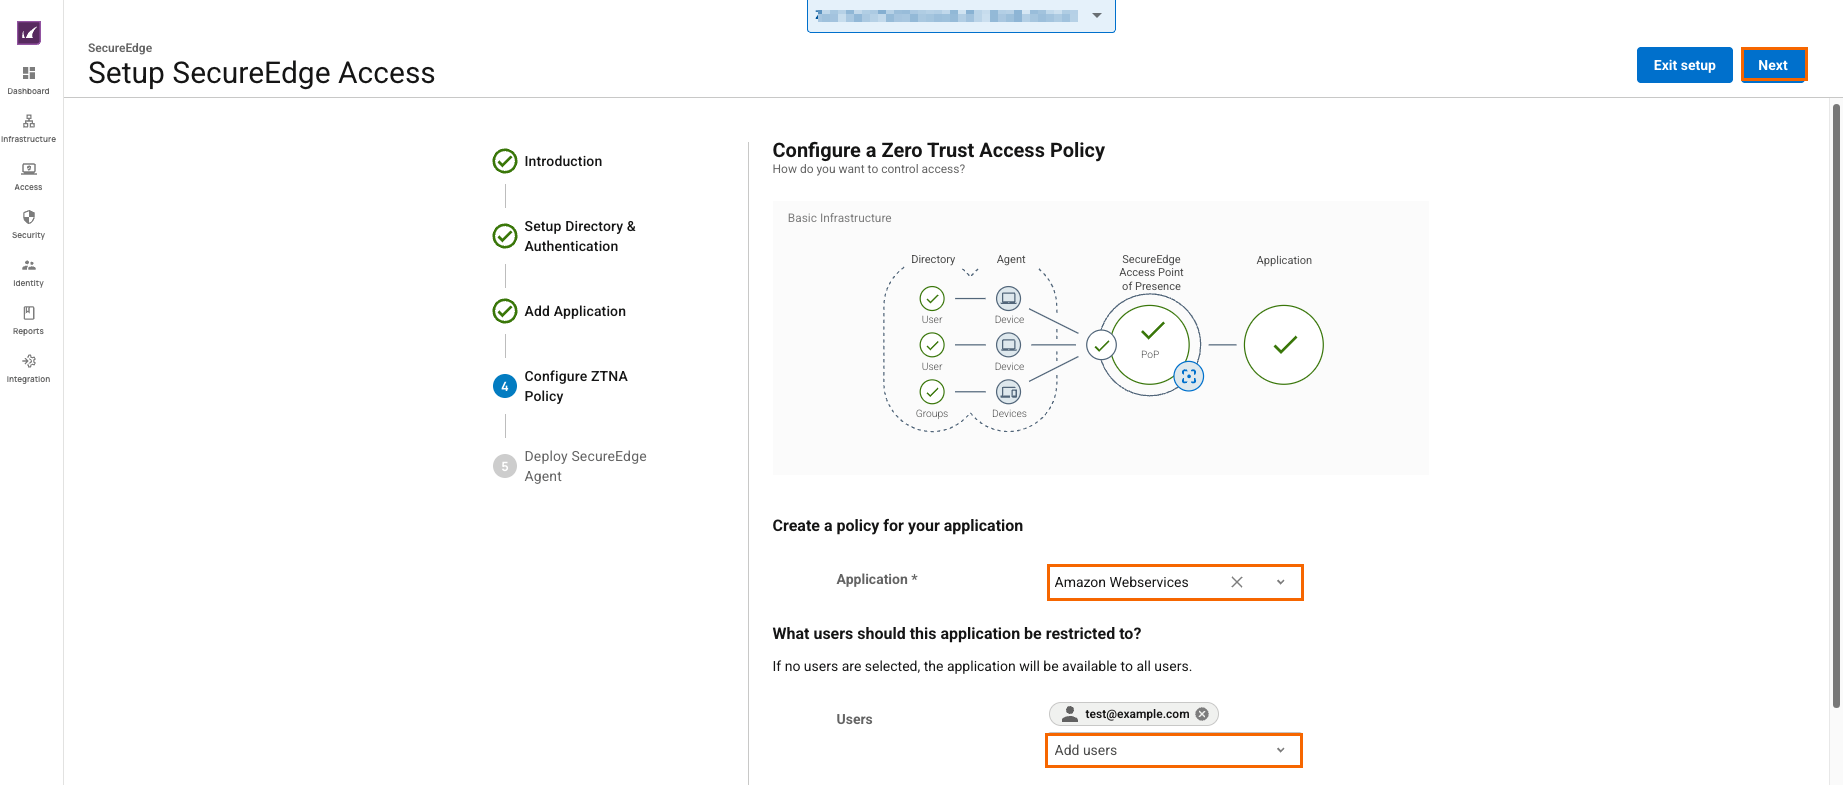
Click Next. After successfully completing this step, the Configure ZTNA Policy icon displays a green check mark.
For more information, see Zero Trust Access Policies.
Step 5: Deploy SecureEdge Agent
The final step is to enroll users or groups for SecureEdge Access. The enrolled users will receive an email with instructions to install and enroll the SecureEdge Access Agent on their device.
Specify the value for the following:
Users – You can select all the users you want to enroll in SecureEdge Access.
In addition, you can see the template of the email that will be sent to the users. The email contains the SecureEdge Access Agent download link and the enrollment link for this specific Workspace/Tenant.
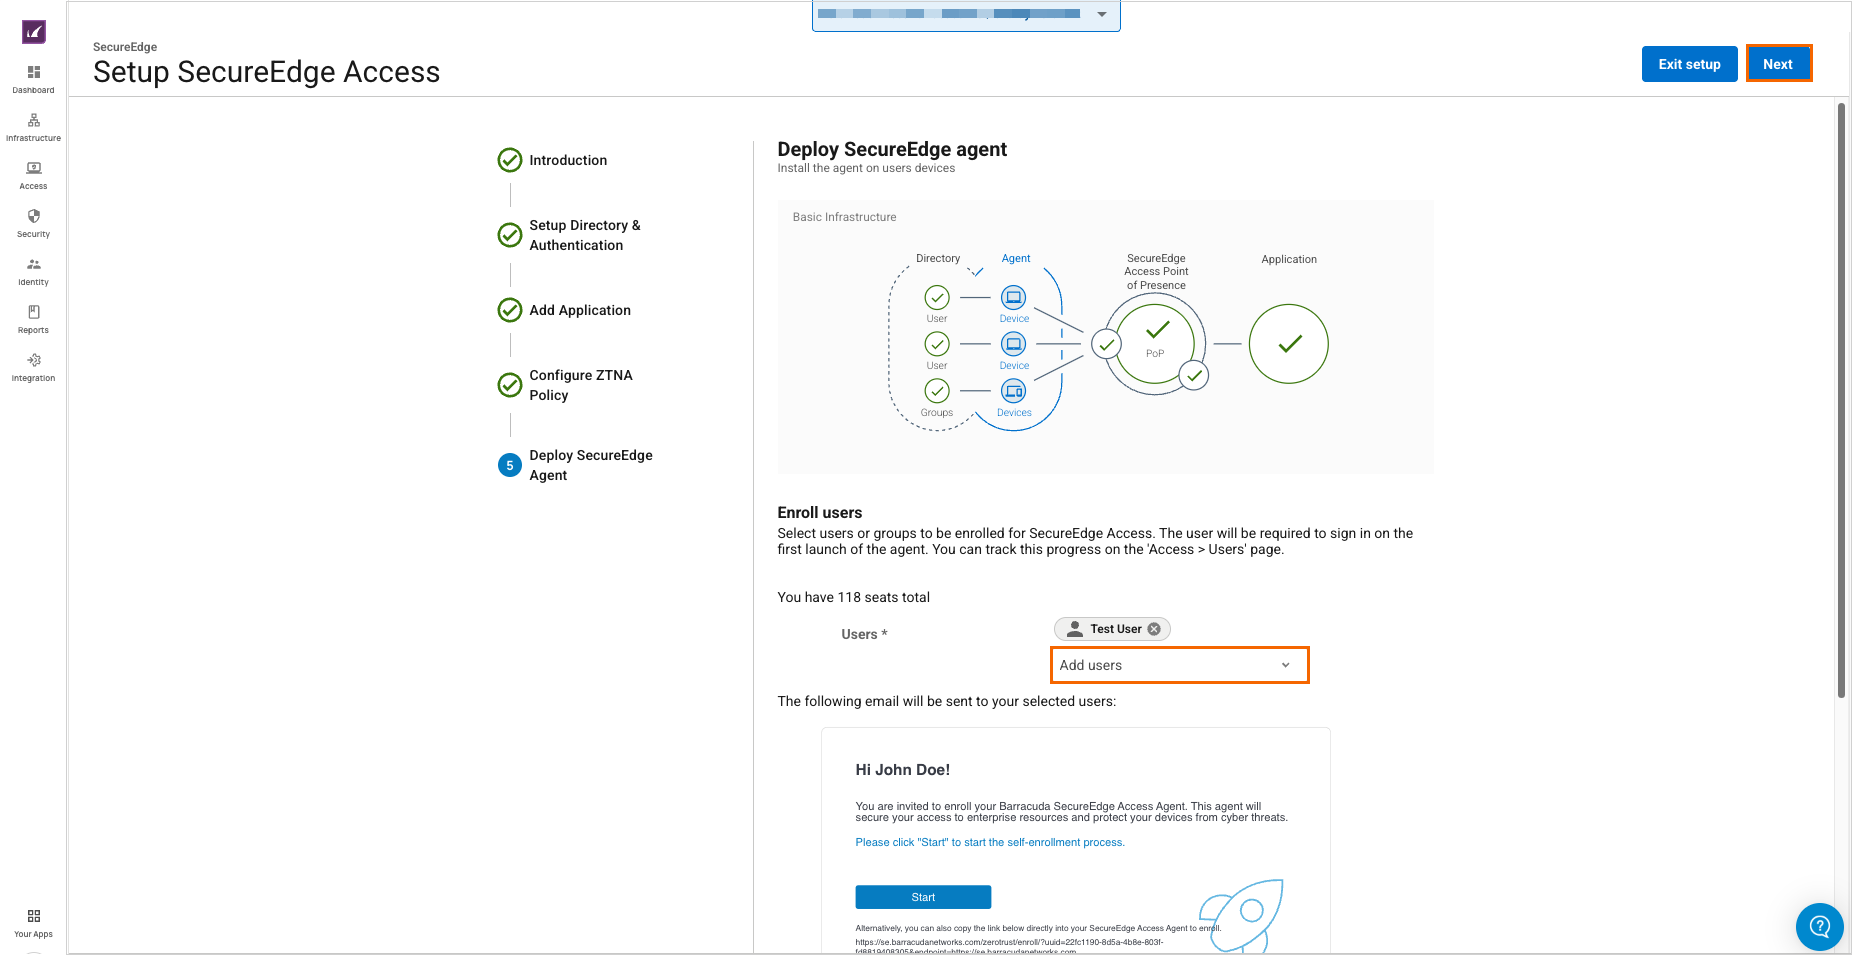
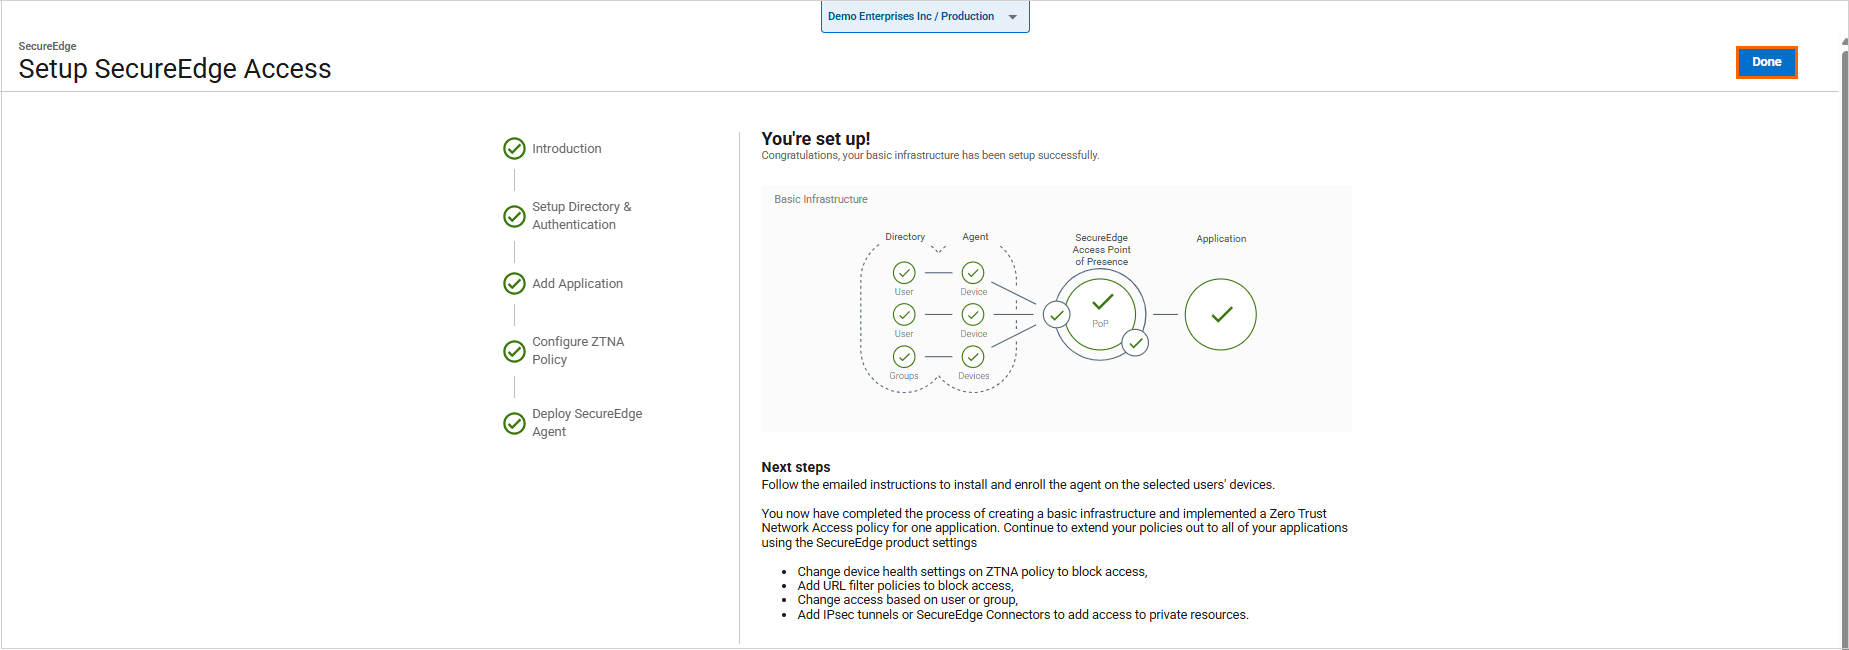
After completing the final step of the wizard, all your basic infrastructure set up and ZTNA policy for the application will display a green check mark. By clicking Done, you will be redirected back to the dashboard.
Connecting with an Access Agent
Follow the emailed instructions:
Download the Barracuda SecureEdge Access Agent.
Install and run the SecureEdge Access Agent.
You have implemented a SecureEdge Access policy for one application. You can now extend your policies to all applications using the SecureEdge features:
Add URL filter policies to block access.
Change SecureEdge Access based on users or groups.
Add IPsec tunnels or SecureEdge Connectors to access private resources.
Modify device health settings in the ZTNA policy to restrict access.
Further Information
For more information on the user enrollment procedure, see How to Enroll Users.