

Barracuda Report Creator is a reporting tool that creates customized reports using statistics and logs collected on sites and Edge Services. Each report can be configured to use multiple appliances, custom or predefined report data templates, and a customizable layout and delivery method. Custom reports can include the following information:
- User Activity Reports – Includes information on traffic caused by individual users, IP addresses or networks, or Active Directory user groups.
- Address Activity Reports – Includes information for accessed URL categories per source IP address or network.
- URL Category Reports – Includes information on which URLs were accessed in this specific URL category per source IP address or network.
- Application Category Reports – Includes information on detected application categories.
- Application Property Reports – Includes information on top blocked or allowed application properties.
- Applications Reports – Includes information on detected applications in a specific application category per source IP address or network.
- Security Reports – Includes IPS, Virus Scanner, and ATP threat reports.
- VPN Usage Reports – Includes information on usage of TINA client-to-site and site-to-site tunnels.
Limitations
- Microsoft .NET Framework 4.0 Client Profile is not contained in the installation archive for the Report Creator.
- Application Control data displayed in the Report Creator might not include the entire data set for the specified time period because old data may be deleted on the appliance if the disc space gets too low. Due to this limitation, the Report Creator is not suitable for comprehensive auditing purposes.
Installation and Requirements
| Operating System | Microsoft Windows 7, or higher |
| Additional Requirement | Microsoft .NET Framework 4.0 Client Profile |
- Download the Report Creator from the Barracuda Download Portal, double-click to start the installation, then follow the on-screen instructions.
- Configure the Report Creator setup in the SecureEdge Manager via Infrastructure > Settings. For more Information, see How to Configure Report Creator in SecureEdge.
Step 1. Add your Site/Edge Service
Add sites/Edge Services to be queried when creating a report. You can generate a report from either SecureEdge sites or Edge Services, or both.
- Launch the Report Creator Configuration.
- Click the Templates tab.
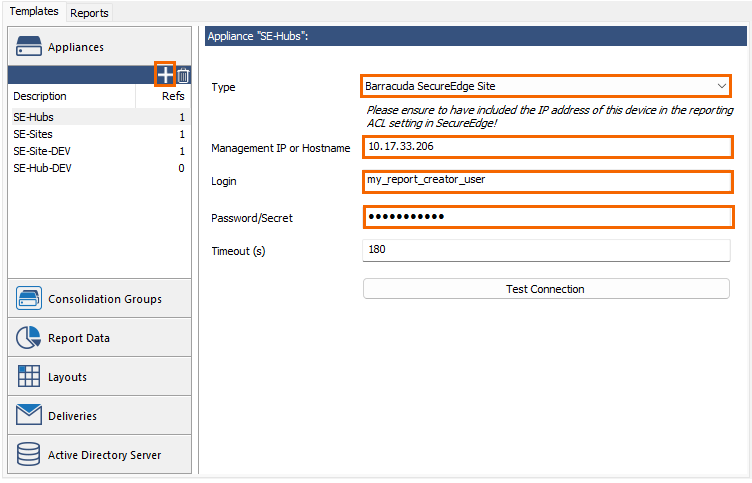
- In the Appliances section in the left pane, click the plus sign.
In the left pane, specify values for the following:
Type – Select the type. You can choose between Barracuda SecureEdge Site and Barracuda SecureEdge Service. For example, in this case Barracuda SecureEdge Site.
- Management IP or Hostname – Enter the management IP or a hostname of the site or service.
- Login – Enter the login.
- Password/Secret – Enter the password.
- Click Test Connection to verify that the Report Creator can connect to the appliance.
- Click Save.
If you are creating reports for more appliances or Edge Services, sort them into Consolidation Groups:
- Click the Templates tab.
- In the left menu, click Consolidation Groups.
- Click the plus sign.
- Right-click the group name, select Rename, and enter a name.
- In the Consolidation Group "Group name" section, select the SecureEdge appliances you want to add and click the right arrow icon to add them to the Appliances in this Group list.
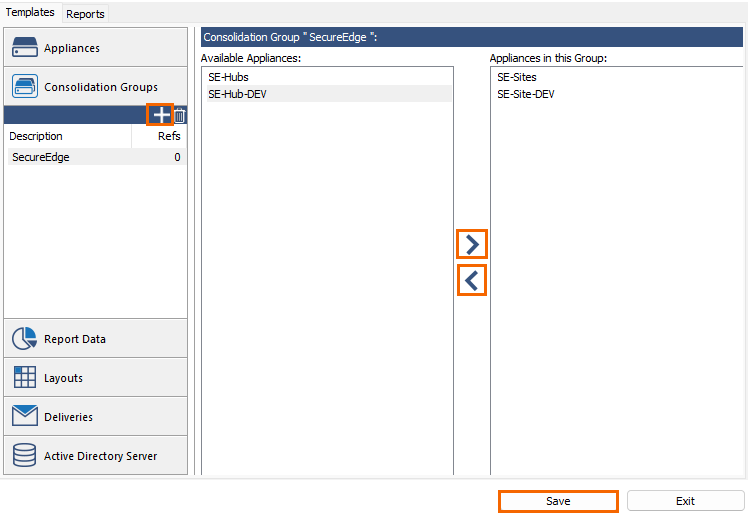
- Click Save.
The Report Creator is now configured to create reports containing selected data from your sites/Edge Services.
Step 2. Configure Report Data
The Report Data templates specify the type of information included in the report.
- Click the Templates tab.
- In the left menu, click Report Data.
- To modify the settings, select the predefined report in the Report Data section.
- Change the settings as necessary. For example, change the time span, or enable Source IP Address Anonymization if you do not want to include the source address in the report.
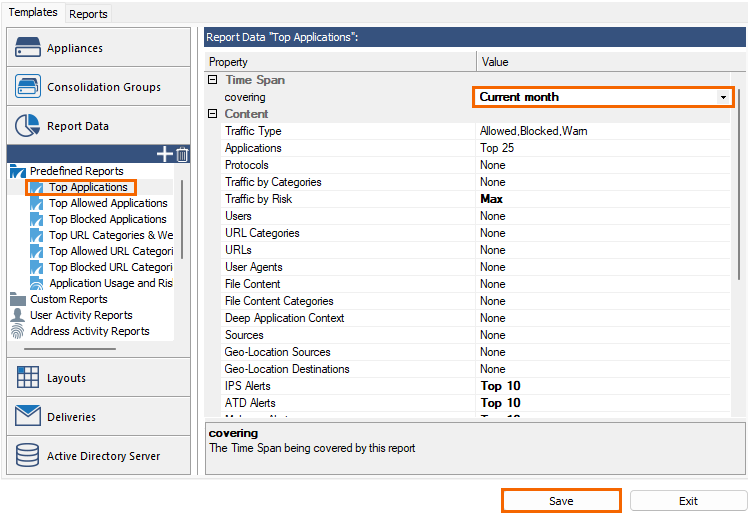
- Click Save.
You can use custom or predefined reports. For more information, see How to Create Custom Reports.
Step 3. Configure the Report Layout
Create a Report Layouts template to configure how the report is displayed.
- Click the Templates tab.
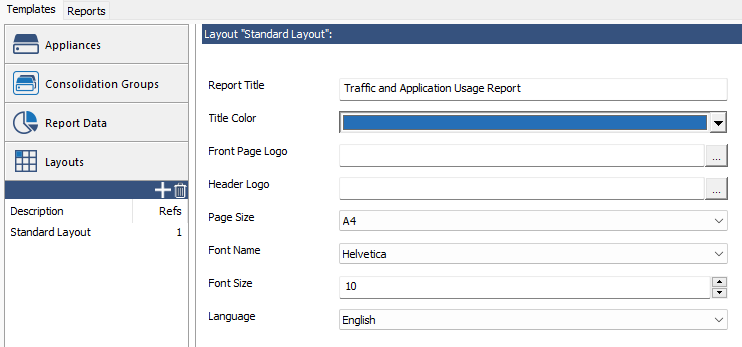
- In the left menu, click Layouts.
- Either select the Standard Layout default template or create a new template by clicking the plus sign.
- Right-click the template name, select Rename, and enter a name.
- Configure the following settings for the layout:
- Report Title – The heading text that is displayed on the first page of the report.
- Title Color – The title color that is displayed on the first page of the report.
- Front Page Logo – The larger image that is displayed on the first page of the report. This image must be in PNG format. Your custom logo image is not automatically resized. Use images with a maximum width of 500 pixels.
- Header Logo – The small logo that is displayed in the headline. This image must be in PNG format and have a maximum height of 44 pixels. The custom header image is automatically resized to 155 X 44 pixels. Upload it in multiples of these values to get the best results.
- Page Size – The print page size.
- Font Name – The font used in the report.
- Font Size – The size of the font for the continuous text. Headlines have a fixed size that cannot be changed.
- Language – The Language used in report.
- Click Save.
Step 4. Configure Report Delivery
Create a Deliveries template to specify how the reports are delivered. You can either store reports in a local directory or email the reports.
- Click the Templates tab.
- In the left menu, click Deliveries.
- Click the plus sign.
- Right-click the template name, select Rename, and enter a description.
- To store the reports in a local directory, select FILE from the Type list and then configure the following settings:
- Filename – The report's file name. When the report is generated, a time stamp is appended to the report name. For example,
report_2017_08_06_09_53_50.pdf. - Folder – The folder where the reports are saved.
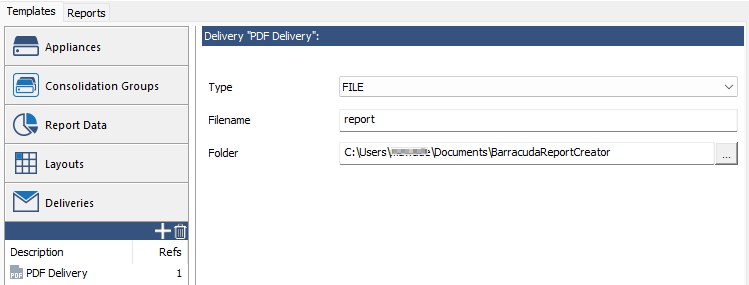
- Filename – The report's file name. When the report is generated, a time stamp is appended to the report name. For example,
- To email reports, select EMAIL from the Type list and then configure the following settings:
- Sender – The sender email address.
- Recipient(s) – The email addresses that should receive the report. Separate multiple addresses with a semicolon (;).
- Subject – The subject of the email that should have important information about the report.
- EMail Text – (Optional) Text for the email body.
- Server Address – The IP address of the email server.
- Port – The SMTP port on the email server to connect to. Common default values are:
- 25 – Anonymous sending.
- 587 – TLS authenticated sending.
- Force TLS encryption – Enables authenticating at the email server, with the username and password configured below. This option requires a valid Sender Address.
- Use anonymous authentication – Allows use of the email server without a username and password. This option does not require a valid Sender Address.
- User Name and Password – If required, the credentials to authenticate on the email server.
- Click Save.
Step 5. (optional) Add an Active Directory Server
To be able to generate reports based on Active Directory user groups, you must configure the IP address and login credentials for the Active Directory server.
- Click on the Templates tab.
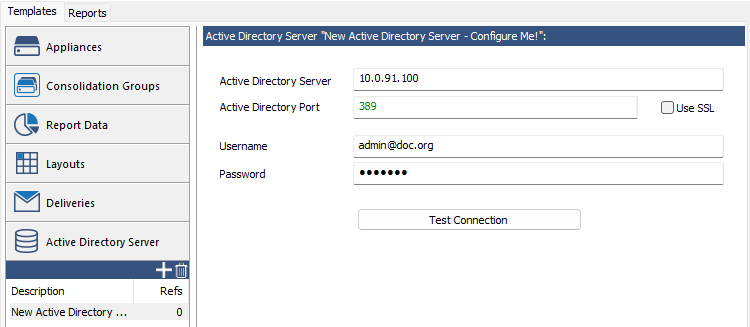
- In the left menu, click Active Directory Server.
- Click the plus sign.
- Right-click the template name, select Rename, and enter a description.
- Enter the IP address or hostname of the Active Directory Server.
- Enter the Active Directory Port. Default: 389
- (optional) If required, select Use SSL.
- Enter the Username of the active directory user.
- Enter the Password of the active directory user.
- Click Test Connection to verify that the Barracuda Report Creator can connect to the appliance.
- Click Save.
Step 6. Generate a Report
After setting up the Report Creator, you can generate a report.
- Click the Reports tab on the upper left of the window.
- In the Reports section in the left menu, click the plus sign.
- Left-click the template name, select Rename, and enter a name for the report.
- In the Content section of the main pane, repeat the following steps for each appliance or consolidation group you want to add to the report:
- In the Appliances section, click the plus sign and then select the consolidation group or appliance.
- In the Data for "your appliance name" section, click the plus sign and then select the types of reports that you want to generate.
- Select the Layout from the list.
- In the Delivery section, click the plus sign and then select the delivery method you previously configured:
- EMAIL – Sends the report to the email address specified in the Deliveries template.
- FILE – Saves the report in the location path specified in the Deliveries template
- Click Save.
Step 7. Run the Report
Click Run Now to generate the report. The report is sent to your desktop or delivered via email, depending on the configuration of the selected Deliveries template.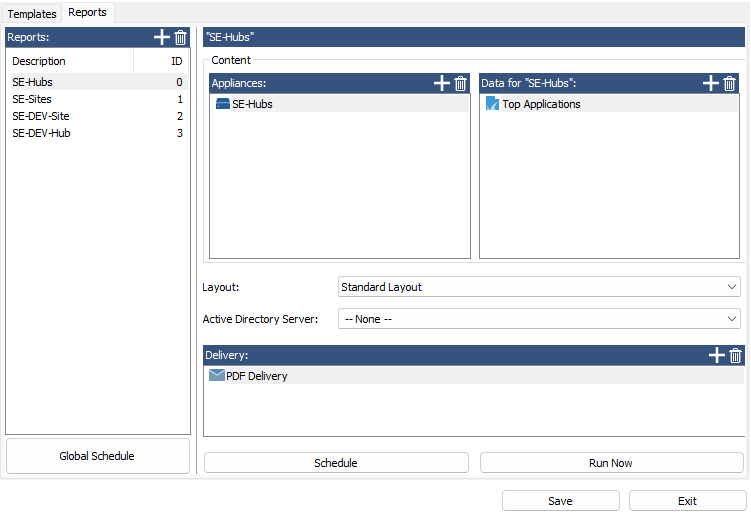
Step 8. Automate Report Creation
To automate the reporting, schedule a task and specify how often the report is generated.
- Click the Reports tab.
- In the left pane, select a report.
- Click Schedule.
- In the Schedule Task for Report Delivery window, specify the delivery times for the report and enter the password for your Windows user.

- To open the Windows Task Scheduler, click Custom Task(s). Report Creator tasks are stored in the
BarracudaNGReportCreatorsubfolder.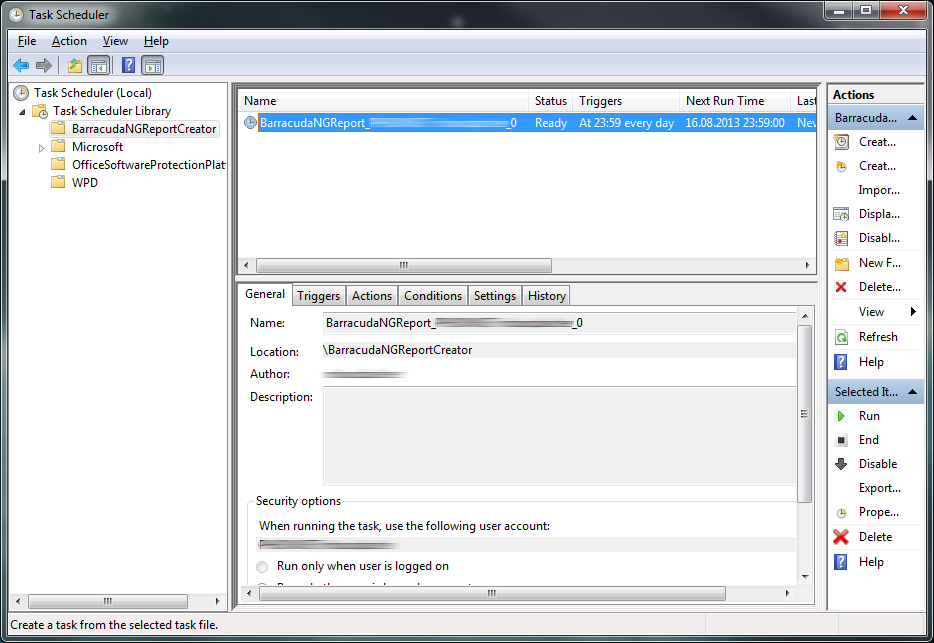
- Click OK. Your scheduling task is created in the Windows Task Scheduler.
- Save your configurations.
Using Keyboard Shortcuts
You can use various keyboard shortcuts within the Report Creator: