

The Barracuda SecureEdge Manager allows administrators to configure SecureEdge Access either via Barracuda Cloud Control or by syncing user directories via Identity Management with the Zero Trust Access service and defining various parameters such as point of entry, custom client network, and DNS suffix in client networks. SecureEdge Identity Management supports the following user directories: Microsoft Entra ID, LDAP, Google Workspace, Okta, SCIM, and Barracuda Cloud Control. SecureEdge Access lets you implement secure access to internal and external enterprise resources, whether they are on-premises or in the cloud, by using a Zero Trust endpoint solution known as the SecureEdge Access Agent. Barracuda SecureEdge Access brings Zero Trust access service to your endpoint with a quick and easy configuration. SecureEdge SaaS Edge Service and SecureEdge Access are subscriptions hosted and managed by Barracuda Networks. You can activate SecureEdge Access using a product activation key. For more information on how to activate Barracuda SaaS Service, see How to Activate the Edge Service and SecureEdge Access Using an Activation Key.
Before You Begin
Create a Barracuda Cloud Control account. For more information, see Create a Barracuda Cloud Control Account.
SecureEdge Access Deployment
Configure SecureEdge Access with the following steps:
Step 1. Activate SecureEdge Access Using Activation Key
After your order is placed with Barracuda Networks, you will receive an email from Barracuda Customer Services with a product activation key. In the Product Key section, click Activate.
Log in with your Barracuda Cloud Control account.
Complete the 4-step product activation process.
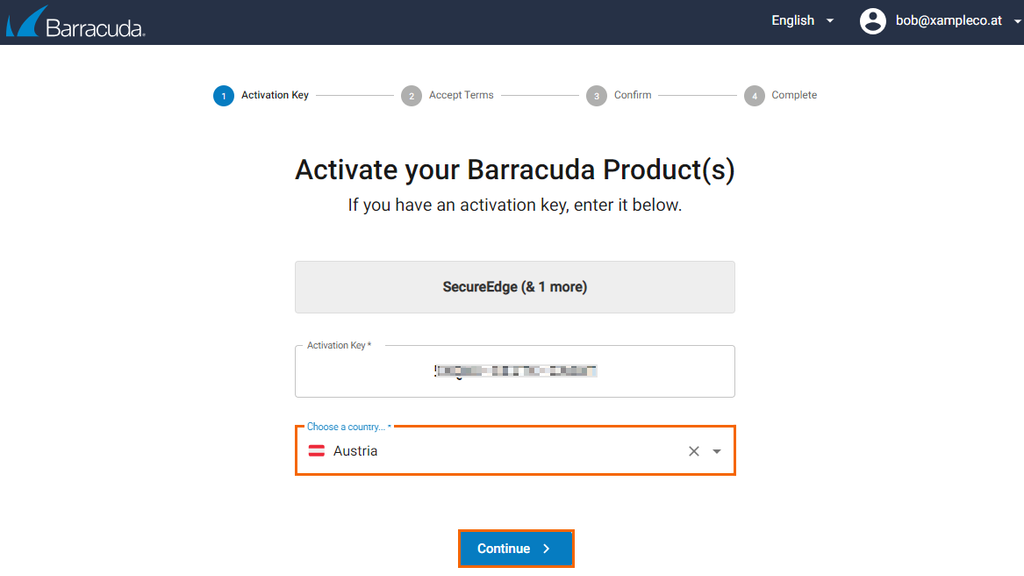
Accept the license agreement to complete the subscription. Your product subscription is activated as soon as the activation procedure is complete.
After accepting the terms, you are directed to the SecureEdge dashboard. You can verify your subscriptions in the SecureEdge Manager via Profile > Subscription. You can proceed with Step 2.
Step 2. Points of Entry
Barracuda SecureEdge supports three different types of points of entry: firewalls, edge services, and sites. The SecureEdge Manager allows you to configure the points of entry by selecting either an existing edge service, site, or firewall that the Barracuda SecureEdge Access Agent can connect to. Registration of CloudGen Firewalls is token based. The CloudGen Firewall fetches a requisite certificate and a zero trust access policy from the cloud services; however, it does not get security features or SD-WAN policies from the service. On the Points of Entry page, you can find information on enrolled points of entry in the Barracuda SecureEdge environment.

For more information, see How to Configure Points of Entry.
Step 3. Connect to Identity Management
The Barracuda SecureEdge Manager allows you to configure an identity provider as well as user directory via the Identity > Settings tab and sync with Zero Trust access. With SecureEdge Identity Management, you can enroll users/groups with their respective devices to create secure remote access to internal and external enterprise resources, whether on-premises or in the cloud with a quick and easy configuration via the SecureEdge Access Agent. For more information, see Identity Management.
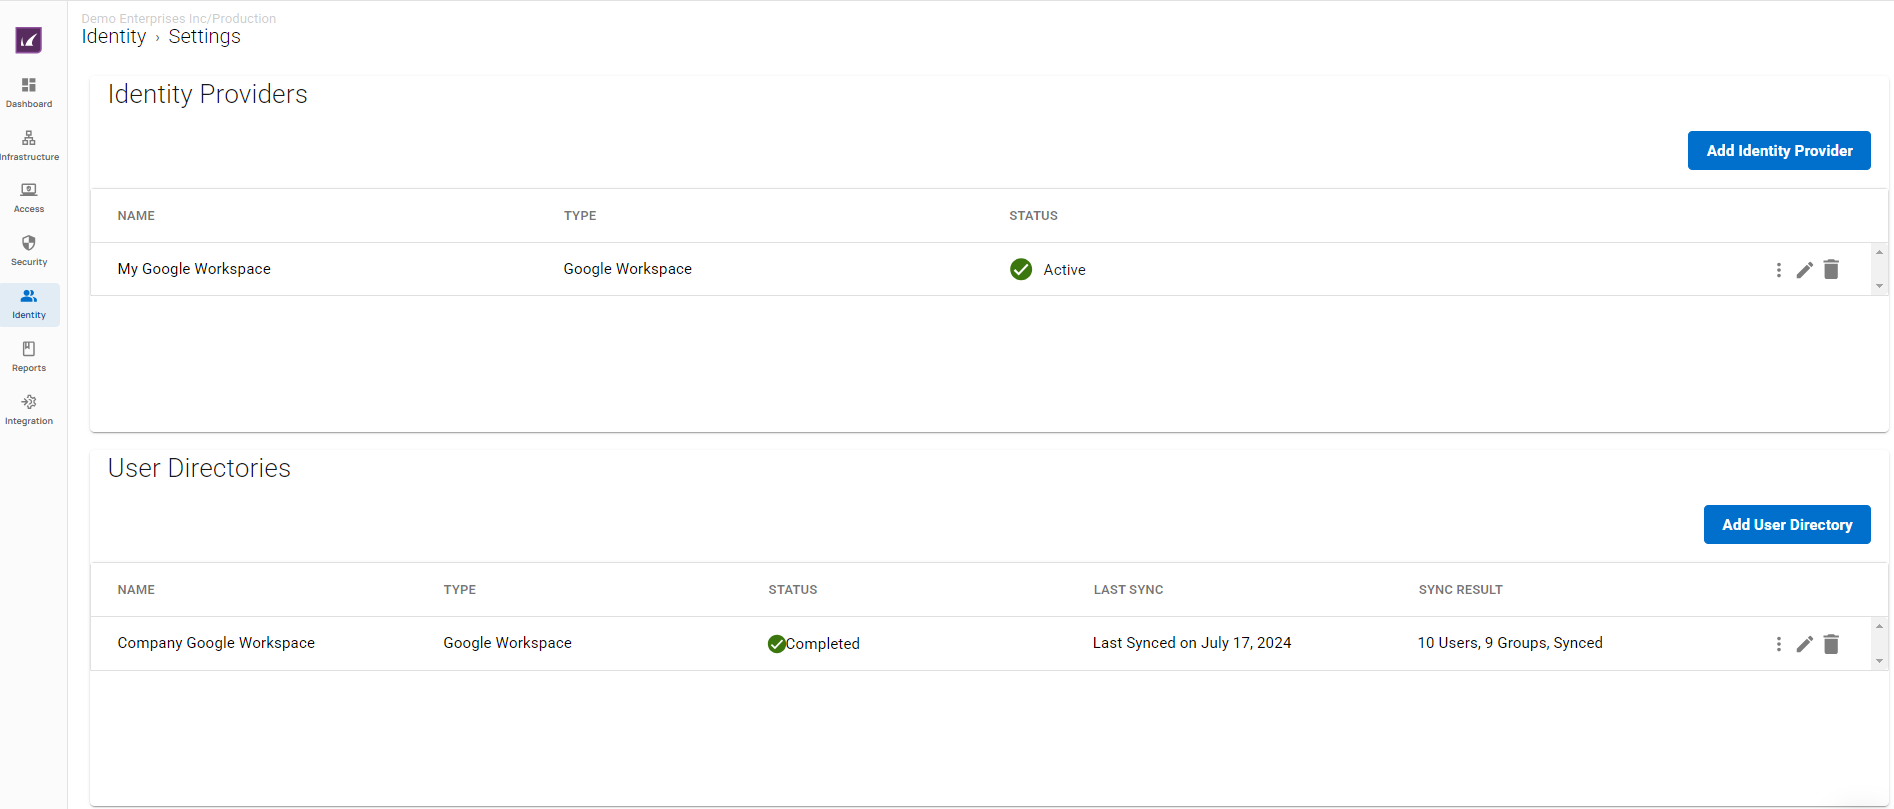
The Barracuda SecureEdge Manager supports the following identity providers and user directories:
Identity Providers | User Directories |
|---|---|
Barracuda Cloud Control | Barracuda Cloud Control |
Microsoft Entra ID | Microsoft Entra ID |
Google Workspace | Google Workspace |
OpenID Connect | Okta |
SAML 2.0 | LDAP |
Okta Workforce | SCIM |
Step 4. SecureEdge Access Global/Default Settings
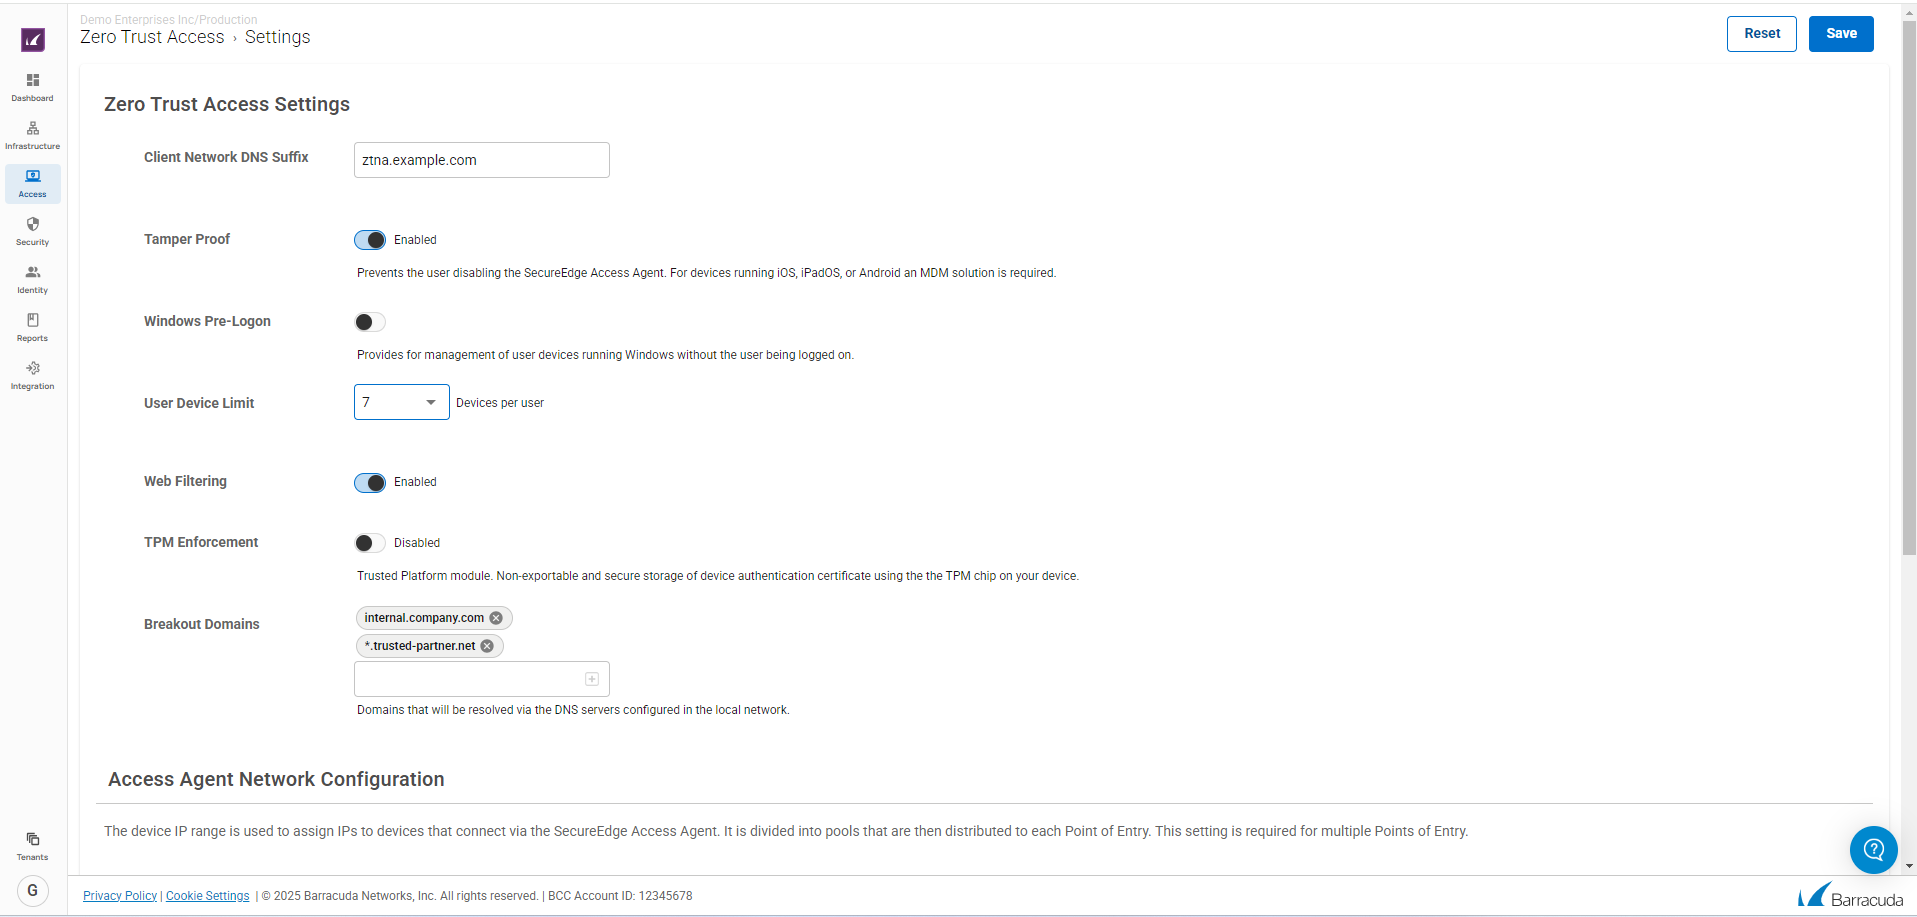
You can configure SecureEdge Access settings on a global level and define various parameters such as Tamper Proof, Windows Pre-Logon, User Device Limit, Web Filtering, Breakout Domains, TPM enforcement, and DNS suffix in client networks. For more information, see How to Configure SecureEdge Access Global Settings. In addition, you can also configure a custom Access Agent network configuration.
For more information, see:
For more on SecureEdge Access Agent network configuration, see How to Configure a SecureEdge Access Agent Network.
For more information on LDAP and Microsoft Entra ID, see LDAP Active Directory and Microsoft Entra ID.
Step 5. Enroll Users
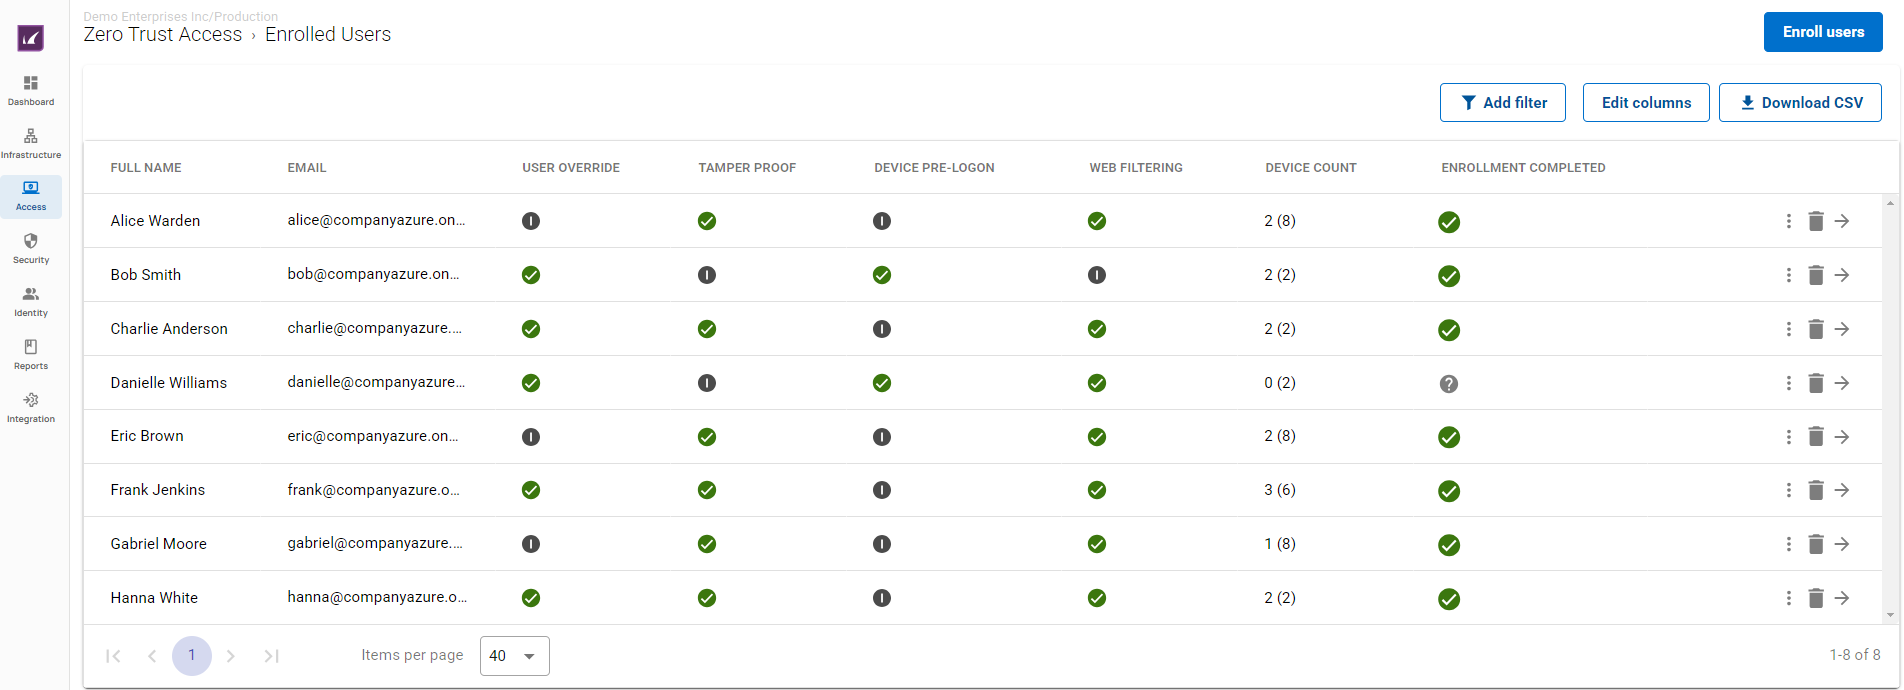
The Barracuda SecureEdge Manager allows you to enroll users. A single user can enroll multiple devices on the same token. On the Enrolled Users page, you can find detailed information on enrolled users.
For more information, see How to Enroll Users in Barracuda SecureEdge.
Step 6. Verify Enrolled Devices and Users
The Barracuda SecureEdge Manager allows administrators to enroll users with their respective devices. After the enterprise enrollment process is completed, your device protection will be automatically enabled. On the Devices page, you can find detailed information on enrolled devices.

For more information, see How to Verify Enrolled Devices and Users.
Step 7 Create a Zero Trust Access Policy
The Zero Trust Access policy defines the resources made available to end users of the Barracuda SecureEdge Access Agent and the associated access restrictions. The Zero Trust Access page displays all defined policies with respect to your selected workspace.
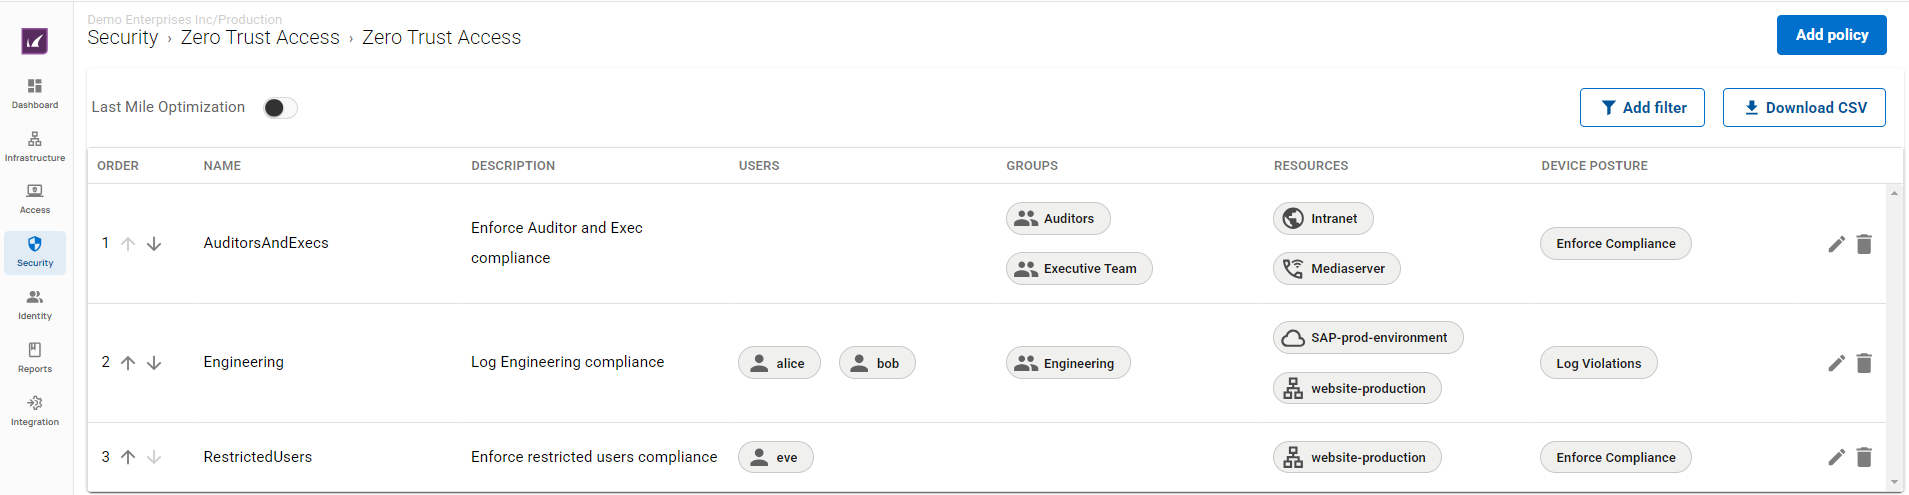
For more information, see Zero Trust Access Policies.
Additional Information
To add a Zero Trust Access Policy for Zero Trust Access to reach a website for which no pre-defined apps exists (for example, zoom.us, msn.com, microsoft.com, tiktok.com, or whatsapp.com), you must define a custom web application. However, this overwrites the ‘non-interceptable’ property that states that SSL Inspection should not inspect such a website. In this case, you must configure an SSL Inspection rule with the respective client network as source and a custom web application as destination, and set SSL Inspection for these websites to Do Not Inspect.