The SecureEdge Connector is a small piece of software that can be installed on Windows or Linux servers to keep your devices secure by redirecting their traffic through a secure VPN connection. The Barracuda SecureEdge Manager allows administrators to configure the SecureEdge Connector, a software solution for establishing a connection between the service and a resource that cannot be reached via routing. According to your requirements, you can add as many servers as you want for each connector installed. Registration of the SecureEdge Connector is token based. Once enrolled, each Connector is assigned a single static IP address within the SecureEdge environment. You can also configure a list of resources that the Connector can connect to. Each resource can be reached via the Barracuda SecureEdge Access Agent if permitted by an existing policy. In addition, the Connector can be used for app-to-app communication between Connectors or between a Connector and the SecureEdge environment. This requires Routed mode to be activated. You can connect to numerous applications on Windows and Linux servers and in the cloud via one-click Connector deployments. The Connector supports all Edge Services including Private Edge Service and Edge Service for Virtual WAN.
Before You Begin
For the Barracuda SecureEdge Connector to work on a Windows client, you must install Microsoft .NET Framework 8.0.
Connector Deployment Modes
Inbound Mode  | Routed Mode 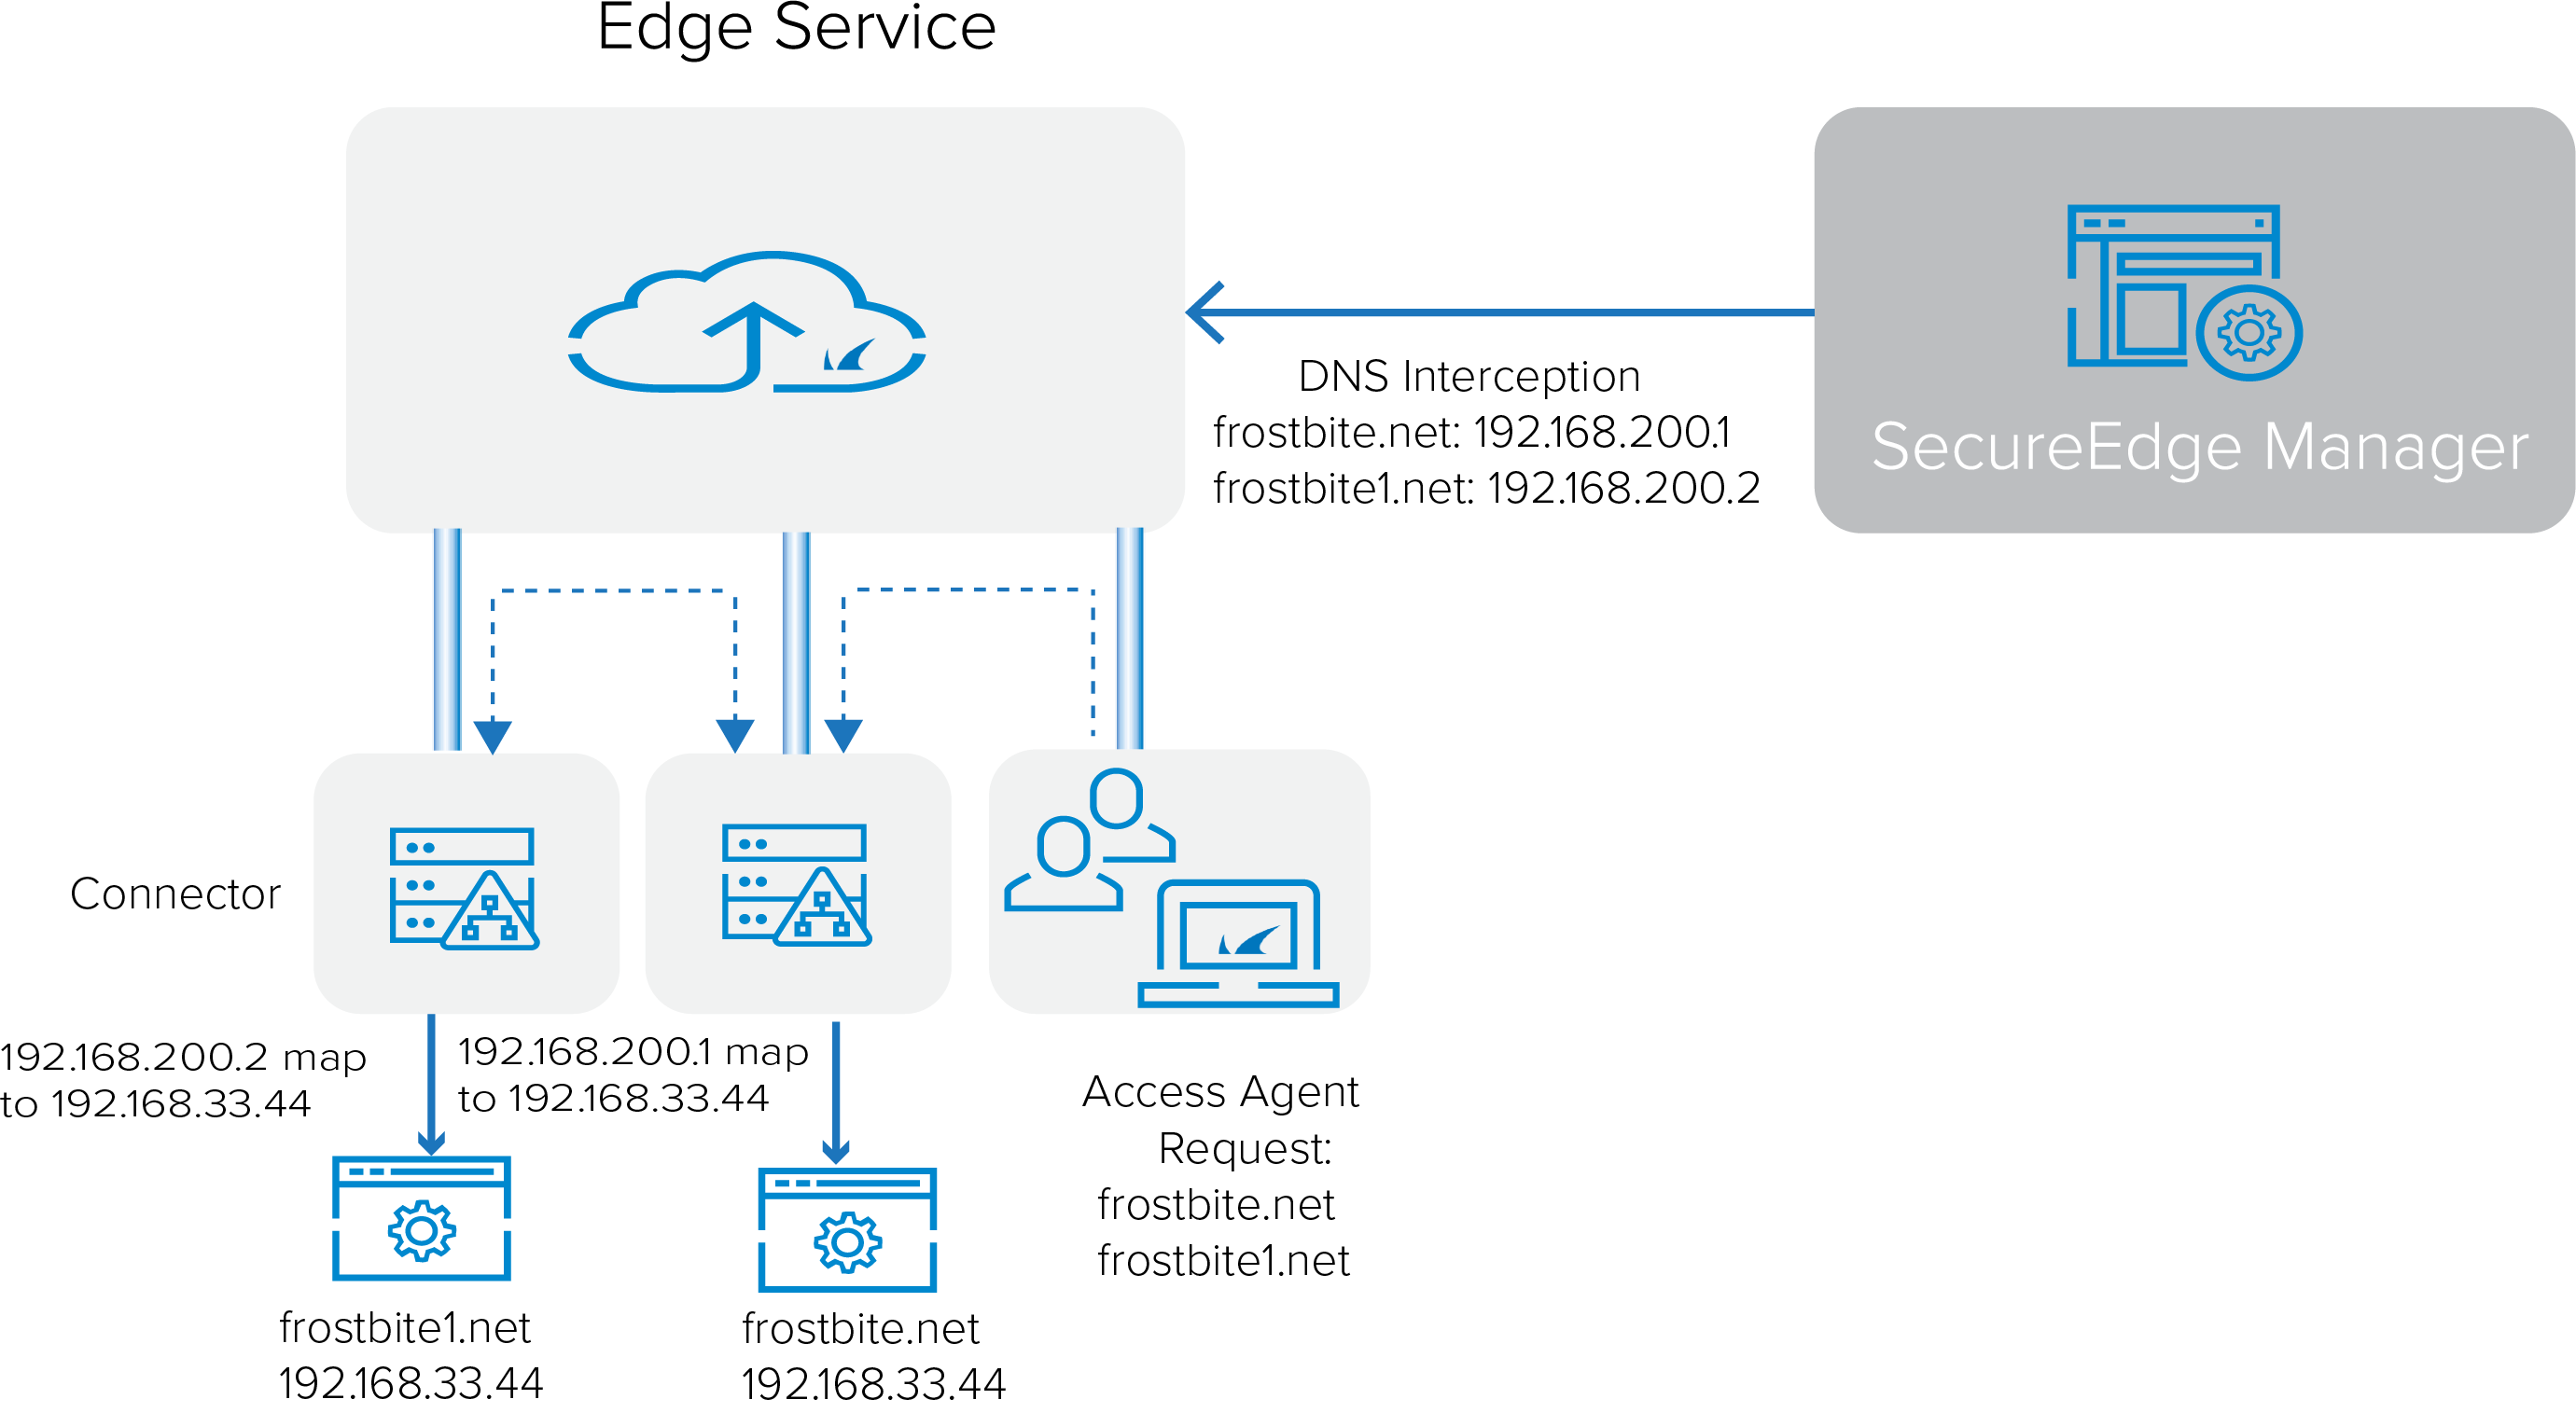 |
System Requirements | Inbound Mode | Routed Mode (app to app) |
|---|---|---|
License | No license required | Additional license required |
Supported Operating Systems |
|
|
Supported Architectures | X86 | X86 |
Minimal Requirements | 1 Core 1GB RAM | 1 Core 1GB RAM |
For Linux Distributions |
|
|
Step 1. Configure Connector IP Range
Go to https://se.barracudanetworks.com and log in with your existing Barracuda Cloud Control account.
Select the workspace your Connector should be assigned to.
Go to Infrastructure > Settings.
Expand the Settings menu on the left and select Connector.

The Connector page opens. In the Connector section, specify a value for the following:
Connector IP Range – Enter the network IP pool range that will be used by the Connector clients.

Click Save.
Step 2. Create a SecureEdge Connector
Go to https://se.barracudanetworks.com and log in with your existing Barracuda Cloud Control account.
Select the workspace your Connector should be assigned to.
In the left menu, click the Infrastructure icon, and select Connectors.
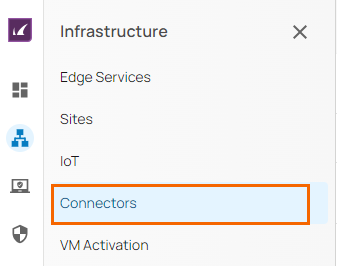
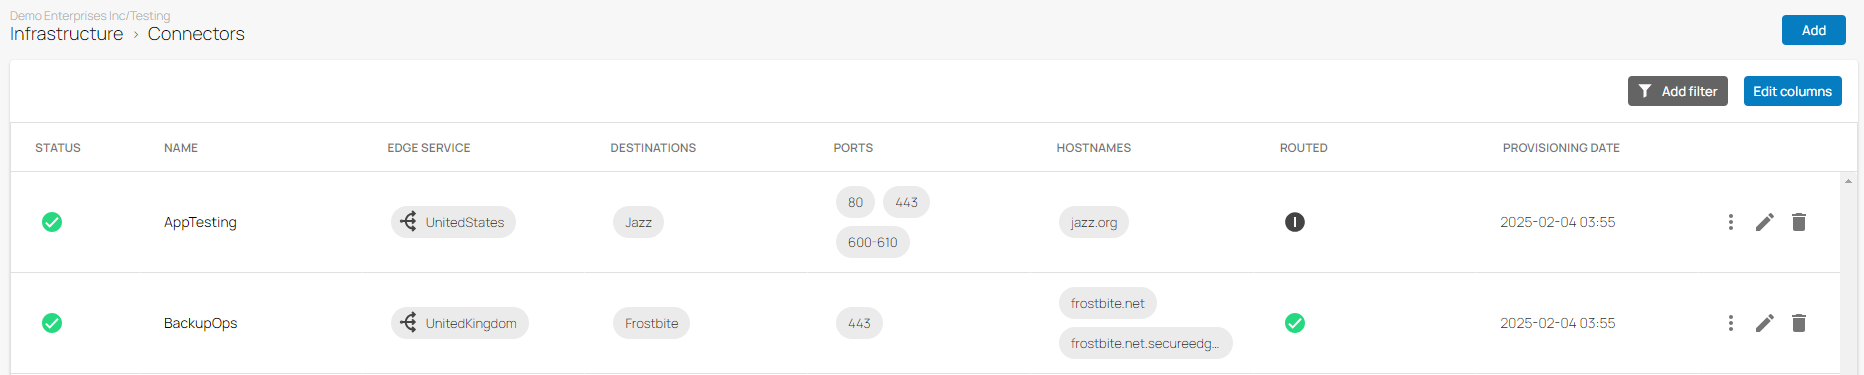
The Connector page opens. All enrolled Connectors deployed in the selected workspace are displayed. Click Add.

The Add Connector window opens. Specify values for the following:
Name – Enter a unique name.
Description – Enter a brief description.
Edge Service – Select the Edge Service you wish to connect to from the drop-down list.
Routed – Enable for app-to-app communication. Note: For Inbound mode, Routed is disabled.
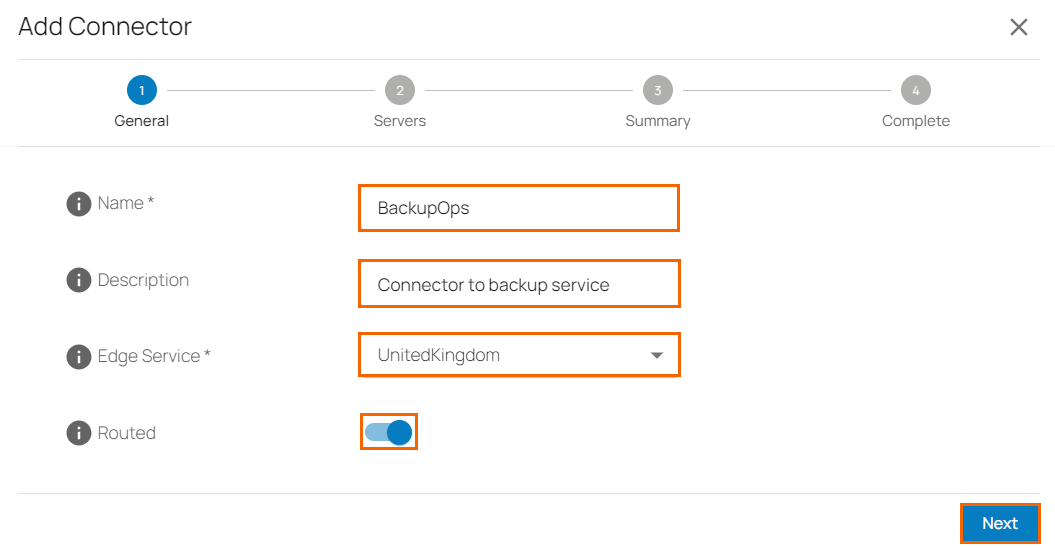
Note: For the initial release, Connectors will be able to connect to only two providers or instances of the Edge Service they are attached to. For this reason, the first two static providers will be used and added under the WAN settings in the Private Edge. Any additional providers will be ignored. This is also true for cloud services when scale units are increased.
Click Next, and specify values for the following:
Servers – Enter the names of the servers. To add a server, click +. To remove a server, click on the trash can icon. Note: For each Connector installed, you can add as many local IP addresses as you want, as long as they are reachable by the Connector.
Hostname – Enter your unique hostname. Note: For Routed mode, the predefined internal DNS suffix
secureedge.barracuda.internalmust be used.Ports – Enter ports. You can enter ports as a single number, in ranges, or as a comma-separated list of these.
Internal IP – Enter the internal IP address on which the resource will be reachable.
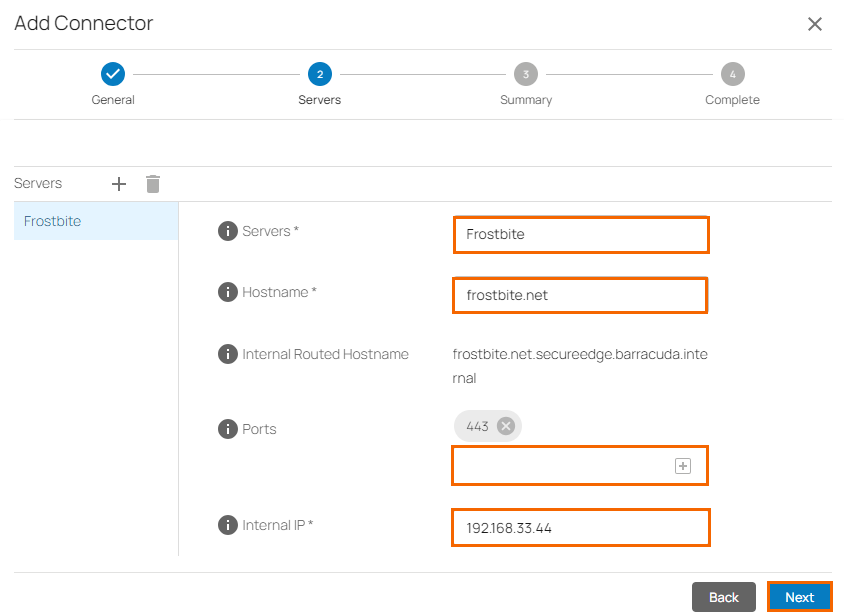
Note: The parameters added above will be used to create resources, and these resources can be used to control access to the exposed services. In this case, for example, a resource is created naming BackupOps-Frostbite to hostname frostbite.net and the port is 443. In addition, the IP address is assigned from the Connector pool, e.g. 192.168.33.0. This Connector app can then be used as source or destination for Network Access Control List policies as well as for other security policies including ZTNA resources. For more information, see Apps and Resources and Custom Applications.
Click Next.
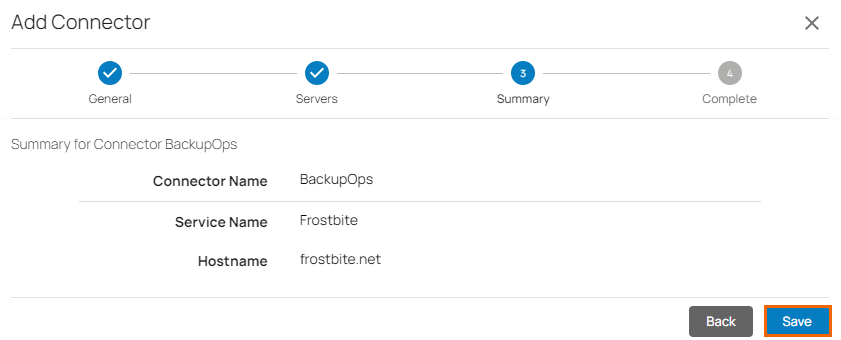
The Summary page opens. Review your settings and click Save.
The Connector status is now displayed.
Verify the status of the Connector and follow the instructions in the configuration window.
You can download and install the required Connector for Windows and Linux. Click Finish.
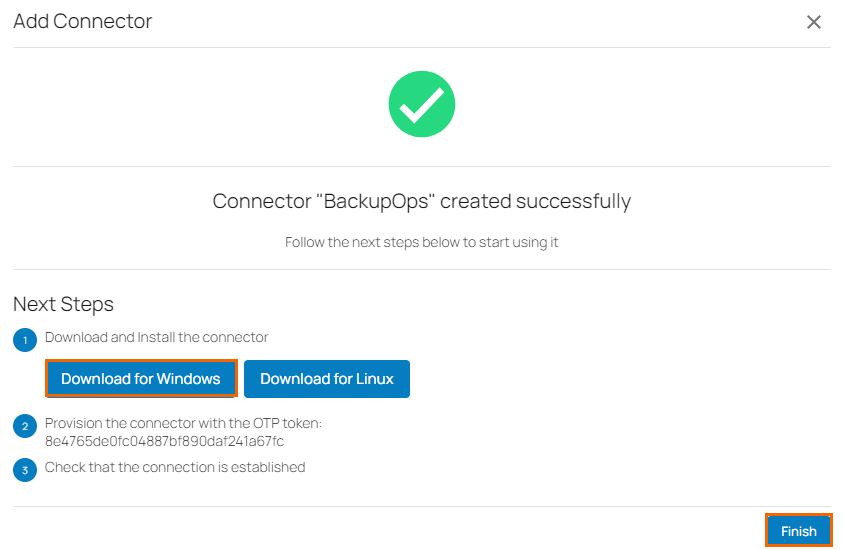
After the configuration is completed, your Connector is created. On the Connectors page, you will see a new Connector has been enrolled.
On the Connector page, click the icon with the three vertical dots.
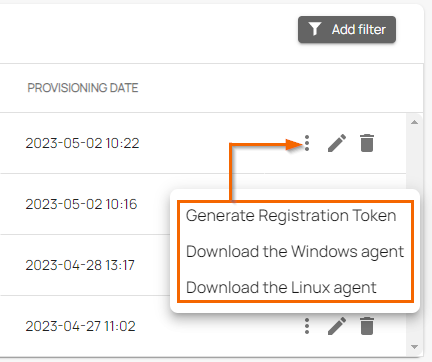
You have three options:
Generate Registration token – To generate new registration token for the Connector, select Generate Registration token.
Download the Windows agent – To download the Windows agent, select Download the Windows agent.
Download the Linux agent – To download the Linux agent, select Download the Linux agent.
Click Generate Registration Token. The Generate Registration Token window opens. Copy the Connector token.
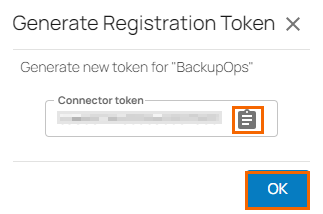
Paste the token into a text file.
Click OK.
Step 3. Install the Barracuda Connector
Launch the setup of the Connector.
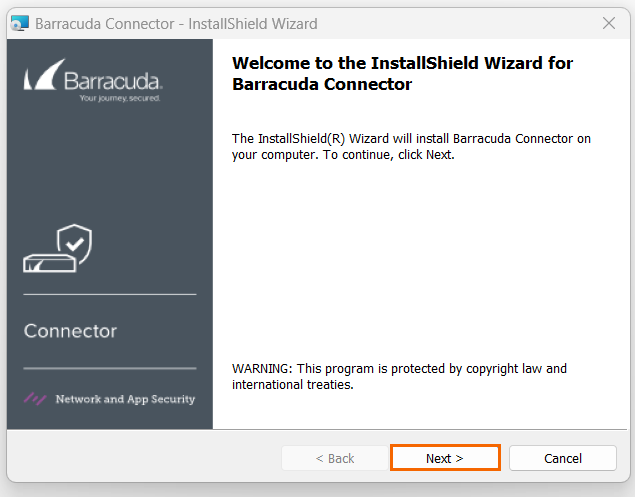
Accept the terms in the License Agreement window and click Next.
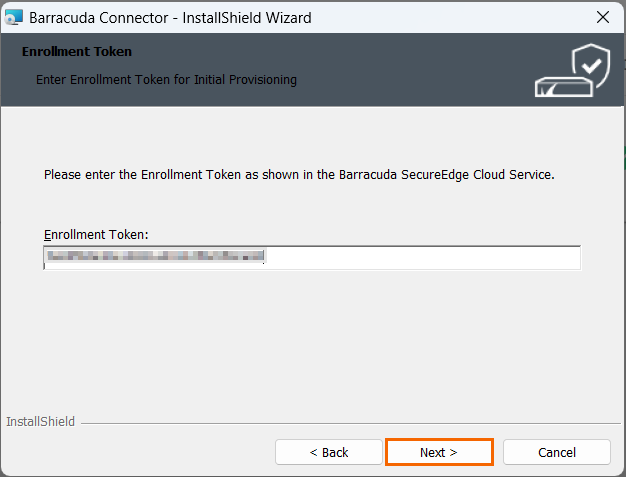
The Enrollment Token window opens. Enter the token retrieved in Step 1 and click Next.
To install the Barracuda Connector, click Install.
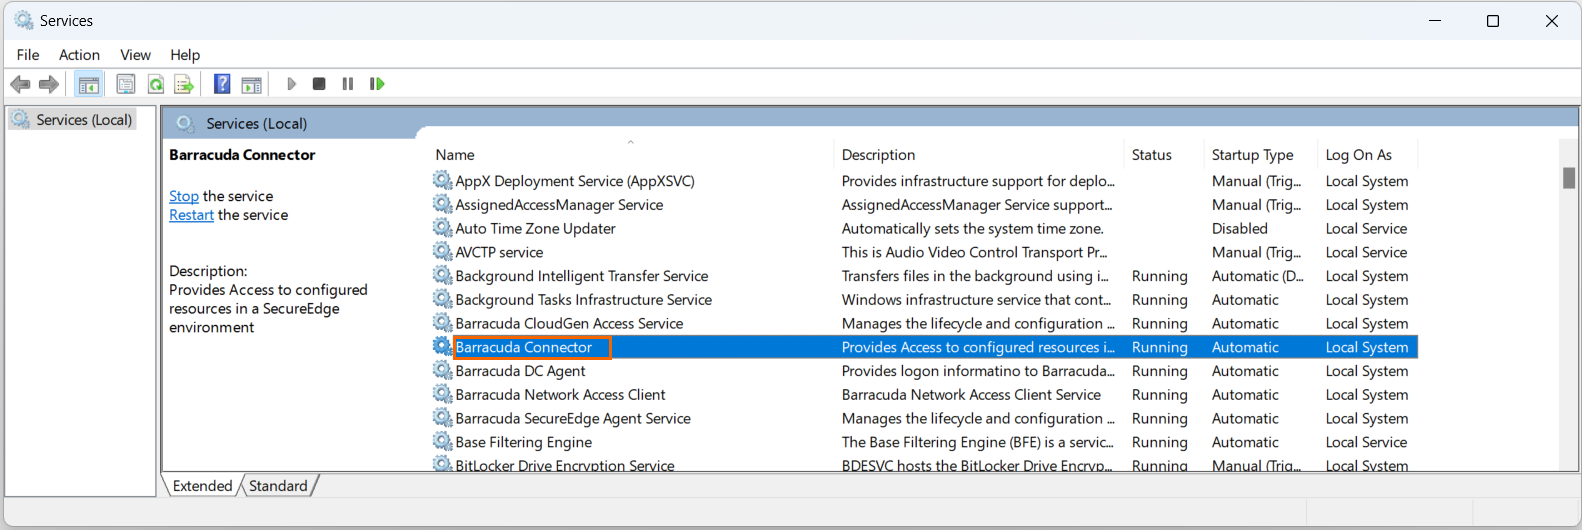
After the installation is complete, click finish. You must verify that the Connector is up and running in your system's services menu.
The exposed resources are accessible over the SecureEdge environment via the domain name you configured in the server configuration of the Connector in Step 1. The resources and services are now reachable via the Barracuda SecureEdge Access Agent for any client. The Barracuda SecureEdge Access Agent is a Zero Trust Network Access (ZTNA) agent running on the client that connects to the services offered by Barracuda SecureEdge. For more information, see How to Enroll Users in Barracuda SecureEdge. You are now ready to access the configured resources and services of the Connector over the SecureEdge environment.
After completing the installation and enrollment process, open the Barracuda Connector application.
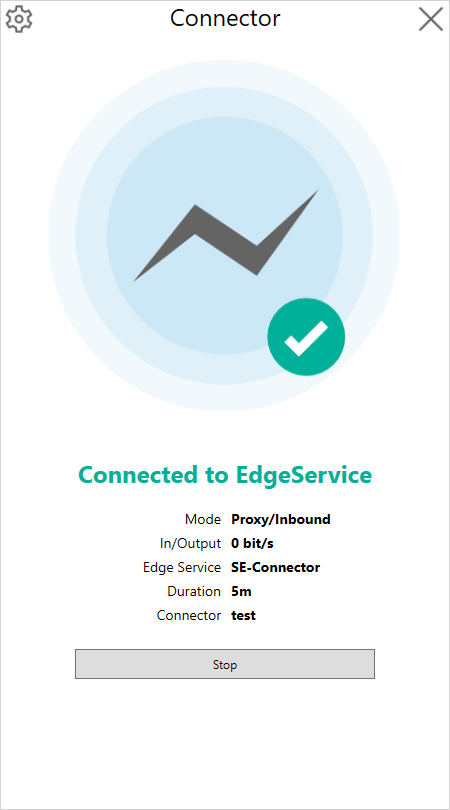
You can verify the status of your Connector. In addition, the Connector page provides following details:
Enter Enrollment Token – You can re-enter the enrollment token.
Open Log File – You can open a log file and display a log text file in .txt format. You can see detailed information about your tokens.
Open Log File Folder – When selecting Open Log File Folder, you can go directly to a log file folder location.
Quit – You can exit the Connector.
Edit an Existing Connector
Go to https://se.barracudanetworks.com/ and log in with your existing Barracuda Cloud Control account.
Select the workspace you want to edit the existing enrolled Connector from.
In the left menu, go to Infrastructure > Connectors.
The Connector page opens. All Connectors enrolled in the selected workspace are displayed.Click on the pencil icon next to the Connector you want to edit.

The Edit Connector window opens. Edit the value you are interested in.
Click Save.
Remove an Existing Connector
Go to https://se.barracudanetworks.com/ and log in with your existing Barracuda Cloud Control account.
Select the workspace you want to remove the existing enrolled Connector from.
In the left menu, go to Infrastructure > Connectors.
The Connector page opens. All Connectors enrolled in the selected workspace are displayed.To remove an enrolled Connector, click on the trash can icon next to the enrolled Connector.

The Delete Connector < Connector-Name> page opens.
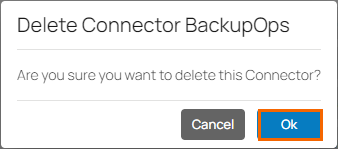
Click OK to confirm.
(Optional) Download Windows/Linux Agent
To download the Windows or Linux agent, proceed with the following steps:
On the Connectors page, click the icon of three vertical dots.
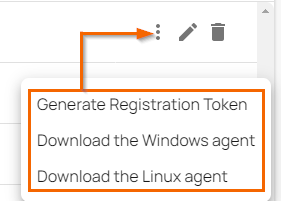
As per your requirement, download the corresponding Windows or Linux agent.
Re-Entering the Enrollment Token on Windows
In Windows operating systems, the Connector application is located in the path C:\Program Files\Barracuda\Connector. When no configuration is available, the Connector service waits for a token; otherwise, you must restart the service to use a newly supplied token.
To re-enter new token in Windows:
Go to C > Program Files > Barracuda > Connector.
Click the application ConnectorUI. The Connector application opens.
In the upper left of the Connector application, click the cog wheel icon and select Enter Enrollment Token.
The Enter Enrollment Token window opens. Enter the token retrieved in Step 1.
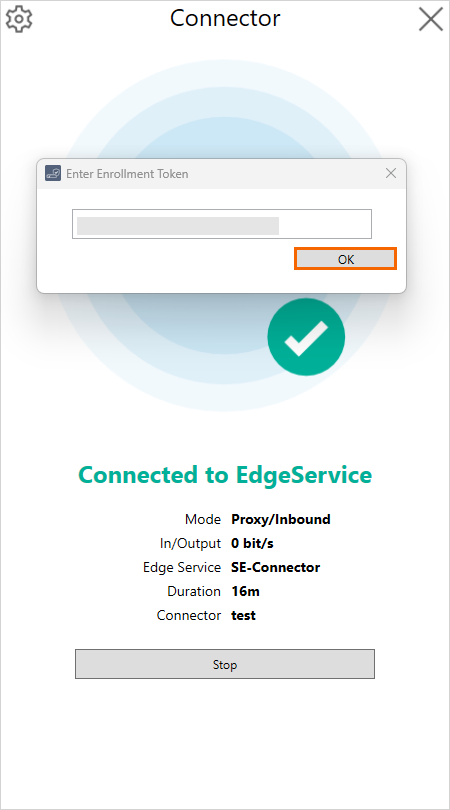
Click OK.
The new token gets enrolled after a restart of the Connector service.
Additional Information
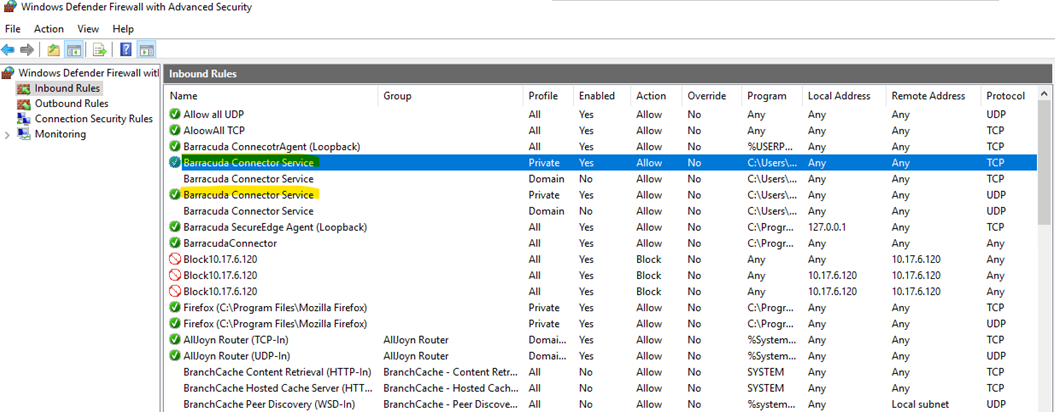
Firewall Settings on a Connector
Windows:
The Connector will add firewalld rules to allow everything that is coming from the
bsdwcsvc.exeapplication and going out of it.