The Barracuda SecureEdge Manager allows you to download a bootstrap configuration file for IoT appliances. You can import the configuration via USB or web interface. The configuration is automatically applied when an IoT appliance is rebooted.
Before You Begin
Before installing the Barracuda SecureEdge, you must have the following:
Empty USB flash drive of at least 2 GB, and no larger than 32 GB.
Step 1. Download the Bootstrap Configuration File
Open https://se.barracudanetworks.com/ in your web browser and log in with your existing Barracuda Cloud Control account.
In the left menu, click the Tenants/Workspaces icon and select the workspace containing your IoT appliance.
Go to Infrastructure > IoT.
The IoT page opens. Select the IoT appliance you wish to download a bootstrap configuration for. You can either search for the name or serial, or use filters to tailor the list of displayed sites. You can also simply scroll through the list.
Click on the arrow icon next to the IoT appliance.

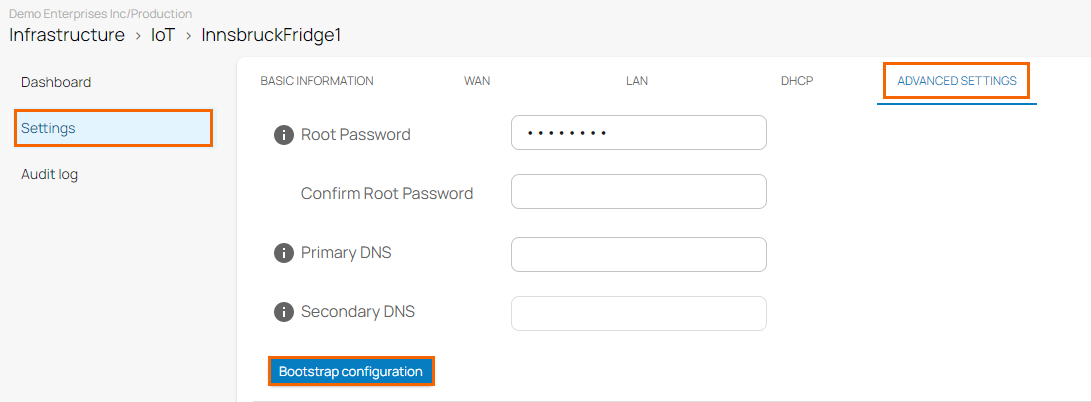
In the IoT menu, go to Settings > ADVANCED SETTINGS and, at the bottom of the window, click Bootstrap configuration.

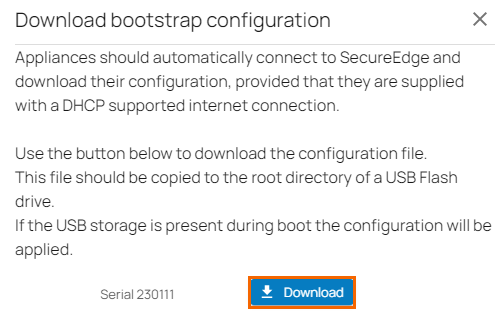
The Download bootstrap configuration page opens. Before downloading, read the useful information.

Click Download.
The configuration file is downloaded with respect to your IoT appliance serial number. Save this file.
Step 2. Copy the Bootstrap Configuration to the IoT
There are three different methods used to copy the configuration file to the IoT. You can copy the configuration file to the IoT appliance either via USB flash drive or USB cable (where the IoT acts as a USB mass storage device), or via web interface.
Import the File via USB Flash Drive
Select the bootstrap configuration of the IoT that you retrieved in Step 1.
Verify the serial number of your appliance.
On the formatted USB flash drive, create the root directory and copy the bootstrap configuration file.
The USB flash drive is now prepared for installation.
Start the installation by inserting the USB drive and rebooting the SecureEdge IoT appliance.
Safely remove the USB flash drive from your client.
Plug the USB flash drive into your Barracuda Networks IoT appliance and then turn the unit on.
Remove the USB flash drive from the appliance and reboot the unit.
Import the File via USB Mass Storage (OTG)
Connect the IoT appliance with a USB cable to your client PC and copy the IoT bootstrap configuration file to the device. The configuration is automatically applied when the IoT appliance is rebooted.
Use a micro-to-standard USB cable to connect the OTG port with a USB port on your client PC.
Wait for your client PC to recognize the IoT appliance as a mass storage device.
Verify the file name of the IoT configuration file with respect to the serial number.
Copy the configuration file to the USB storage of the IoT appliance.
Unplug the USB cable and reboot.
The configuration is automatically applied on first boot. The IoT appliance configuration file is not removed from the device, but only applied once.
Import the File via IoT Web Interface
The IoT appliance listens on 192.168.200.200 on the LAN port. You must configure your client PC to connect to the IoT appliance and then use the web interface to upload the configuration file.
Change your client PC IP address to:
IP address – 192.168.200.100
Netmask – 255.255.255.0
Gateway – 192.168.200.200
Connect your client PC to the LAN port of the IoT.
Open a browser and go to https://192.168.200.200/.
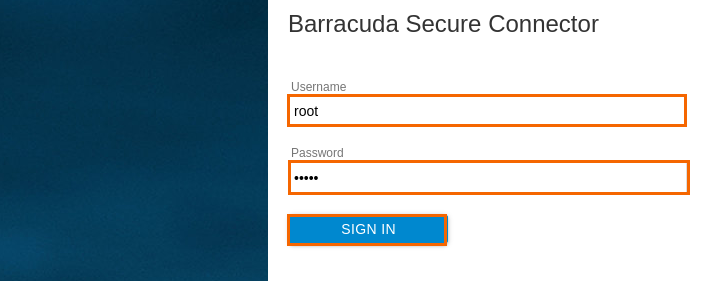
Log into the IoT:
Username – Enter
root.Password – Enter
root.
Click Sign In.

The web interface Dashboard page opens. Click Retrieve Lock.

In the Backup section, click Browse and select the configuration file created in Step 1. For example, in this case: cloudgenwan-1708802.gz.

Click Apply backup.
At the top of the page, click Activate Configs.

Click Release Lock.
Your IoT appliance now automatically connects to the SecureEdge Cloud UI. The WAN LED turns green when a connection has been established. The device is now visible on the Dashboard page. To get more detailed information about your device, go to Infrastructure > IoT.
