

System Requirements
Before configuring the Barracuda DC Agent, make sure that your system meets the following requirements:
Local Installation – Microsoft Windows Server 2008, 2008 R2, 2012, 2012 R2, 2016, 2019, or 2022. Windows Server Core is not supported for local installation and monitoring. The DC Agent can, however, communicate with a domain controller that is running Windows Server Core. In this case, you could install the DC Agent on a server running Microsoft Windows Server 2008, 2008 R2, 2012, 2012 R2, 2016, 2019, or 2022 and configure it to remotely monitor a domain controller that is running on a Windows Server Core machine.
Remote Installation – Microsoft Windows 2008 and higher. Also note that, for the remote installation of DC Agent, you MUST be a domain member to query the server.
Get and Install the Barracuda DC Agent Version 7.x
You can install the Barracuda DC Agent directly on the domain controller or on a dedicated Windows PC within your network environment. To monitor wireless device logins using Windows Network Policy Server (NPS) log events, see Using the Barracuda DC Agent With Microsoft Network Policy Server.
For the Barracuda Web Security Gateway:
- Log into the web interface as admin
- Download the Barracuda DC Agent from the USERS > Authentication page using the
Barracuda DC Agent (Download/Install) link at the bottom of the screen. - To launch the installation file (DCAgent.exe), right-click it and select Run as administrator.
- Follow the instructions in the wizard. When going through the steps in the installation wizard, all settings normally should be left at default. The required settings to configure should be:
- Your domain information
- The IP address of the allowed Barracuda Web Security Gateway
- Confirm that Logon Events are monitored by your domain controller:
- Open Domain Controller Security Policy (Start > Programs > Administrative Tools).
- Click Local Policies.
- For Audit account logon events and Audit logon events, verify that the Policy Settings column displays Success.
For the NextGen Firewall F-Series:
- Get the Barracuda DC Agent from your Barracuda Cloud Control Account.
- While logged into your account, go to the Support > Downloads page.
- From the Product list, select Barracuda NG Firewall.
- Select Fulltext, enter Barracuda DC Agent, and then click Search.
- Download the latest Barracuda DC Agent version that is compatible with your system.
- To launch the installation file (DCAgent.exe), right-click it and select Run as administrator.
- Confirm that Logon Events are monitored by your domain controller:
- Open Domain Controller Security Policy (Start > Programs > Administrative Tools).
- Click Local Policies.
- For Audit account logon events and Audit logon events, verify that the Policy Settings column displays Success.
Configure the Barracuda DC Agent
After the Barracuda DC Agent is installed and running correctly, launch the application and complete the following steps. Note: Your entries in the DC Agent interface will NOT be saved until you click the Save button.
- Define location and login credentials for your Active Directory. Click the Active Directories tab and click the green + sign to add a domain.
- Select Local if you installed the DC Agent on the Domain Controller; select Remote if you installed on another machine on the network.
- If you selected Remote, enter the Fully Qualified Domain Name (FQDN) in the Host field.
- Enter a name for referring to the domain, e.g. 'Finance', 'Salesnet', etc.
The Username should be associated with permissions to run WMI queries on the domain controller. Enter that user's Password and click OK.
- Click Test to verify connectivity with the domain controller.
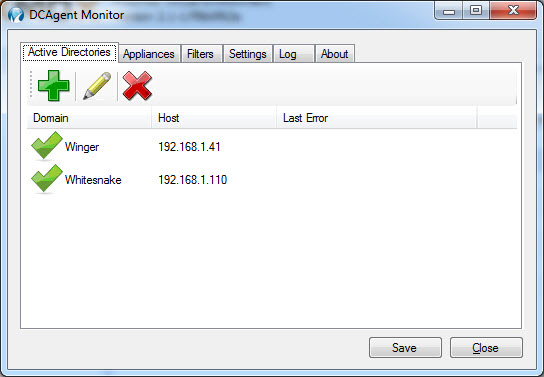
Add the internal IP Address and a Description for each Barracuda Networks appliance (Barracuda Web Security Gateway, NG Firewall, etc. – hardware or virtual) with which you want to use the DC Agent.
On the Filters tab, specify any IP Address, User, or Group for which you don't want the DC Agent to capture and send login information to your Barracuda Networks products. These are exceptions and associated login events will be ignored by the DC Agent. Here are the formats you can use to specify IP address exemptions:
Single IP address (Example: 192.168.0.1)
IP Range/CIDR notation (Example: 192.168.0.0/24)
IP Range/Subnet mask (Example: 192.168.0.0/255.255.255.0)
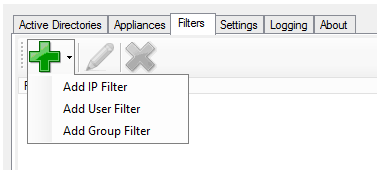
User and Group (CN) formats are the same as in the Barracuda Web Security Gateway web interface, and they do support leading and trailing wildcards (e.g. “*name” or “name*” , but not “na*me”). For example:
CN=Jane Smith- On the Settings tab, configure the following:
- Appliance Listening Port – If required, you can change the TCP listening port. Make sure that you also specify the same port on all configured Barracuda Networks products. Default is port 5049.
- Debug Log Level:
- Errors Only = log errors only
- Info = informational
- Debug = verbose (most information logged)
- Group Options (Barracuda Next Firewalls only) – select which option best fits your logging requirements. If group information is required for authenticated users, select one of these group name types.
- Cache groups for: Amount of time, in minutes, to allow the DC Agent to rely on cached login information. Since users will most likely log in once/workday, the default time is 480 minutes, or 8 hours. The shorter this time is, the more often the DC Agent will retrieve login event information from the domain controller and pass it to the Barracuda Networks product, which requires more processing overhead.
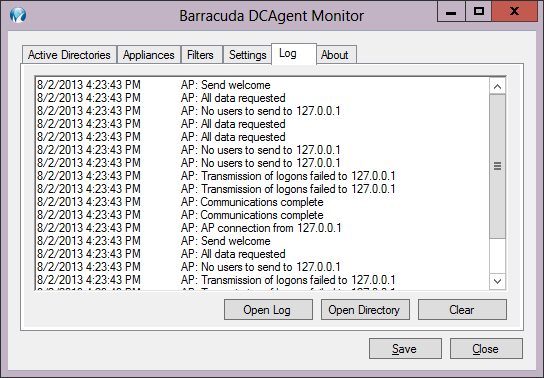
DC Agent Logging
Typically you'll only need the Log upon first install of the DC Agent to make sure everything is working as expected. Note that, if you were previously running another version of the DC Agent, that data logged while the old agent was running will no longer show in the user interface log window. That data is still, however, in the database and will appear in reports as usual. To monitor wireless device logins using Windows Network Policy Server (NPS) log events, see Using the Barracuda DC Agent with Microsoft Network Policy Server.
Configure your Barracuda Networks Product
To ensure that your Barracuda Web Security Gateway or NextGen Firewall can communicate with the Barracuda DC Agent, you must configure the product as well.
- For the Barracuda Web Security Gateway, see the online help on the USERS > Authentication page in the web interface.
- For the Barracuda NG Firewall, see How to Configure the MSAD DC Client.
How to Uninstall the Barracuda DC Agent
- Verify that the Barracuda DC agent service is not running.
- Use the Add/Remove Programs or Programs and Features tool in the Windows Control Panel to uninstall the Barracuda DC Agent.