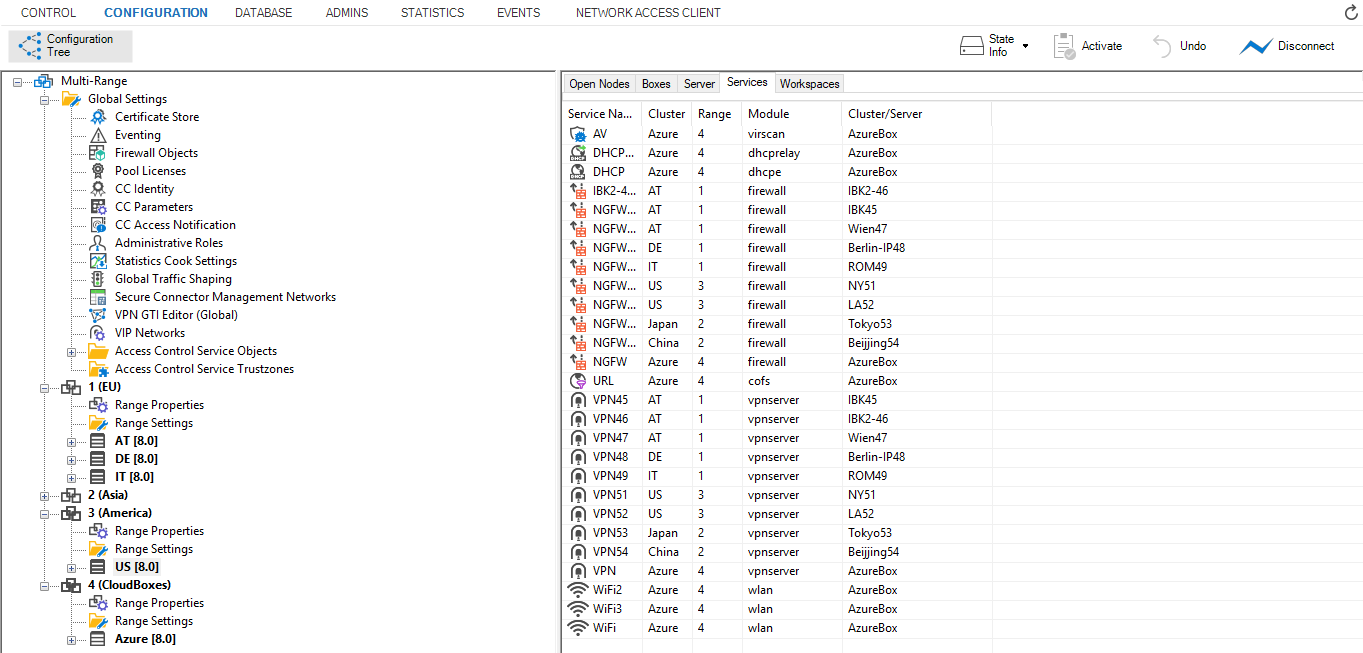
The Configuration page of the Barracuda Firewall Control Center lets you configure the Control Center. It also lets you remotely configure the managed Barracuda CloudGen Firewall units. To access the Configuration page, click the Configuration tab in the ribbon bar.
The main display of the Configuration page consists of two frames:
- Configuration Tree (left) – Lists all configuration pages in hierarchical order.
Tabs Section (right) – Provides information related to configuration nodes and units. In case this section is not visible, move your cursor to the right of the window and drag the section to the middle of the screen.

Configuration Tree
The configuration tree displays all configuration pages, just like on the CloudGen Firewall. The Multi-Range node represents the highest level within the hierarchy and contains all available ranges, clusters, and boxes that are managed by the Control Center. From here, you can manage your configurations and administrative sessions. You can also identify which nodes have been modified. To access the sub-pages of a configuration section, click + (expand).
When you right-click the nodes of the configuration tree, you are provided with the following options:
- Collapse All – Closes all open nodes in the configuration tree down to the top level.
- Properties – Opens a window that displays the properties of the configuration node.
Lock – Locks write access to the selected node or tree branch. A lock icon is then displayed next to the node or branch. This lets other administrators know that the page has been locked for editing. If a page has been locked by you, a yellow lock is displayed next to it. If a page is locked by another administrator, a gray lock is displayed next to it.
Selecting Show Lock Info from the context menu displays information on the administrator who has locked the selected node or tree branch. Break Lock breaks the lock held by another administrator on the selected node or tree branch. Unlock releases write access to the configuration page. It is recommended that you unlock all configuration files before quitting a session or starting another task.
To prevent administrators from overwriting each other's changes, you can only break locks that belong to broken sessions that are older than 10 minutes. An active session is broken when the associated client is suddenly disconnected and cannot successfully reconnect. You cannot break locks held in active sessions. However, if you have the appropriate permissions, you can kill sessions that own the lock.
- Collapse – Closes the right-clicked node after being selected in the list.
- Expand – Expands the right-clicked node after being selected in the list.
Depending on a related setting in Firewall Admin, expanding a node will behave differently with a large number of subordinated nodes. For more information, see How to Enable Dynamic Loading for Large Configuration Trees. - Copy To Repository – Copies the selected configuration page to the corresponding repository section. This option is available only after you create a repository.
- Refresh From Here – Updates the view of the Configuration Tree from the selected node.
- Show RCS Versions – Displays Revision Control System (RCS) information for the selected nodes. For more information, see How to Configure Revision Control System Monitoring (RCS).
- Show History – Displays a history of the locks that have been made to the selected node.
- Show Backlinks – Shows references to other objects, if available.
- Show Backlink Overrides – Displays overrides if backlinks are present.
- Show Config Definition – Opens a window displaying the details of this configuration node.
- Remember Position – If you want Barracuda Firewall Admin to open at a specific node for your next session, right-click the node and select Remember Position. To clear the saved position, right-click it and select Clear Remember Position.
The following options are available only when you right-click the Multi-Range node:
Create Range – Clicking this entry allows you to create a new range.
- Toggle Permission View – Clicking this entry displays the configurable read (r) and write (w) permissions for each entry of the configuration tree. For information on how to configure permission settings, refer to the last section in this article (Defining Node Properties).
- Toggle Release View – Clicking this entry displays the release version numbers of all boxes and services included in the Multi-Range configuration.
- Restrict View to Range, Restrict View to Cluster – These entries become available when selecting either the Range or Cluster node. Clicking the respective entry restricts the view to the selected range or cluster.
- Show Full tree – This entry becomes available when the configuration tree view is restricted to either range or cluster view (see above). Clicking it expands the configuration tree view to display of all ranges and clusters.
- Migrate Clusters, Migrate Ranges, Migrate Complete Tree – For a description of these context menu entries, see Updating CloudGen Firewalls and Control Centers.
The following options are available only when you right-click the Box node:
Reset to Cluster Default – Resets the configuration view to cluster default.
- Create PAR file for box – Creates a PAR file for the selected box.
- Remove DHA box – Deletes the DHA unit.
- Copy Box – Creates a copy of the selected box.
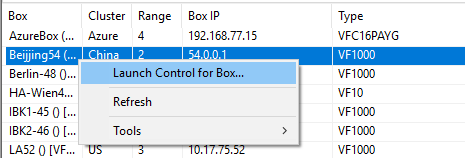
- Launch Control for box – Launches the login screen providing the login details for the Control Center that manages the selected box.
Refresh from here – Updates the view of the configuration tree from the selected box.
- Collapse – Collapses all nodes in the selected tree branch.
- Expand – Opens all nodes in the selected tree branch.
- Show RCS Report – Displays Revision Control System (RCS) information for the selected nodes. For more information, see How to Configure Revision Control System Monitoring (RCS).
- Show RCS Session Report – Displays Revision Control System (RCS) information for the selected system. For more information, see How to Configure Revision Control System Monitoring (RCS).
The following options are available only when you right-click the Assigned Services node:
- Create Service – Creates a service.
- Add Shared Service – Opens a window that lets you select a shared service from a list, if configured.
- Remove Service – Marks the selected service for deletion.
Tabs Section
The right section of the configuration window provides the following information listed under the corresponding tabs:
- Open Nodes – Provides access to all opened configuration files.
- Boxes – Provides access to the boxes' configuration files.
- Services – Provides access to the assigned services' configuration files.
To switch from the Control Center to a box, right-click the desired box and choose Launch Control for Box from the context menu.

- Server – This tab refers to the vintage 3-layer server-service architecture and is still displayed for appliances that are operating under this architecture. In the Control Center, those appliances are included in this tab.
For more information on the new 2-layer service architecture, see Assigned Services. - Workspaces – Provides access to configured workspaces.
Defining Node Properties
For additional access restriction, the Control Center offers a context menu for the definition of node properties for each item of the configuration tree. To access the context menu, right-click an entry in the configuration tree and select Properties.
The node properties are displayed as follows:
General Section
- Name – The name of the service’s software module.
- Description – A short description for the software module.
- Created – The date/time, admin, admin IP of service creation.
- Last Modified – The date/time, admin, admin IP of last modification.
- Release – The release version installed on the box.
- Backwards Compatible – Shows all releases that the configuration can be reverted to.
- Module – Shows the configuration module path.
Administrative Level Section
- Your Level – Your administrative level.
Read – By entering the corresponding configuration level, the read permission is specified. Any level lower than the set one has access. For more information, see How to Configure Administrative Profiles.
- Write – By entering the corresponding configuration level, the write permission is specified. Any level lower than the set one has access. For more information, see How to Configure Administrative Profiles.
- Click Change to save the new configuration.
- Modify Event – Specifies the type of event notification if the corresponding file is modified. Available notification types are:
- No Event – Default.
- Normal Event – Generates event Config Node Change Notice [2400]
- Notice Event – Generates event Config Node Change Warning [2401]
- Alert Event – Generates event Config Node Change Alert [2402]
- History – States configuration actions performed on this entity; administrator and peer IP are logged:
- param – When changes to the read or write level were made.
- lock – When conf entity was locked.
- unlock – When conf entity was unlocked.
- change – When conf entity was changed.
- add – When a service object was added to the configuration tree.
