

Before creating a SQL backup set, make sure that you are familiar with the backup type restrictions and recommendations.
To back up a SQL Server, perform the following steps.
- Navigate to the Computer page. See Navigating to the Computer Page for instructions.
The Computer page is displayed.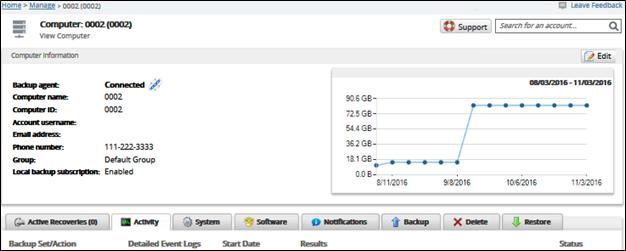
- Click the Backup tab.
The Backup Selections page is displayed.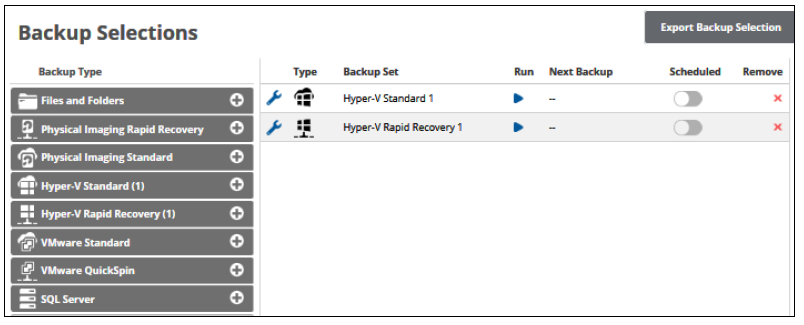
- In the Backup Type pane, click SQL Server.
The Select page is displayed.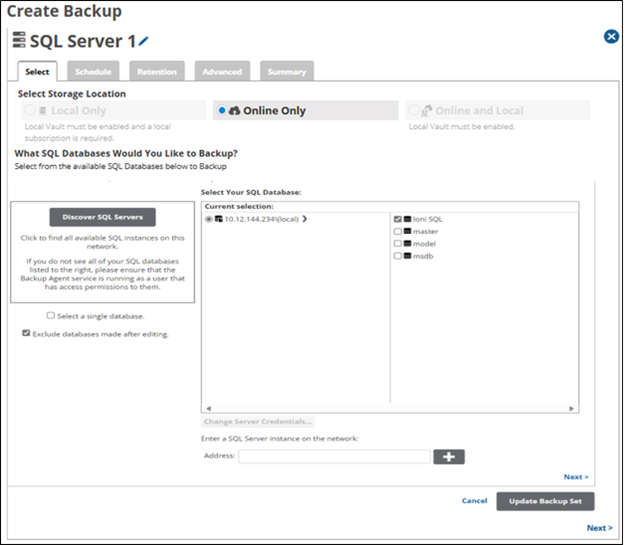
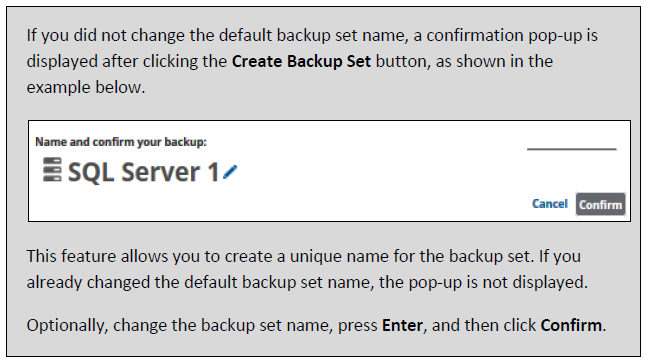
- Click the Backup Name to provide a new name for the backup set or accept the default. See Changing Backup Set Names.
- At the Select Storage Location section, click one the following options.
Note: This procedure applies to all options. See Backup Options for more information.- Local Only (Local Vault must be enabled, and a local subscription is required. Data is not backed up to the cloud.)
- Online Only (An enabled Local Vault disables this option.)
- Online and Local (Local Vault must be enabled.)
- At the SQL Servers section, click the Discover SQL Servers button.
The following Stop button is displayed.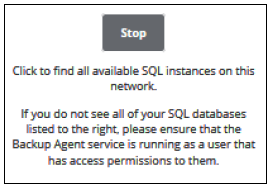
- Optionally, click the Select a single database check box.
- Optionally, click the Exclude databases made after editing check box.
The available SQL databases are displayed in the Current Selection pane.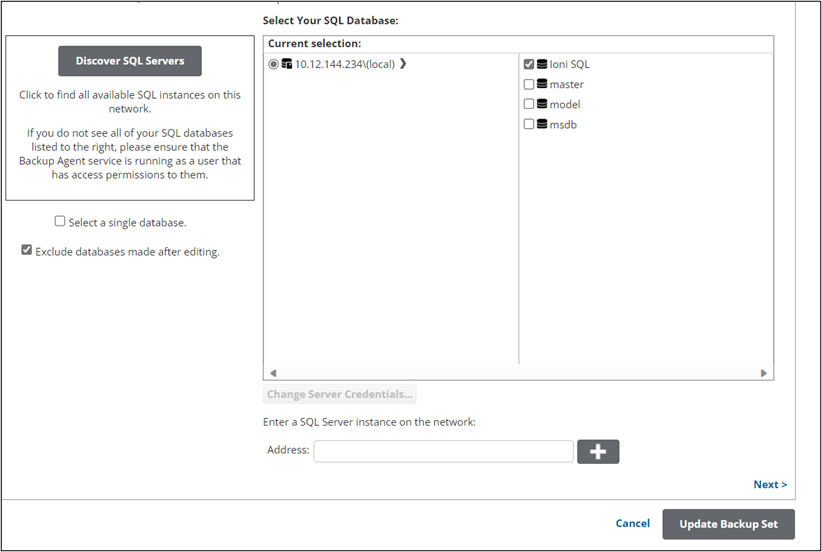
In the Current Selection page, select the databases you want to backup.
The authentication pop-up is displayed.
- Update the SQL password within the IBU portal so that the IBU backup set is in sync with the Microsoft SQL database.
At the Authentication field, select Windows Authentication or SQL Server Authentication from the drop-down menu, type your credentials, and then click OK.
The Change Server Credentials button is enabled as shown below.
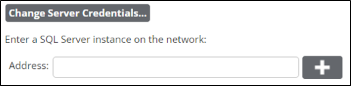
Optionally, click the Change Server Credentials button to change server credentials.
The credentials pop-up is displayed.
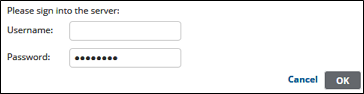
Type your credentials and then click OK.
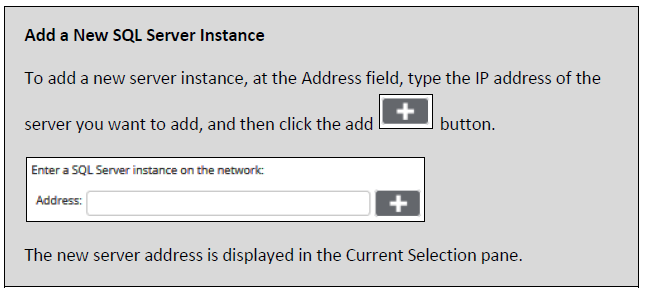
- To add a new SQL Server instance on the network, perform the following step.
- After you have finished selecting the SQL databases you would like to back up, click Next.
The Schedule page is displayed.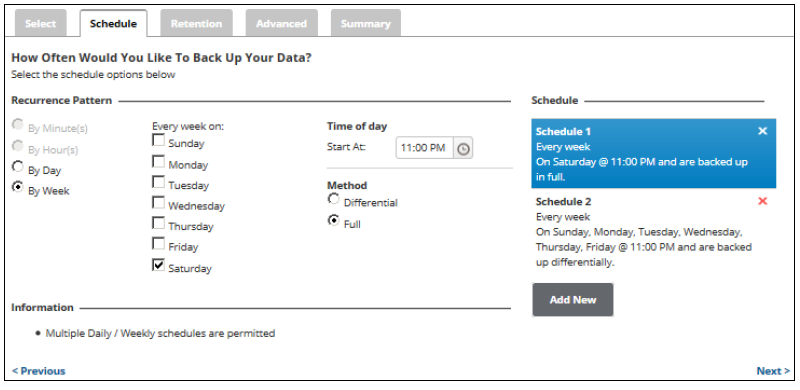
- Accept or edit the default schedule. See Adding a New Daily or Weekly Schedule for more information.
Notes:- The default is nightly with once a week being a full.
- Multiple daily/weekly schedules are permitted (if they do not overlap).
- Select the method, Differential or Full, by which you would like to back up your server.
- After setting the schedule, click Next.
The Retention page is displayed.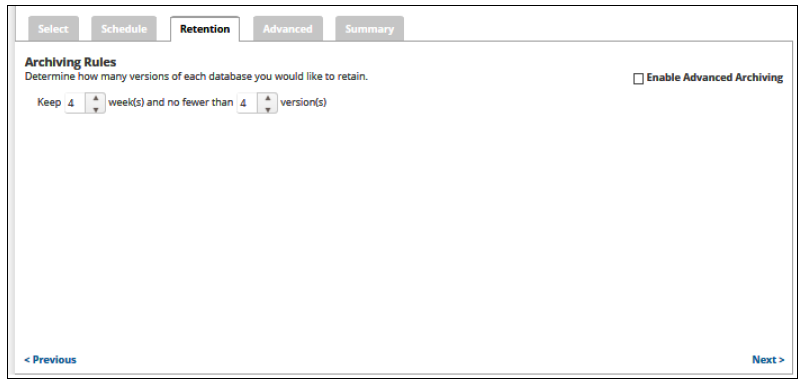
- Select the number of days and versions you wish to archive.
Note: The default is 4 recoverable versions of backups at the destination retained for no fewer than 4 weeks. - Optionally, select the Enable Advanced Archiving check box. For Advanced Archiving information, see Archiving Rules.
The Advanced Archiving fields are displayed.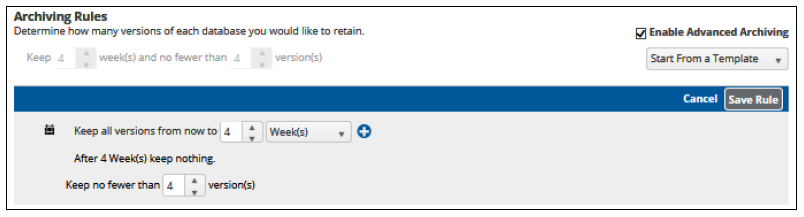
- Make your selections, click Save Rule, and then click Next.
The Advanced page is displayed.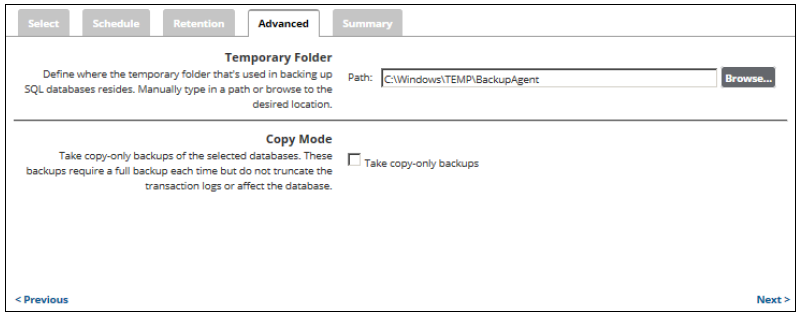
Requirement: You must specify a temporary folder located on a disk with enough space. - At the Temporary Folder field, accept the default, type a new path, or click the Browse button to locate the temporary folder that is used in backing up. See Browsing to a Folder.
- To run copy-only backups of the selected servers, select the Take copy-only backups check box.
Note: These backups require a full backup each time but do not truncate the transaction logs or affect the production SQL server. - After making your selections, click Next.
The Summary page is displayed.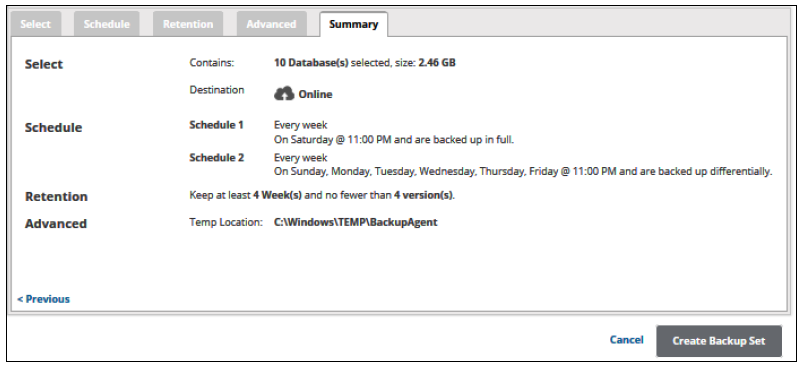
- Verify your selections, and then click Create Backup Set.
The Backup Selections page is displayed with the latest backup set.