

To use the DHCP service to assign IP addresses and other network configurations to clients, you must enable it on the LAN port of the site device where the clients are connected to.
Step 1. (Optional) Configure a LAN Interface of the Site Device
Skip this step if you have already configured a LAN interface during deployment and want to use this interface. For more information, see How to Create a T/VT Site Configuration in Barracuda SecureEdge.
- Go to https://se.barracudanetworks.com and log in with your existing Barracuda Cloud Control account.
- Select the workspace containing your site.
- Go to Infrastructure > Sites. The Sites page opens.
- Select the site where you want to enable the DHCP service. You can either search for the name or serial, or use filters to tailor the list of displayed sites. You can also simply scroll through the list. Click on the arrow icon next to site you want to edit.

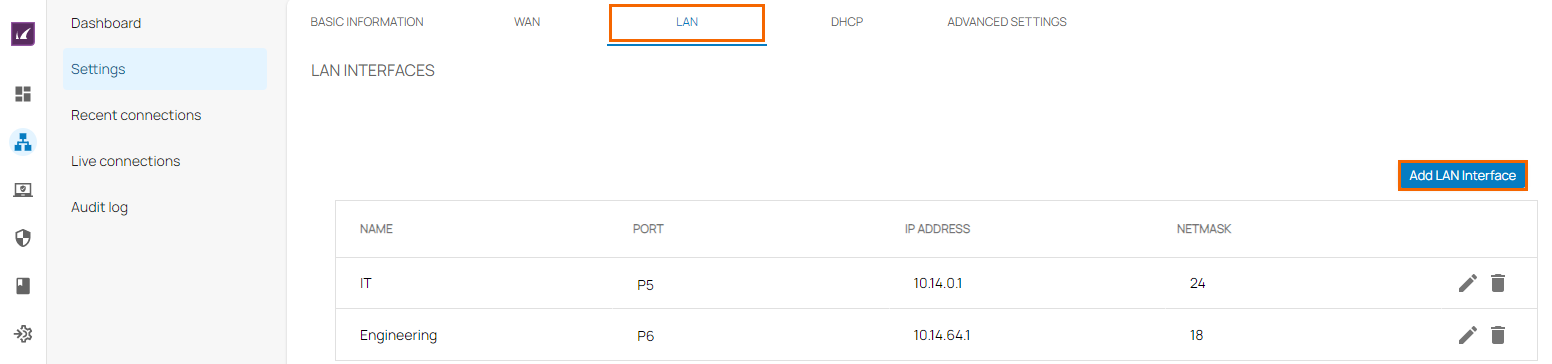
- In the site menu, go to Settings > LAN and click Add LAN Interface.
- The Add New LAN Interface window opens. Specify values for the following:
- Name – Enter a name for your LAN.
- Port – Select a port from the drop-down list where the LAN is attached to. Note: Port 1 is reserved for high availability.
- IP Address – Enter the IP address.
Netmask – Enter a number between
0and32for the subnet mask.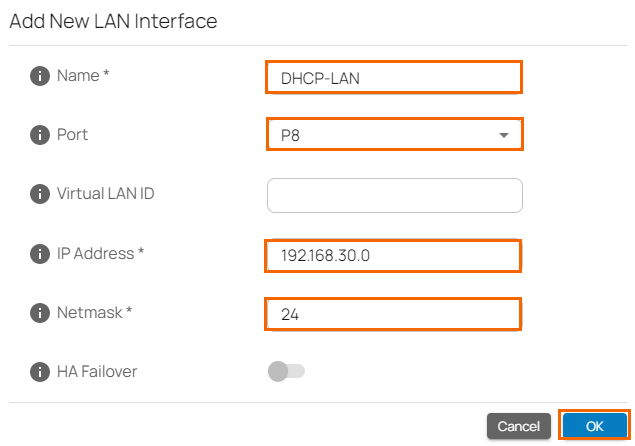
- Click OK. The LAN window opens.
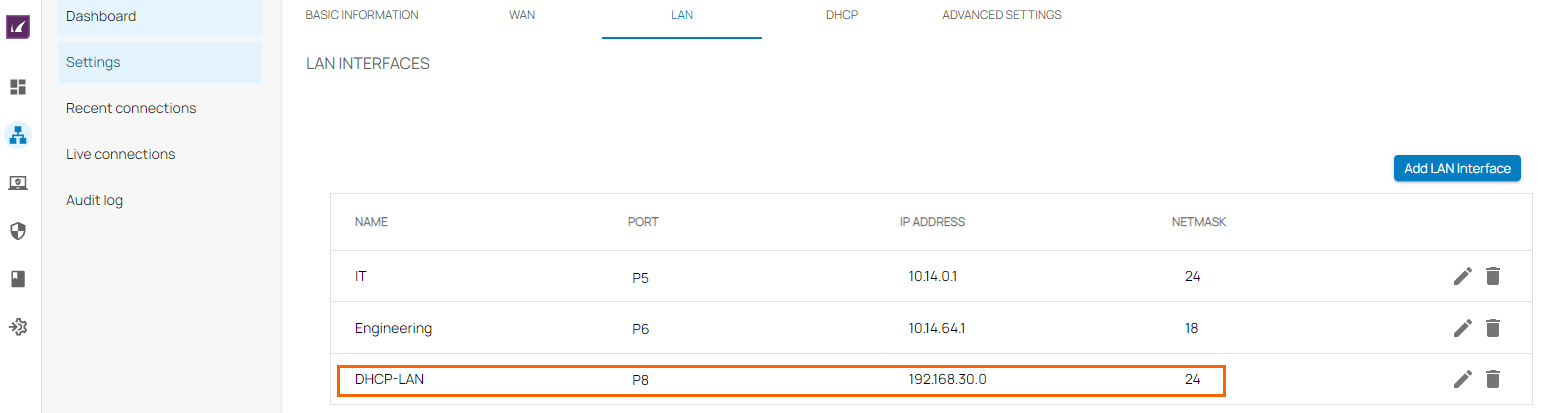
- Click Save.
Step 2. Specify DHCP Settings
- Go to https://se.barracudanetworks.com and log in with your existing Barracuda Cloud Control account.
- Select the workspace containing your site.
- Go Infrastructure > Sites. The Sites page opens.
- Select the site where you want to enable the DHCP service. You can either search for the name or serial, or use filters to tailor the list of displayed sites. You can also simply scroll through the list.
- Click on the arrow icon next to site you want to edit.
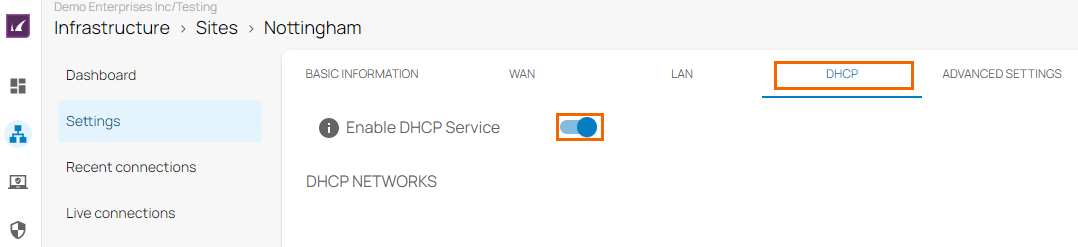
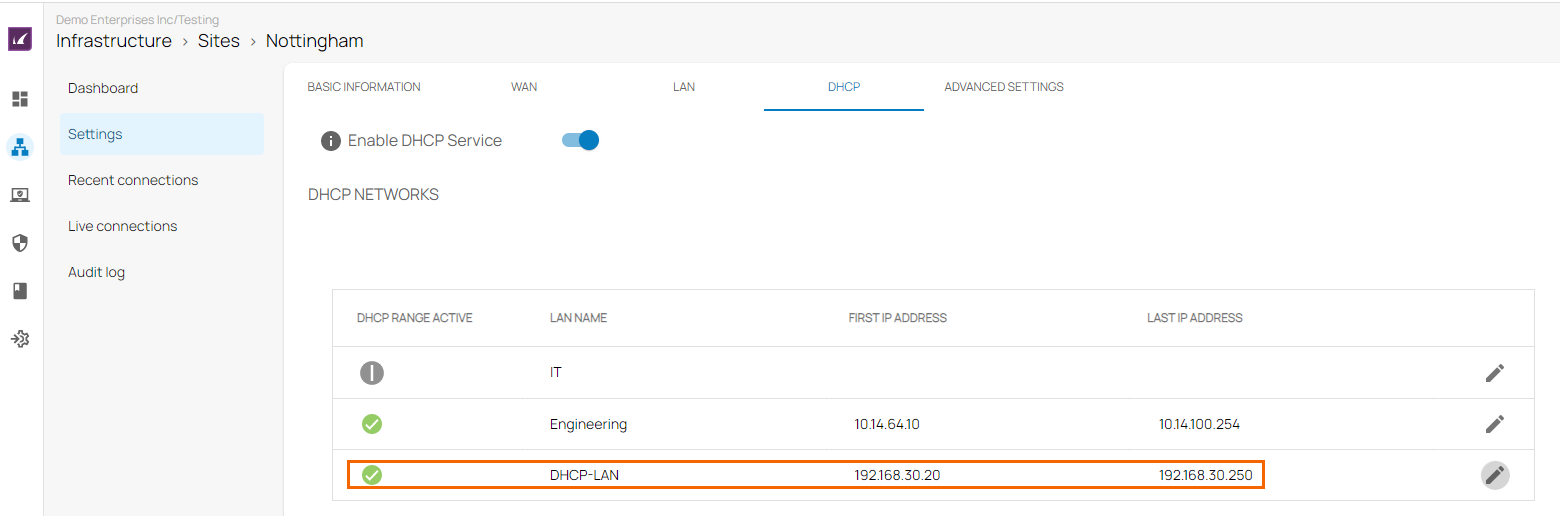
- In the site menu, go to Settings > DHCP and click Enable DHCP Service.
- In the DHCP Networks section, click on the pencil icon next to the LAN port where the clients using DHCP are connected, e.g., DHCP-LAN.
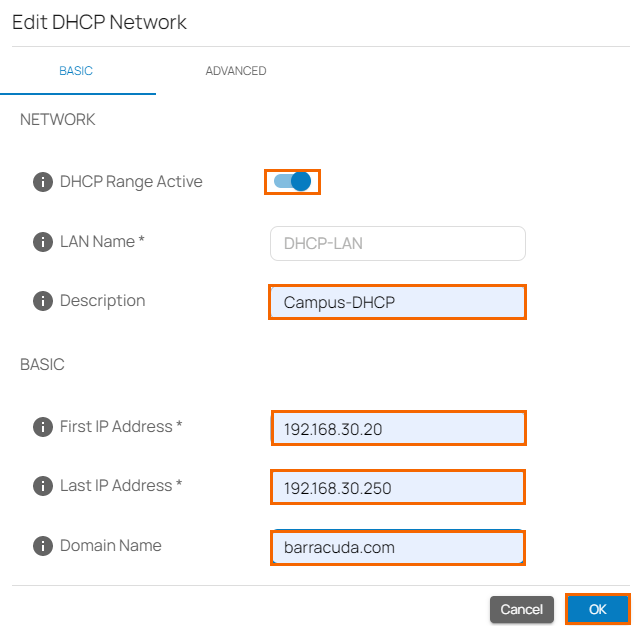
- The Edit DHCP Network window opens. In the BASIC tab Specify values for the following:
- In the NETWORK section, specify the following:
- DHCP Range Active – Set to enabled.
- LAN Name – Verify that the correct LAN is selected.
- Description (Optional) – Enter a description.
- In the BASIC section, specify the following:
- First IP Address – Enter the first IP address available for DHCP assignment.
- Last IP Address – Enter the last IP address available for DHCP assignment.
- Domain Name (Optional) – Enter the domain name.
- In the NETWORK section, specify the following:
- Click Ok. The site settings window opens.
- Click Save.
If you do not need advanced DHCP options, your configuration is now complete. For advanced DHCP options, continue with Step 3.
Step 3. (Optional) Specify Advanced DHCP Parameters
In certain cases, you might need to specify advanced DHCP parameters, such as lease time.
- Go to https://se.barracudanetworks.com and log in with your existing Barracuda Cloud Control account.
- Select the workspace containing your site.
- Go to Infrastructure > Sites. The Sites page opens.
- Select the site you want to edit. Click on the arrow icon next to the site you want to edit.
- In the site menu, go to Settings > DHCP.
- In the DHCP Networks section, click on the pencil icon next to the LAN port you configured in Step 2.

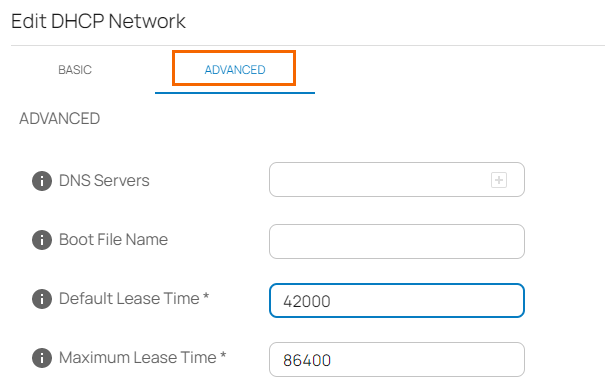
- The Edit DHCP Network window opens. Click ADVANCED.
- The ADVANCED tab opens. Specify the values you need for your network configuration:
- DNS Servers – Enter the IP address of the DNS server and click +.
- Boot File Name – Enter the name of an initial boot file that is to be loaded by a client. It should be recognizable to whatever file transfer protocol the client can be expected to use to load the file.
- Default Lease Time – Enter the default lease time in seconds.
- Maximum Lease Time – Enter the maximum lease time in seconds.
- WINS Servers – Enter the IP address of the WINS server and click + .
- TFTP Host Name – Enter the host name of the TFTP server.
- TFTP IP Address – Enter the IP address of the TFTP server and click + .
- Vendor Options – Enter one or more vendor options separated by a ";" (semicolon).
- Click OK. The site settings window opens, showing you DHCP network entry.
- Click Save.