

You can configure the Malware Protection policy to either scan or not scan traffic by default. Scanning is done according to the virus scanner configuration and, if an Advanced Threat Protection (ATP) license is present, also by the ATP engine. When performing an ATP scan, a hash DB lookup is performed before a user receives a downloaded file, which compares a hash of the file with the Barracuda database to see if it is a malicious file. Simultaneously, the file is uploaded to the Barracuda Advanced Threat Protection (ATP) cloud if the file size is 10 megabytes or less (see Advanced Threat Protection (ATP) for general information). Depending on the behavior of the file, it is assigned a threat level that is transmitted to the appliance. The file is then either blocked or delivered.

For information on how to customize default policy profiles, see How to Configure Policy Profiles.
Before You Begin
When using Malware Protection for HTTPS and FTPS, make sure that SSL Inspection is enabled in the Security Settings. For more information, see How to Configure Outbound SSL Inspection.
Create a Malware Protection Policy Profile
Create an explicit Malware Protection policy profile to match individual requirements.
- (On the Control Center) Go to CONFIGURATION > Configuration Tree > Multi-Range > Global Settings > Global Firewall Objects.
- Click Lock.
- In the left menu, expand Policy Profiles.
Select Malware Protection.
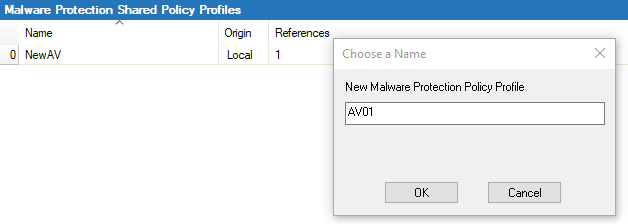
- To add a new policy profile, click the plus icon (
 ) at the top right of the window, enter a profile name, and click OK.
- Click Send Changes and Activate.
The policy profile now appears in the Malware Protection Shared Policy Profiles list, and you can create explicit policies for it.
Create an Explicit Malware Protection Policy
- (On the Control Center) Go to CONFIGURATION > Configuration Tree > Multi-Range > Global Settings > Global Firewall Objects.
- (On a CloudGen Firewall) Go to CONFIGURATION > Configuration Tree > Box > Assigned Services > Firewall > Forwarding Rules.
- Click Lock.
- In the left menu, expand Policy Profiles.
Select Malware Protection. The Malware Protection Policies window opens.
- Select the profile you wish to create the policy for. The policy list appears under the corresponding tab in the lower window.
- To add a new policy, click the plus icon (
 ) at the top right of the lower window. You can also right-click the list and select Add Policy.
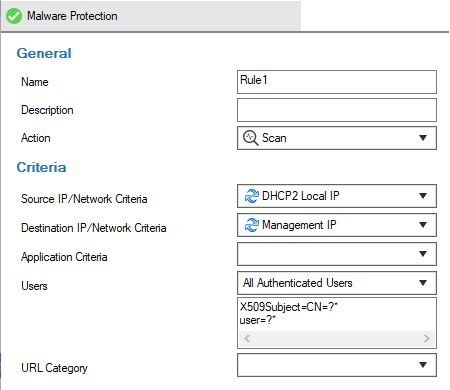
 - Specify values for the following:
- Name – Enter a descriptive name for the explicit policy.
- Description – Enter a description for the policy.
- Action – Select Scan or Do Not Scan.
- Source / Destination IP / Network Criteria – Select the source and destination network, or select <Explicit Network> and enter an IP address / network or a domain that gets resolved to an IP address for the matching.
- Application Criteria – Define the application match condition. Add an application the policy should apply to, or create explicit applications. To open the selection menu, double-click the corresponding field. Selecting applications in the application editor works similar to the process in the objects configuration for the application rule set. For more information, see How to Create an Application Object and How to Create a Custom Application Object.
- Users – Select the users or groups the policy should apply to.
- URL Category – Specify URL categories the policy should apply to.
- Click OK.
- Click Send Changes and Activate.
The policy is now listed in the lower window and can be selected as Policy in your forwarding rules. For more information, see the last step in How to Configure Policy Profiles.