

Barracuda SecureEdge offers point-to-site capabilities. Point-to-site connections are used to connect an individual device, such as a laptop, to the company network. The VPN client running on the client connects to the VPN service of Barracuda SecureEdge. Site authentication allows devices physically located within the network to authenticate against the Barracuda SecureEdge service to enforce Security Policies.
Before You Begin
- If you want to use your Microsoft Entra ID users and groups for User Connectivity, Site Authentication, and Security Policies, you must first connect your Microsoft Entra ID with Barracuda Cloud Control in order to synchronize users and groups.
- If you do not synchronize Microsoft Entra ID with Barracuda Cloud Control, you must create a user account in Barracuda Cloud Control for each of your users using User Connectivity. For more information, see How to Connect Your Microsoft Entra ID with Barracuda Cloud Control.
- Create a SAML endpoint in Microsoft Azure. For more information, see How to Create a SAML Endpoint in Microsoft Azure and Basic User Connectivity & Personal Security Configuration.
- If you are using a firewall, you must allow certain Barracuda and Microsoft domains before you continue. For more information, see List of Required Barracuda Authentication & Discovery Services for Point-to-Site & Personal Security.
Step 1. Enable / Disable User Connectivity and Site Authentication
For more information on the configuration, see Step 2 of How to Create a SAML Endpoint in Microsoft Azure and Basic User Connectivity & Personal Security Configuration.
- Go to https://se.barracudanetworks.com and log in with your existing Barracuda Cloud Control account.
- Go to Infrastructure > Settings.
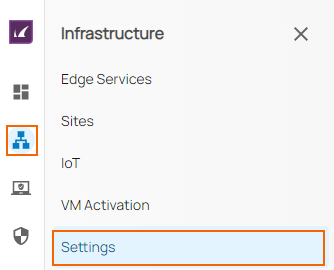
- The Settings window opens. Specify values for the following:
- Enable User Connectivity – Click to enable/disable.
- Enable Site Authentication – Click to enable/disable.

- Click Save.
Step 2. User Enrollment
Go to https://se.barracudanetworks.com and log in with your existing Barracuda Cloud Control account.
Go to Infrastructure > Settings.
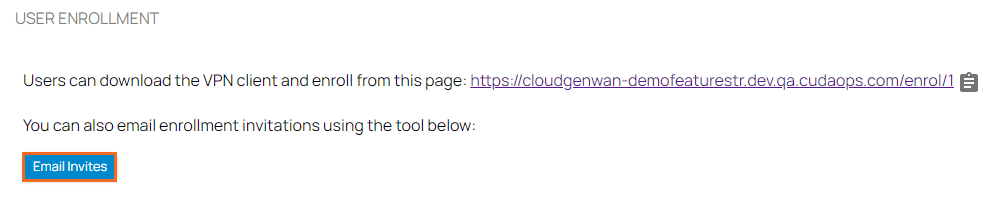
Scroll down to USER ENROLLMENT.
Copy the enrollment link and send it to the user, or click on Email Invites.
After clicking on Email Invites, the Send Enrollment Invitations window opens. Specify values for the following:
To – Enter an email address, or select user/groups from the drop-down menu. Note: To select user or groups, you must enable synchronization between Cloud Control and your Microsoft Entra ID. For more information, see How to Connect Your Microsoft Entra ID with Barracuda Cloud Control.
Subject – Keep the subject or enter your own subject.
Body – Keep the text or enter your own text.
- Click Send.
Step 3. Connect a Client
- Install the VPN client. Open the link for enrollment retrieved in Step 2 and download the VPN client.
- For more information on the installation on a Windows client, see Installing the Barracuda Network Access/VPN Client for Windows.
- For more information on the installation on a Mac client, see Installing the Barracuda VPN Client for macOS.
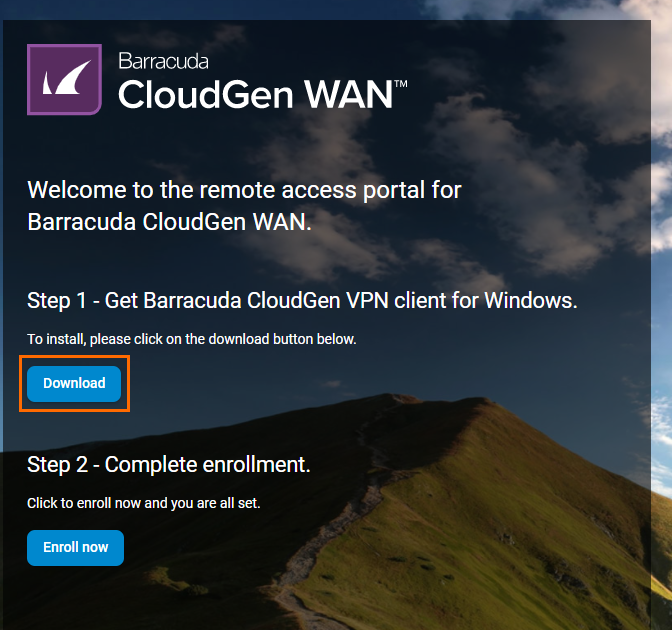
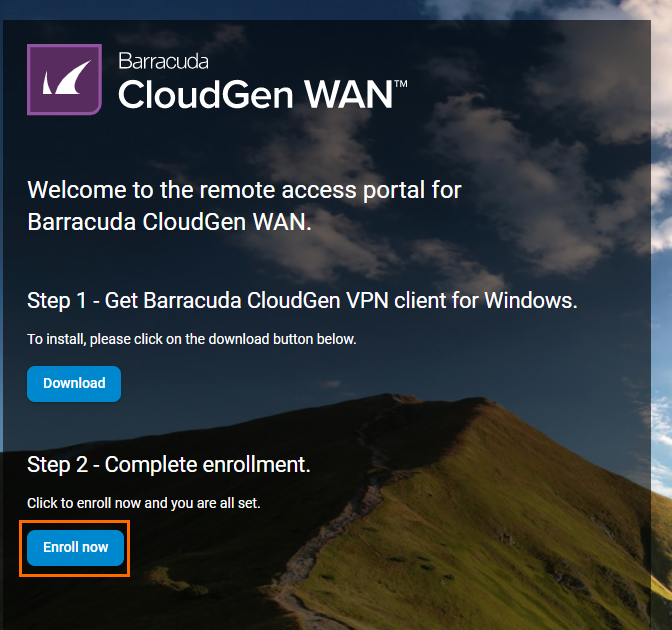
- Click Enroll now.
- The Barracuda VPN client opens and the user must log in with the credentials that were either synchronized from Microsoft Entra ID or created by the admin in Barracuda Cloud Control.
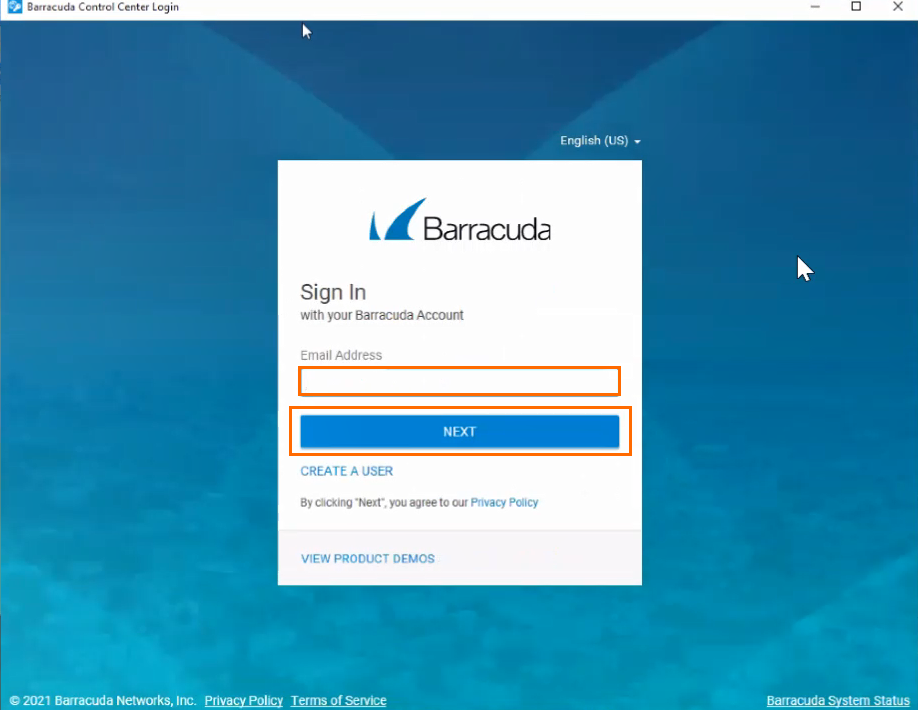
- Click NEXT.
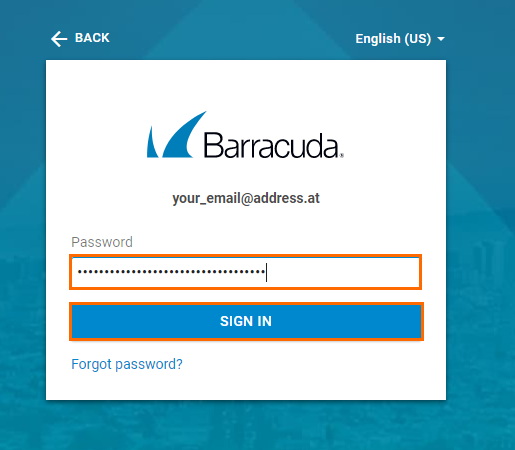
- Enter your password and click SIGN IN.
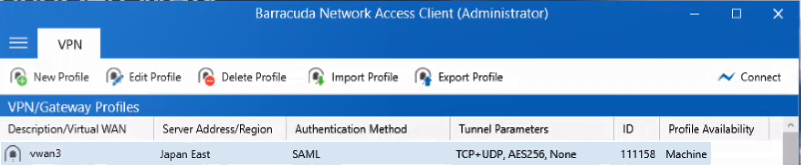
- The profile is imported in the VPN client and opens automatically.
- Select the Virtual WAN and hub you want to connect to and click OK.

- The new profile is imported and appears in the list.
- Follow this guide to establish a connection: How to Establish a VPN Connection Using Barracuda VPN Client for Windows or How to Establish a VPN Connection Using Barracuda VPN Client for macOS.
- All available Barracuda SecureEdge VPN endpoints are in the Barracuda VPN client.
Step 4. (Optional) Download the VPN Profile from the Edge Service or Site
Note: When importing the VPN profile, you can either import a Site VPN profile or a Gateway VPN profile. Barracuda SecureEdge will automatically add all available VPN endpoints to connect to in your Barracuda VPN client. 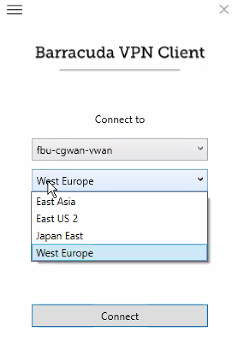
- Go to https://se.barracudanetworks.com and log in with your existing Barracuda Cloud Control account.
- In the left menu, click the Tenants/Workspaces icon.
- From the drop-down menu, select the workspace containing your gateway.

- Go to Infrastructure > Edge Services. The Edge Services page opens.
- Next to your edge service, click on the download icon to download the client VPN configuration.

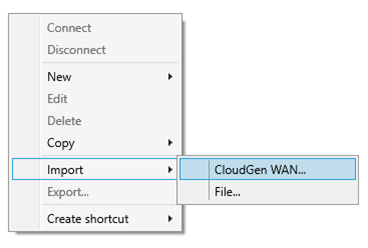
- When importing the downloaded VPN configuration file, make sure to select SecureEdge. For more information, see How to Establish a VPN Connection Using Barracuda VPN Client for Windows or How to Establish a VPN Connection Using Barracuda VPN Client for macOS.
Further Information
- For more information on enabling User Connectivity via a site, see How to Enable User Connectivity on a Site.
- For more information on the VPN client, see VPN Client & Network Access Client.
- For more information on importing VPN profiles, see How to Import a *.vpn File into the VPN Client.
- For more information on configuring the VPN client, see How to Configure the Barracuda VPN Client for Windows and How to Configure the Barracuda VPN Client for macOS.
- For more information on establishing VPN connections, see How to Establish a VPN Connection Using Barracuda VPN Client for Windows and How to Establish a VPN Connection Using Barracuda VPN Client for macOS.